
Fill this layer with black (Shift+F5) and convert it to a Smart Object. Flip this shadow vertically (Edit > Transform > Flip Vertical), then lower the opacity to 60%:

To soften the shadow, go to Filter > Blur > Gaussian Blur and set the radius to 6 px:

Step 7
I used Color Balance to match the snail color with the background:


Step 8
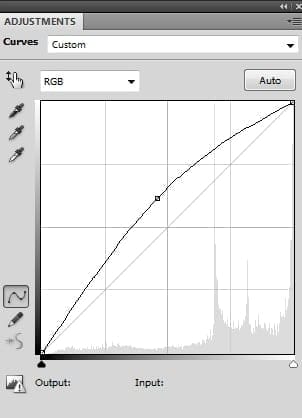
I used Curves to darken the snail:

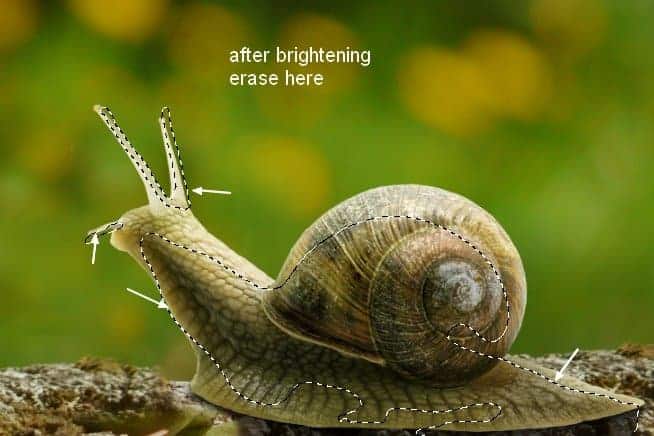
On this layer mask use a soft black brush to erase the upper part and make the dark effect visible on the back, the lower part of the snail:

On this layer mask use a soft black brush to erase the upper part and make the dark effect visible on the back, the lower part of the snail:
On this layer mask use a soft black brush to erase the back of the snail and create a nice contrast on his body:
Step 9
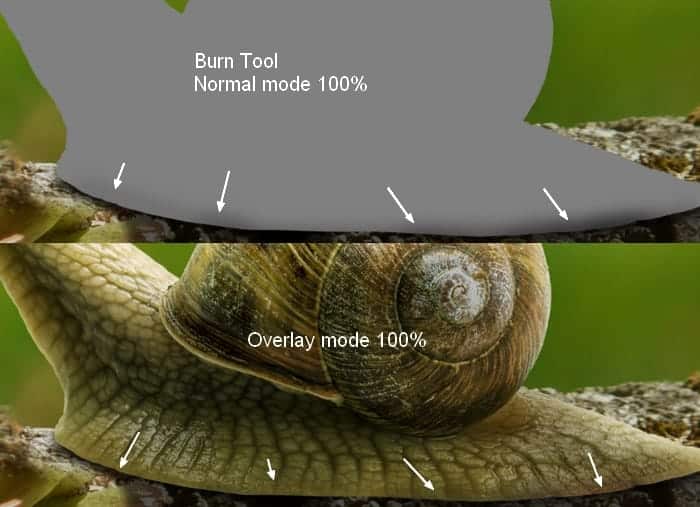
Make a new layer, change the mode to Overlay 100% and fill with 50% gray:
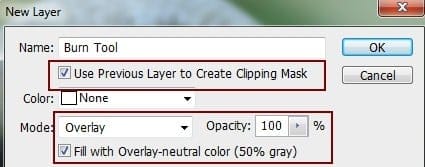
Active the Burn Tool (O) with Midtone Ranges, Exposure about 10-15% to darken the lowest edge of the snail body. You can see how I did it with Normal mode and the result with Overlay mode:
Step 10
Open the meadow image. Use the Retangular Marquee Tool (M) to select a grass part then place it over the snail shell, use the Free Transform Tool (Cmd/Ctrl+T) to tweak it a little:


Add a mask to this layer and use a black brush to erase the grass following the shape of the shell. To make the edge of the grass, I used a hard brush and the size about 3-4 px to trim (it’s better if you use a tablet pen):

Step 11
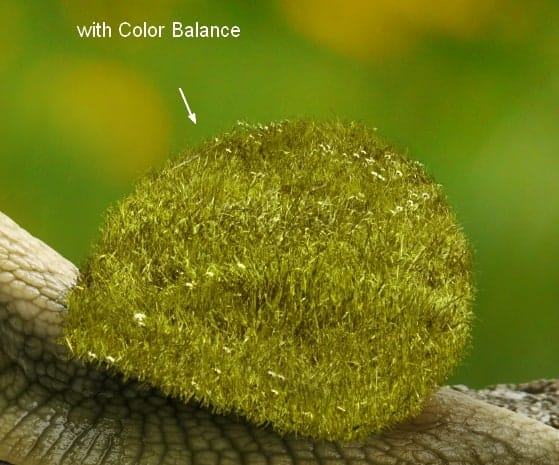
I used Color Balance to change the grass color:

Step 12
I used Curves to darken the grassy shell:

On this Curves layer mask I used a soft black brush to erase the upper of the grass to keep it brighter than the lower (it’s illuminated by the light):

Step 13
I created a new layer with the same settings like in the step 9. Use the Dodge and Burn Tool to define the light and shade of the grassy shell:


Step 14
Isolate the child from the background and place her onto the top of the grassy shell:

To change the form of her dress to fit the shell , go to Edit > Puppet Warp:

Step 15
Add a mask to the child layer and use a hard black brush with a smaiil size (2-3 px) to blend the dress bottom with the grass:
12 responses to “Create a Surreal Snail with a Grassy Shell in Photoshop”
-

Photoshop is the toll where things can create how the mind actually want. this tutorial is really awesome, and images are very helpful to do practice to make it. Very detail and very creative really helpful for me. Really thanks man
-
I love this! What a cool fantasy design you put together. I think any young child would love to get lost just staring into it.
-
It’s fantastic! you are the master of photoshop and also a hard worker.
-
Amazing…??
-
NICE! i REALLY WANT TO LEARN A LOT ON Adobe Photoshop… looking forward that this page may help me to improve my photoshop experience especially in photo editing..
-
nice
-
Thank you very much! I love these tutorials with a poetic look! Do you have any others of the same kind?
Excuse me if there are any mistakes. I’m French-speaking.
-
Very lovely lesson.Thanks
-
I do this lesson with pleasure. Thanks for fantastic lesson
-
Đẹp lắm bạn ^^
-
This tutorial is fantastic, Jenny! I am doing this today. Need an escape, anyway, so, why not delve into a fantasy? Thank you so much for your tuts!!
Su -
Eonjena Caster
Leave a Reply