

Make the child shadow as done with the snail:

Step 16
I used an adjustment layer to reduce the child saturation:

Step 17
I used Color Balance for the child layer and on its layer mask use a soft black brush to reduce the little green effect on the skin:

Step 18
I used Curves to darken the child and on its layer mask use a soft black brush to erase the face and dress parts:

Step 19
I made a new layer with the same settings like the step 9 and 12. Use the Burn Tool to darken the dress bottom more:

Step 20
Cut out the flowers from the images indicated in the resources list and arrange them around the grassy shell, duplicate, use Cmd/Ctrl+T to transform them if needed:
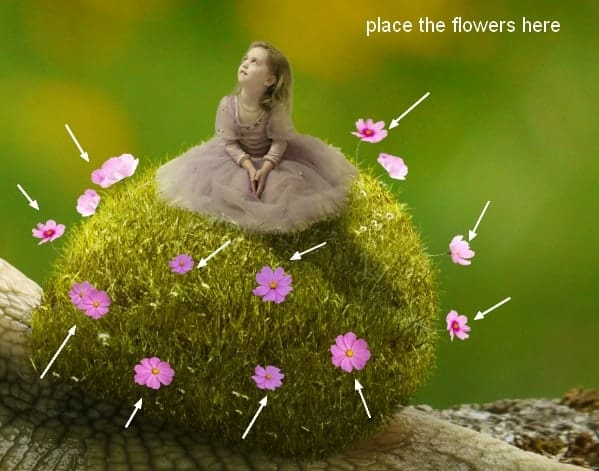
Place these layers under the child one.
Step 21
Take a flower from the flowers 1 image and place it behind the model, make its size much bigger than the other flowers:
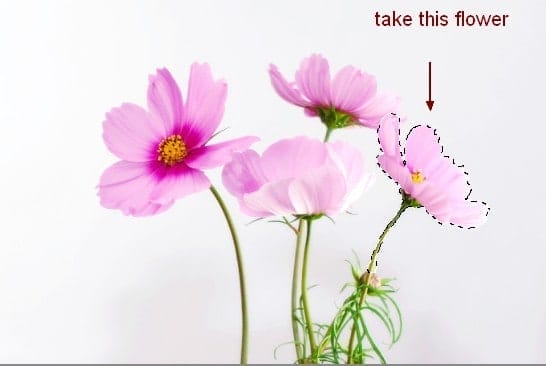

To correct the pose of this flower, use the Puppet Warp and drag the petals down to make the two sides of the flower more proportional and the stem more straight:

Step 22
I made a new layer with Clipping Mask) for this big flower and used the Burn Tool to give more details to the petals:


Step 23
Select all the flower layers and press Cmd/Ctrl+G to make a group for them. Change this group mode from Pass Through to Normal 100%. Make a new layer at the bottom of this group and use a soft black brush, the opacity about 40% to paint the shadow for some of the flowers:

Step 24
Create the shadow for all other flowers as done with the child and snail:

Step 25
Make a Hue/Saturation adjustment layer on the top of the flower layers (within this group) to change their color:


Step 26
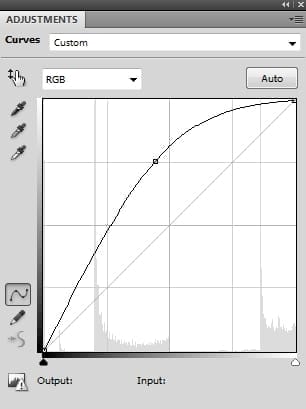
I used Curves to darken the flowers:

On this layer mask use a soft black brush to clear the effect on the flowers parts which are darker than the rest already:

Step 27
I used another Curves adjustment layer to brighten some of the flowers. On this layer mask erase the parts which are hidden from the light and the big flower:

Step 28
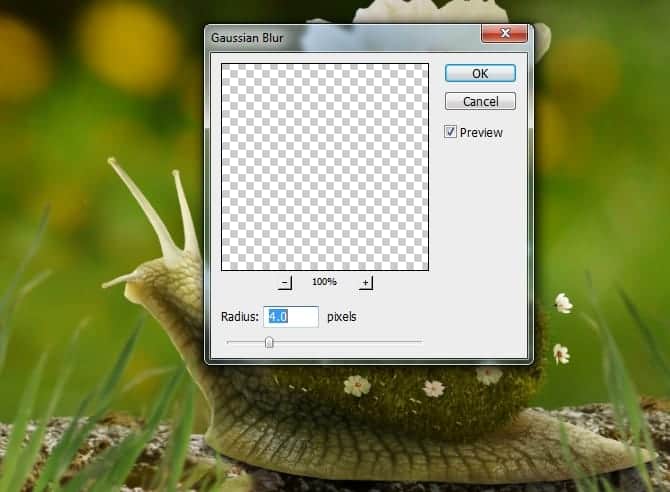
Open the grass pack. Take some different blades and clumpings to add to the foreground:

Apply a Gaussian Blur of 4 px to all the grass layers:
Step 29
Make a group for the grass ones as done with the flowers. Create a Curves adjustment layer to brighten the grasses and on its layer mask use a soft black brush to erase the grasses bottom (at the edges):
12 responses to “Create a Surreal Snail with a Grassy Shell in Photoshop”
-

Photoshop is the toll where things can create how the mind actually want. this tutorial is really awesome, and images are very helpful to do practice to make it. Very detail and very creative really helpful for me. Really thanks man
-
I love this! What a cool fantasy design you put together. I think any young child would love to get lost just staring into it.
-
It’s fantastic! you are the master of photoshop and also a hard worker.
-
Amazing…??
-
NICE! i REALLY WANT TO LEARN A LOT ON Adobe Photoshop… looking forward that this page may help me to improve my photoshop experience especially in photo editing..
-
nice
-
Thank you very much! I love these tutorials with a poetic look! Do you have any others of the same kind?
Excuse me if there are any mistakes. I’m French-speaking.
-
Very lovely lesson.Thanks
-
I do this lesson with pleasure. Thanks for fantastic lesson
-
Đẹp lắm bạn ^^
-
This tutorial is fantastic, Jenny! I am doing this today. Need an escape, anyway, so, why not delve into a fantasy? Thank you so much for your tuts!!
Su -
Eonjena Caster
Leave a Reply