
Step 30
Open the light texture pack. I chose “starry 4” image and placed it over the working document and changed the mode to Screen 100%:

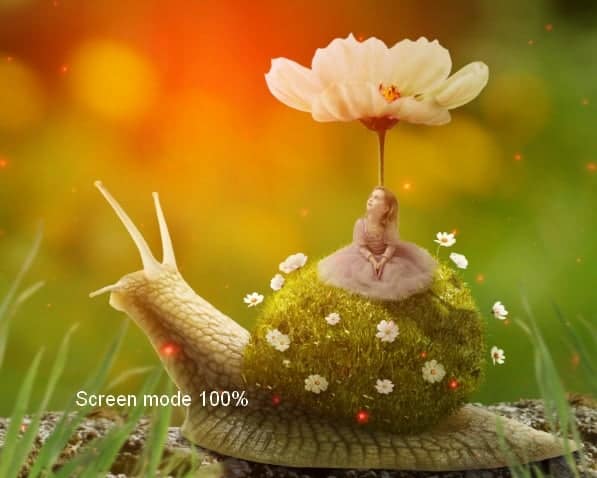
Add a mask to this layer and reduce the light intensity on the snail and child:

Step 31
I used Hue/Saturation to change the light color:


Step 32
I used Levels to increase the highlight and on its layer mask erased the big flower as I didn’t want it to be too bright and lost the details:


Step 33
Open the butterflies image. Choose different butterflies and arrange them on the snail head, at the edge and above the child where she is looking up at.

Step 34
I used Curves to brighten the butterfly in the middle as I found it darker than the others:

Step 35
Make a group for the butterflies. Use Hue/Saturation for their color change:

Step 36
I used Curves to brighten the butterflies:

Step 37
Place the bokeh texture over the image and change the mode to Screen 100%:

Add a mask to this layer and use a soft black brush to reduce the bokeh effect:

Apply a Gaussian Blur of 8 px:


Step 38
It’s time for coloring the scene. Make a Gradient Map adjustment layer on the top:

Change this layer mode to Soft Light 100%:

Step 39
I used Color Balance to add some yellow to the scene:


Step 40
I used Curves to brighten the whole picture:

On this layer mask use a soft black brush to reduce the lightness on the snail and the big flower:

Final Results

Download the PSD
[vc_column width=”1/1″ el_position=”first last”] [vc_cta_button title=”Download” href=”https://downloads.photoshoptutorials.ws/Snail.zip” color=”btn” size=”btn-large” icon=”none” target=”_self” position=”cta_align_right” call_text=”Snail.zip | 71.4 MB” width=”1/1″ el_position=”first last”] [/vc_column]
Tutorial by Jenny Le
12 responses to “Create a Surreal Snail with a Grassy Shell in Photoshop”
-

Photoshop is the toll where things can create how the mind actually want. this tutorial is really awesome, and images are very helpful to do practice to make it. Very detail and very creative really helpful for me. Really thanks man
-
I love this! What a cool fantasy design you put together. I think any young child would love to get lost just staring into it.
-
It’s fantastic! you are the master of photoshop and also a hard worker.
-
Amazing…??
-
NICE! i REALLY WANT TO LEARN A LOT ON Adobe Photoshop… looking forward that this page may help me to improve my photoshop experience especially in photo editing..
-
nice
-
Thank you very much! I love these tutorials with a poetic look! Do you have any others of the same kind?
Excuse me if there are any mistakes. I’m French-speaking.
-
Very lovely lesson.Thanks
-
I do this lesson with pleasure. Thanks for fantastic lesson
-
Đẹp lắm bạn ^^
-
This tutorial is fantastic, Jenny! I am doing this today. Need an escape, anyway, so, why not delve into a fantasy? Thank you so much for your tuts!!
Su -
Eonjena Caster
Leave a Reply