Hide the lower part of the nebula in the layer mask so that only that stars are visible (you can use the Gradient Tool – G key).
Step 5
You can import brushes by either double-clicking on them in the Explorer or go to Edit > Preset Manager and press the Load Button.Import the Birds brush. Create a new layer (Ctrl + Alt + N) and create some black birds. Lower the opacity of the layer to 46%.
Step 6
Open the image “Moon”. Using the Elliptical Marquee Tool create a selection of the moon. Copy/paste into our document and resize as shown below. Lower the opacity to 22% and in the layer mask hide the bottom part of the moon until it looks like the moon is rising from the water.
Step 7
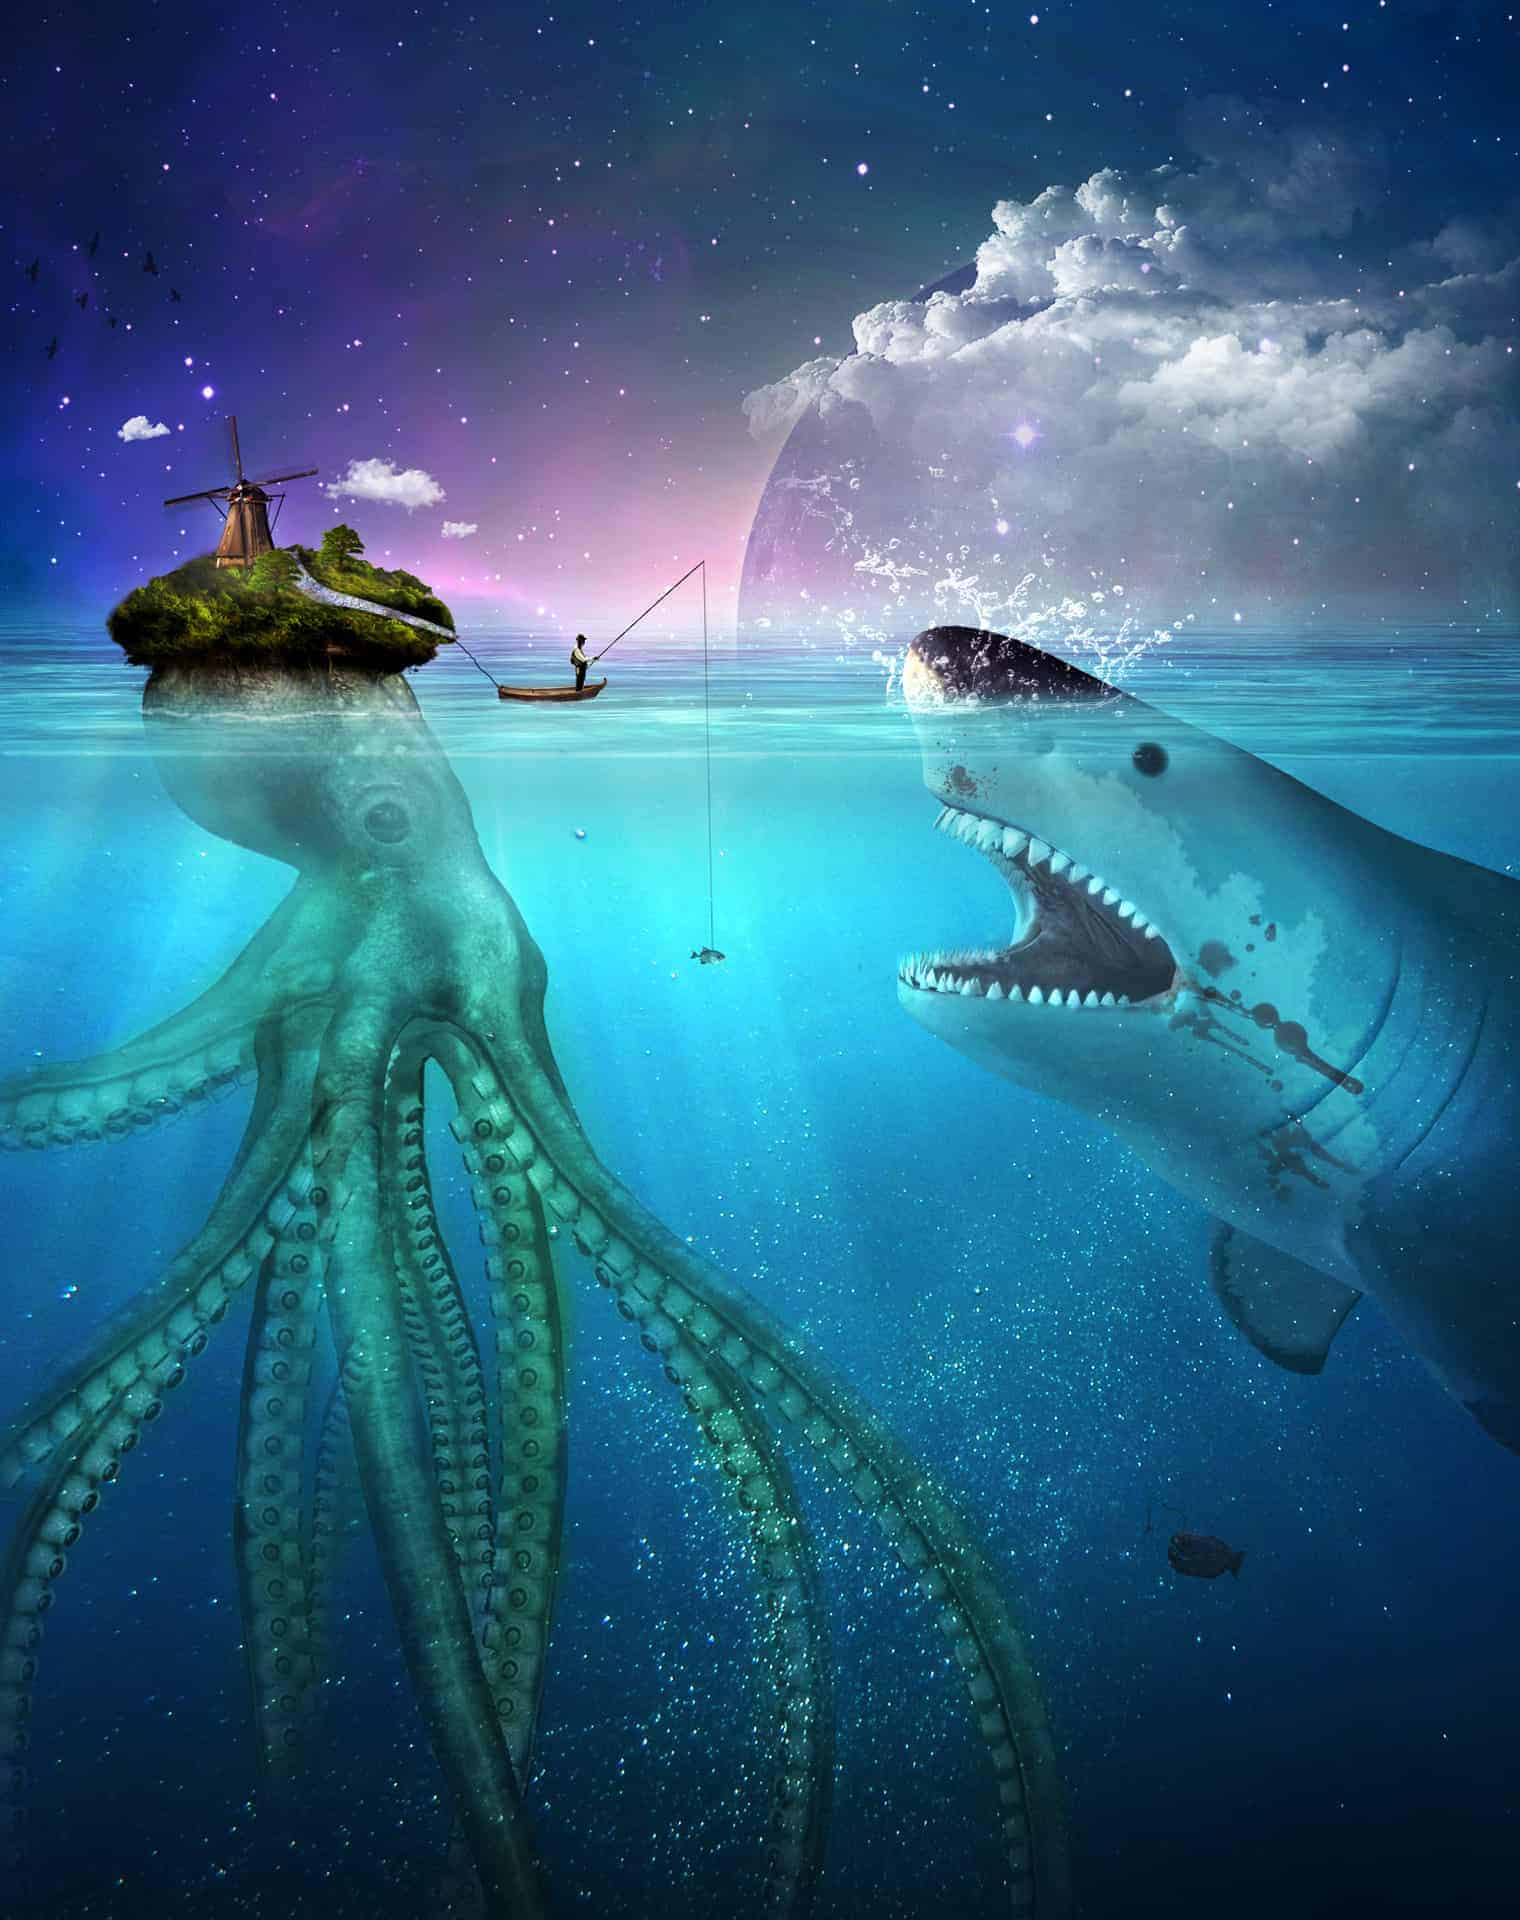
Open the image “Underwater2” and copy all. Paste into our document place it as shown below.
Step 8
In the layer mask hide the upper part (hide everything where it overlaps the sky) of the underwater layer you just pasted (with a brush or a gradient).
Step 9
Create a new layer and change the blending mode to Overlay. Paint a white line between the surface water and the underwater. Lower the opacity to 33%.
Step 10
Open the image “Fish1”. Select all and copy/paste in our document. Resize the fish and place him underwater. Lower the Opacity to 49%.
Step 11
Now let’s create the island the squid. Open the image “Squid”. Select all and copy/paste in our document. Place the squid as indicated below.
Step 12
In the layer mask partially hide the squid portions that are underwater (in the layer mask use a black brush at 40-50% Opacity).
Step 13
A quick word about clipping layers because we will use them a bit in our tutorial. You can Alt-click between two layers in order to clip the upper layer to the lower. Clipping a layer to another means that the upper layer will be visible only through the pixels of the lower layer. If you want to clip multiple layers simply keep Alt-clicking between all the upper layers you want clipped and they will all show through the lower layer. Clipping layers are especially useful for adjustment layers because we can limit the adjustment to a certain layer without affecting the rest of the document.
I didn’t find the Nebula2 in the resources. It’s not perfect, but I got this: http://s1.postimg.org/855ny4hfj/Unlucky_Fisherman.jpg
With this tutorial, I got to know more about how to use the curves, especially custom-made. Thanks.


Leave a Reply