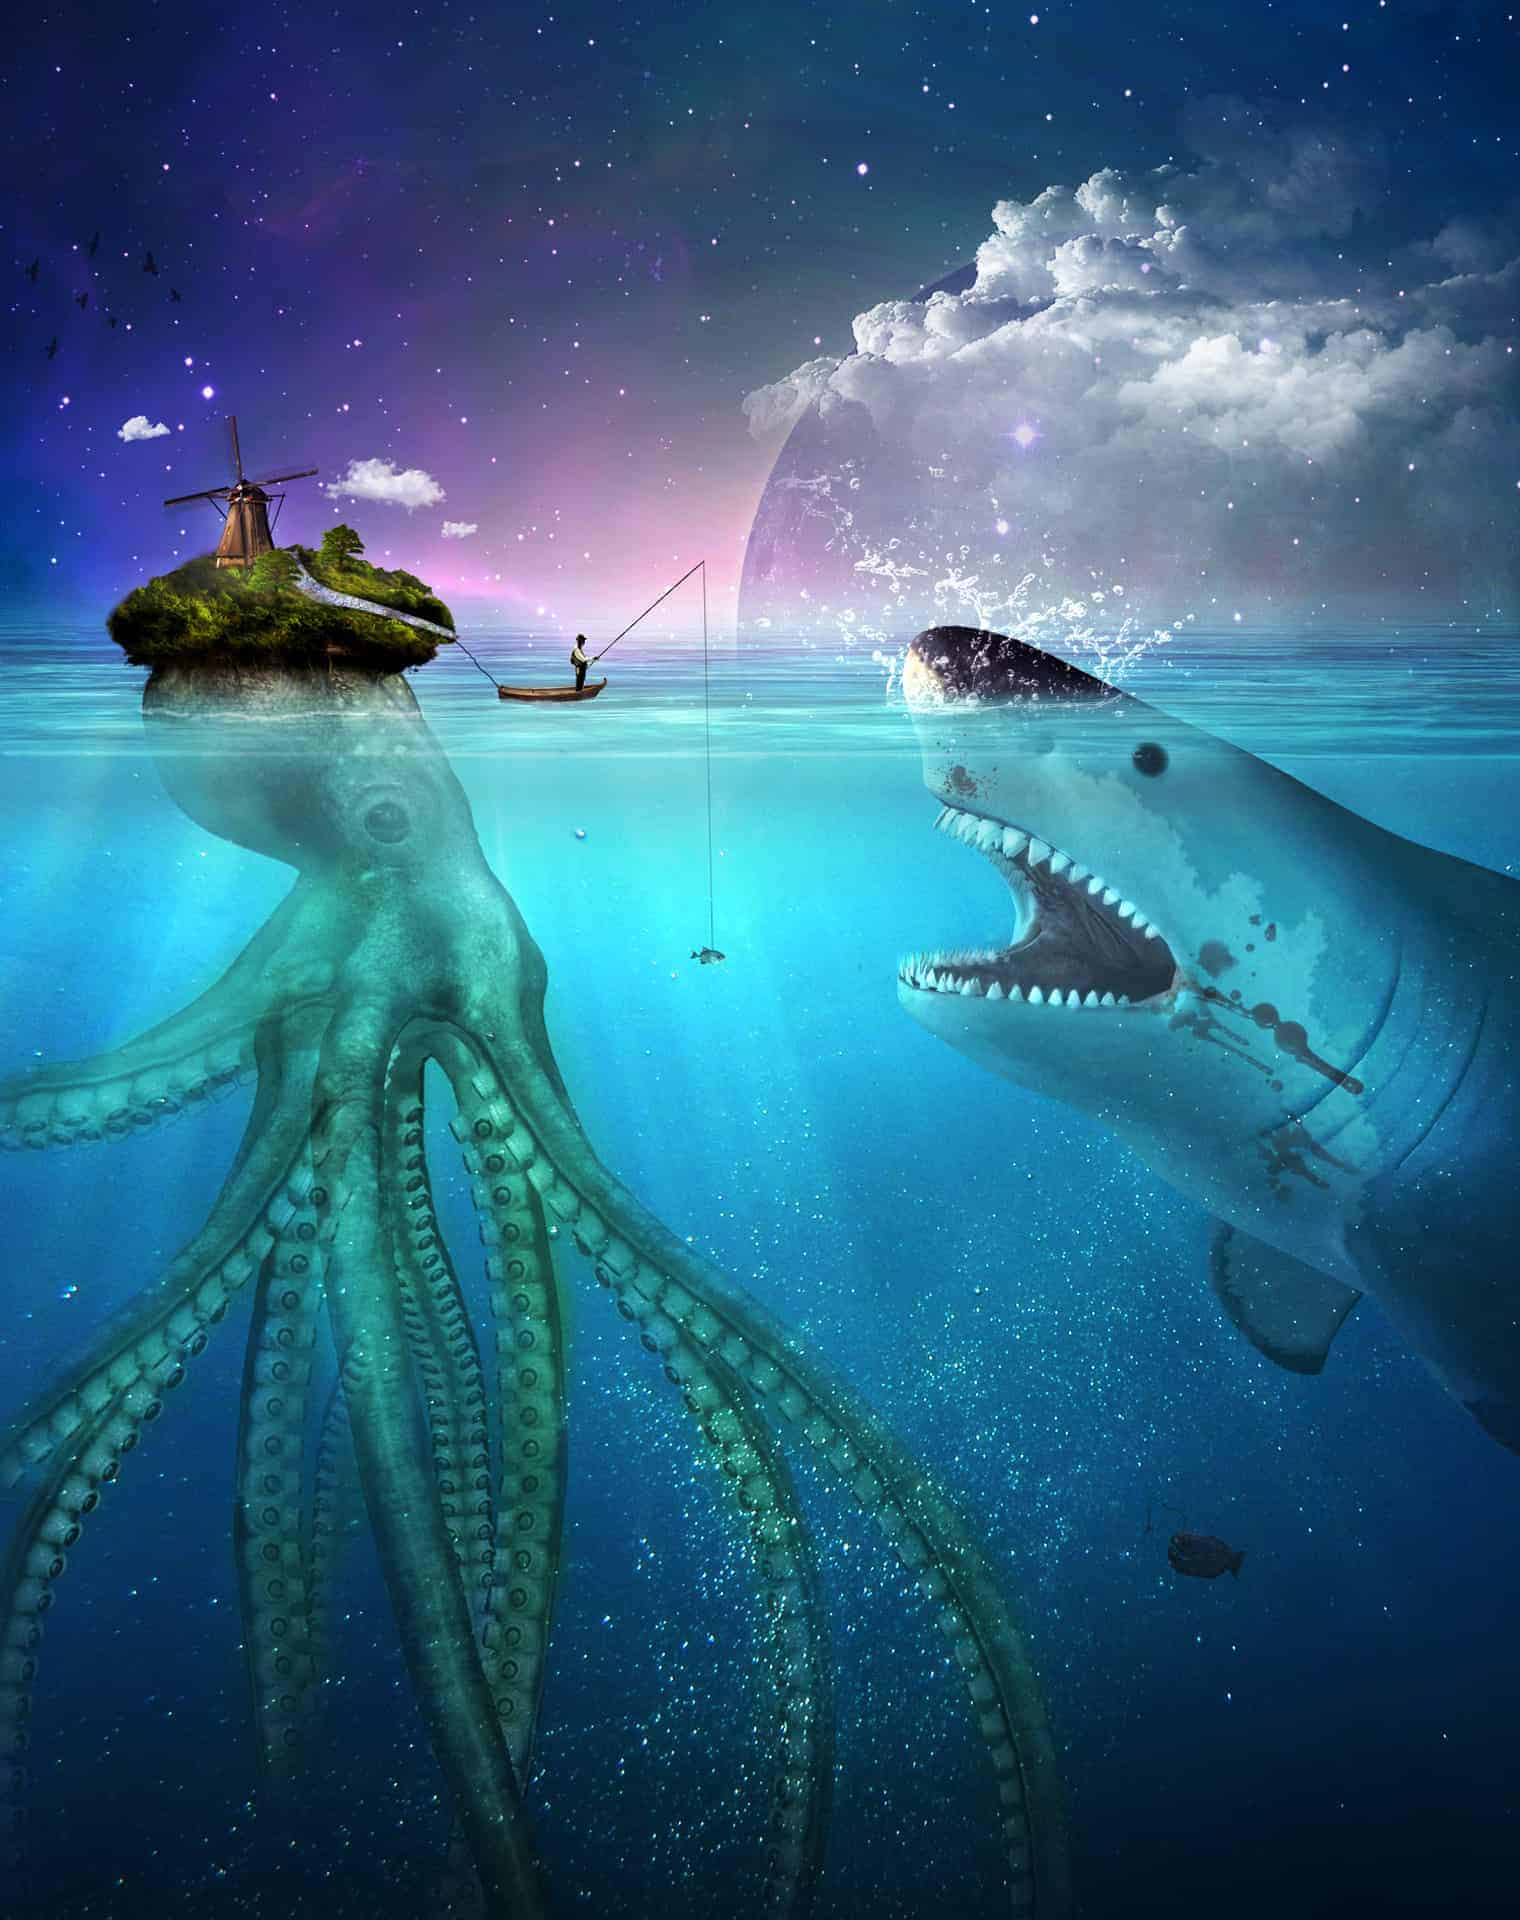

Step 22
Create a Hue/Saturation Adjustment Layer and use the settings shown below (we increase the red intensity). Fill the layer mask with black and paint with white to reveal the deep red inside the mouth of the shark.
Step 23
Create a new Curves Adjustment Layer and drag the curve up. Fill the layer mask with black and with a soft white brush paint carefully over the shark’s teeth. We want them looking white and dangerous.
Step 24
Create a new Hue/Saturation Adjustment Layer and drag the Lightness Slider to -100. Fill the layer mask with black and with a white brush at 100% Opacity paint over the shark’s eye.
Step 25
Create a new layer and with a white brush at 10% Opacity paint some subtle reflections in the eye.
Step 26
Import the Splash brush. Create some new layers (three in my case) and create on each a white splash. Position each splash near the shark’s mouth (you can also resize them if they are too big) and use the layer mask to hide unwanted parts. Lower the opacity of the splash layers to 70-80%.
Step 27
Open image “Boat”. Select all and copy/paste the boat into our document. Place the boat on the surface of the water near the island. In the layer mask hide a little of the boat bottom to give the illusion that the boat is emerged in water.
Step 28
Create a new layer and change the blending mode to Overlay. Clip it to the boat layer and with a back brush at 20% Opacity paint some dark colors on the boat.
Step 29
Create a new Hue/Saturation Adjustment Layer and clip it to the boat layer. Drag the Saturation slider to -68.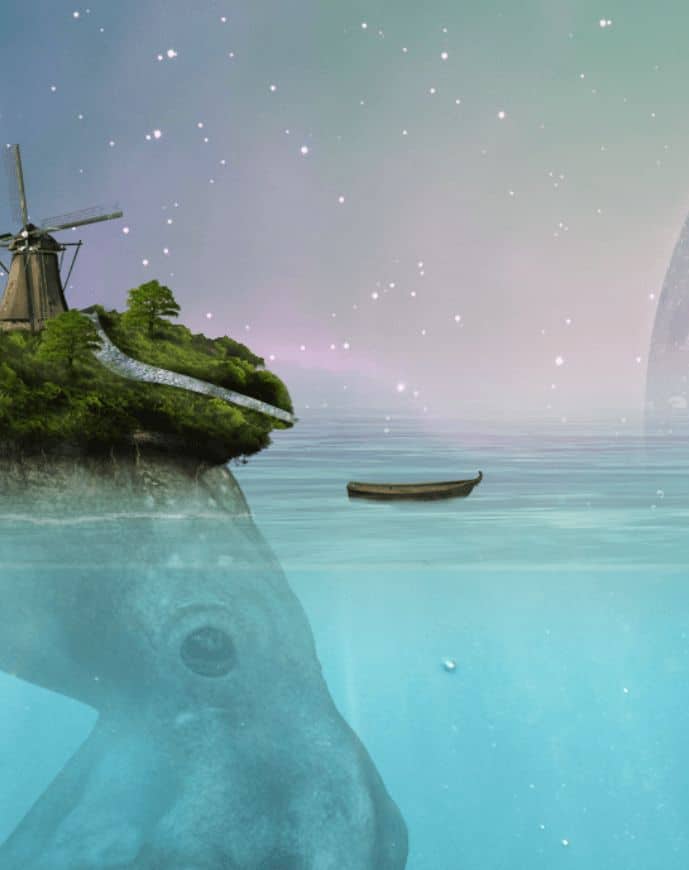
Step 30
Create Curves Adjustment Layer and use the settings shown below. Clip the Curves layer to the boat layer.
Step 31
With a black brush of 1px size create a rope connecting the boat to the island on a new layer.
Step 32
Now create a thin white line on a new layer representing the waves crashing into the boat.
Step 33
Open the image “Fisherman”. Use the pen tool to create a selection of the fisherman and the fishing road. Copy/paste the fisherman in our document and place the fisherman in the boat.
Step 34
Create Curves Adjustment layer and clip it to the fisherman layer. Drag the curve up to brighten the fisherman a little and boost up the contrast on the same time.7 responses to “Create This Symbolic Underwater Scene of an Unlucky Fisherman and a Hungry Shark in Photoshop”
-

yhyh come on
-
ne
-
Bastante largo, pero me encantó! Intentaré hacerlo poco a poco! Gracias!
-
Very well explained tutorial.
Thanks
-
I didn’t find the Nebula2 in the resources. It’s not perfect, but I got this: http://s1.postimg.org/855ny4hfj/Unlucky_Fisherman.jpg
With this tutorial, I got to know more about how to use the curves, especially custom-made. Thanks. -
awesome tutorial man
-
Nice Tutorial..!!!
Leave a Reply