
Step 35
Create a Hue/Saturation Adjustment Layer and clip it to the fisherman layer. Lower the saturation and change the hue to a dirty yellow.
Step 36
Now let’s create the fishing line. Use a 1px black brush to draw the vertical line a new layer. In order to restrict the brush movement on a perfectly vertical line hold the Shift key while dragging. Lower the opacity of the layer to 50%.
Step 37
Open the image “Fish2”. Make a selection of the fish with the Pen Tool and paste it in our scene. Place the fish on the end of the fishing line and lower the opacity to 41%.
Step 38
Most of the elements of our scene are in place so now it’s time to start adding special effects and make the scene look graphically pleasant.Create a Hue/Saturation Adjustment Layer with the settings indicated below and fill the layer mask with black. With a white round soft brush at 50% Opacity paint over the squid to reveal the effect.
Step 39
Now let’s add some volume to the squid and the shark. Create a new layer and set the blending mode to Overlay. With the standard soft brush at 20% Opacity paint with white over the shark and the tentacles of the squid. Also, add a bit of volume to the moon.
Step 40
Create a new layer and with a black soft brush paint some darkness on the bottom of our scene.
Step 41
Let’s boost the sky color a little. Create a new Hue/Saturation Adjustment Layer and increase the saturation to 35. Use the layer mask to reveal the effect only on the sky.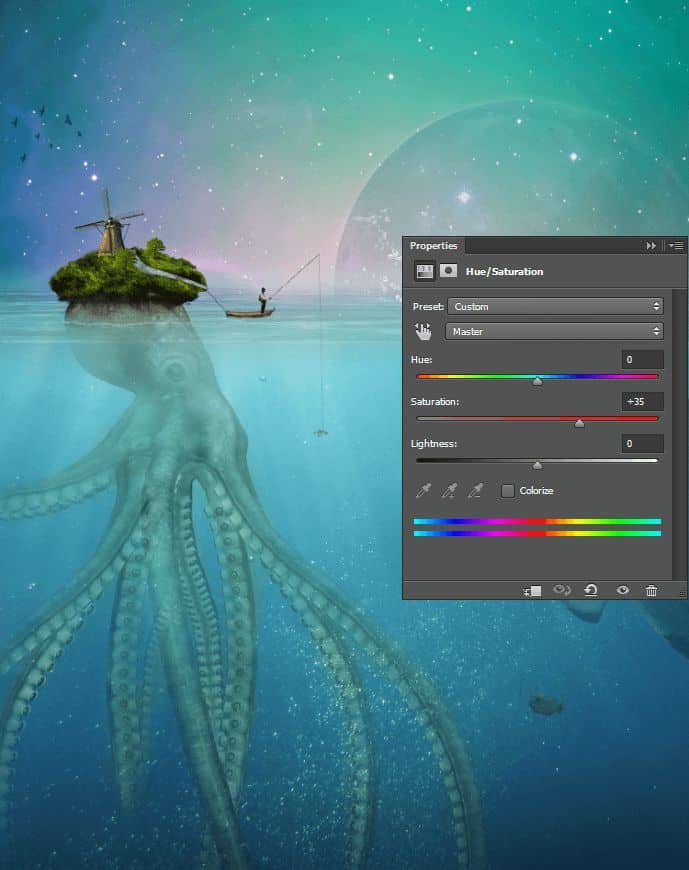
Step 42
The water surface seems a bit dull so let’s increase its brightness. Create a Curves Adjustment Layer with the settings shown below. Fill the layer mask with black and paint with white over the water surface in the layer mask to reveal the brightness.
Step 43
Now let’s do the same thing for the underwater. Create a new Curves Adjustment Layer with the settings shown below and use the layer mask to limit the effect only for the underwater portion of our scene.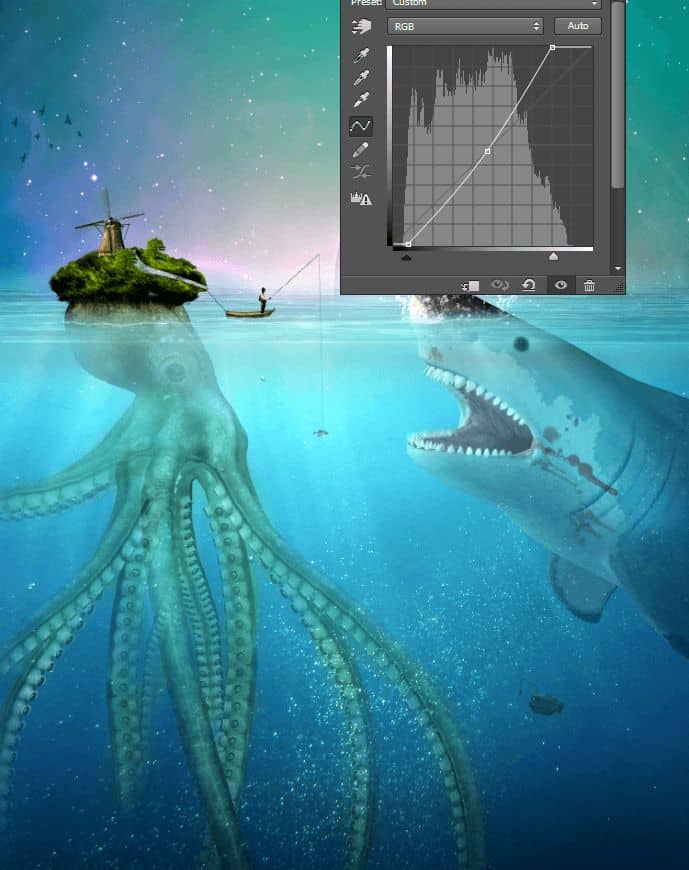
Step 44
The sky color is a little too common. Let’s make it look a bit more interesting. Create a new layer and fill it with a bright magenta color (#c656e3). Change the blending mode to soft light and use a gradient in the layer mask to reveal the effect only for the sky.7 responses to “Create This Symbolic Underwater Scene of an Unlucky Fisherman and a Hungry Shark in Photoshop”
-

yhyh come on
-
ne
-
Bastante largo, pero me encantó! Intentaré hacerlo poco a poco! Gracias!
-
Very well explained tutorial.
Thanks
-
I didn’t find the Nebula2 in the resources. It’s not perfect, but I got this: http://s1.postimg.org/855ny4hfj/Unlucky_Fisherman.jpg
With this tutorial, I got to know more about how to use the curves, especially custom-made. Thanks. -
awesome tutorial man
-
Nice Tutorial..!!!
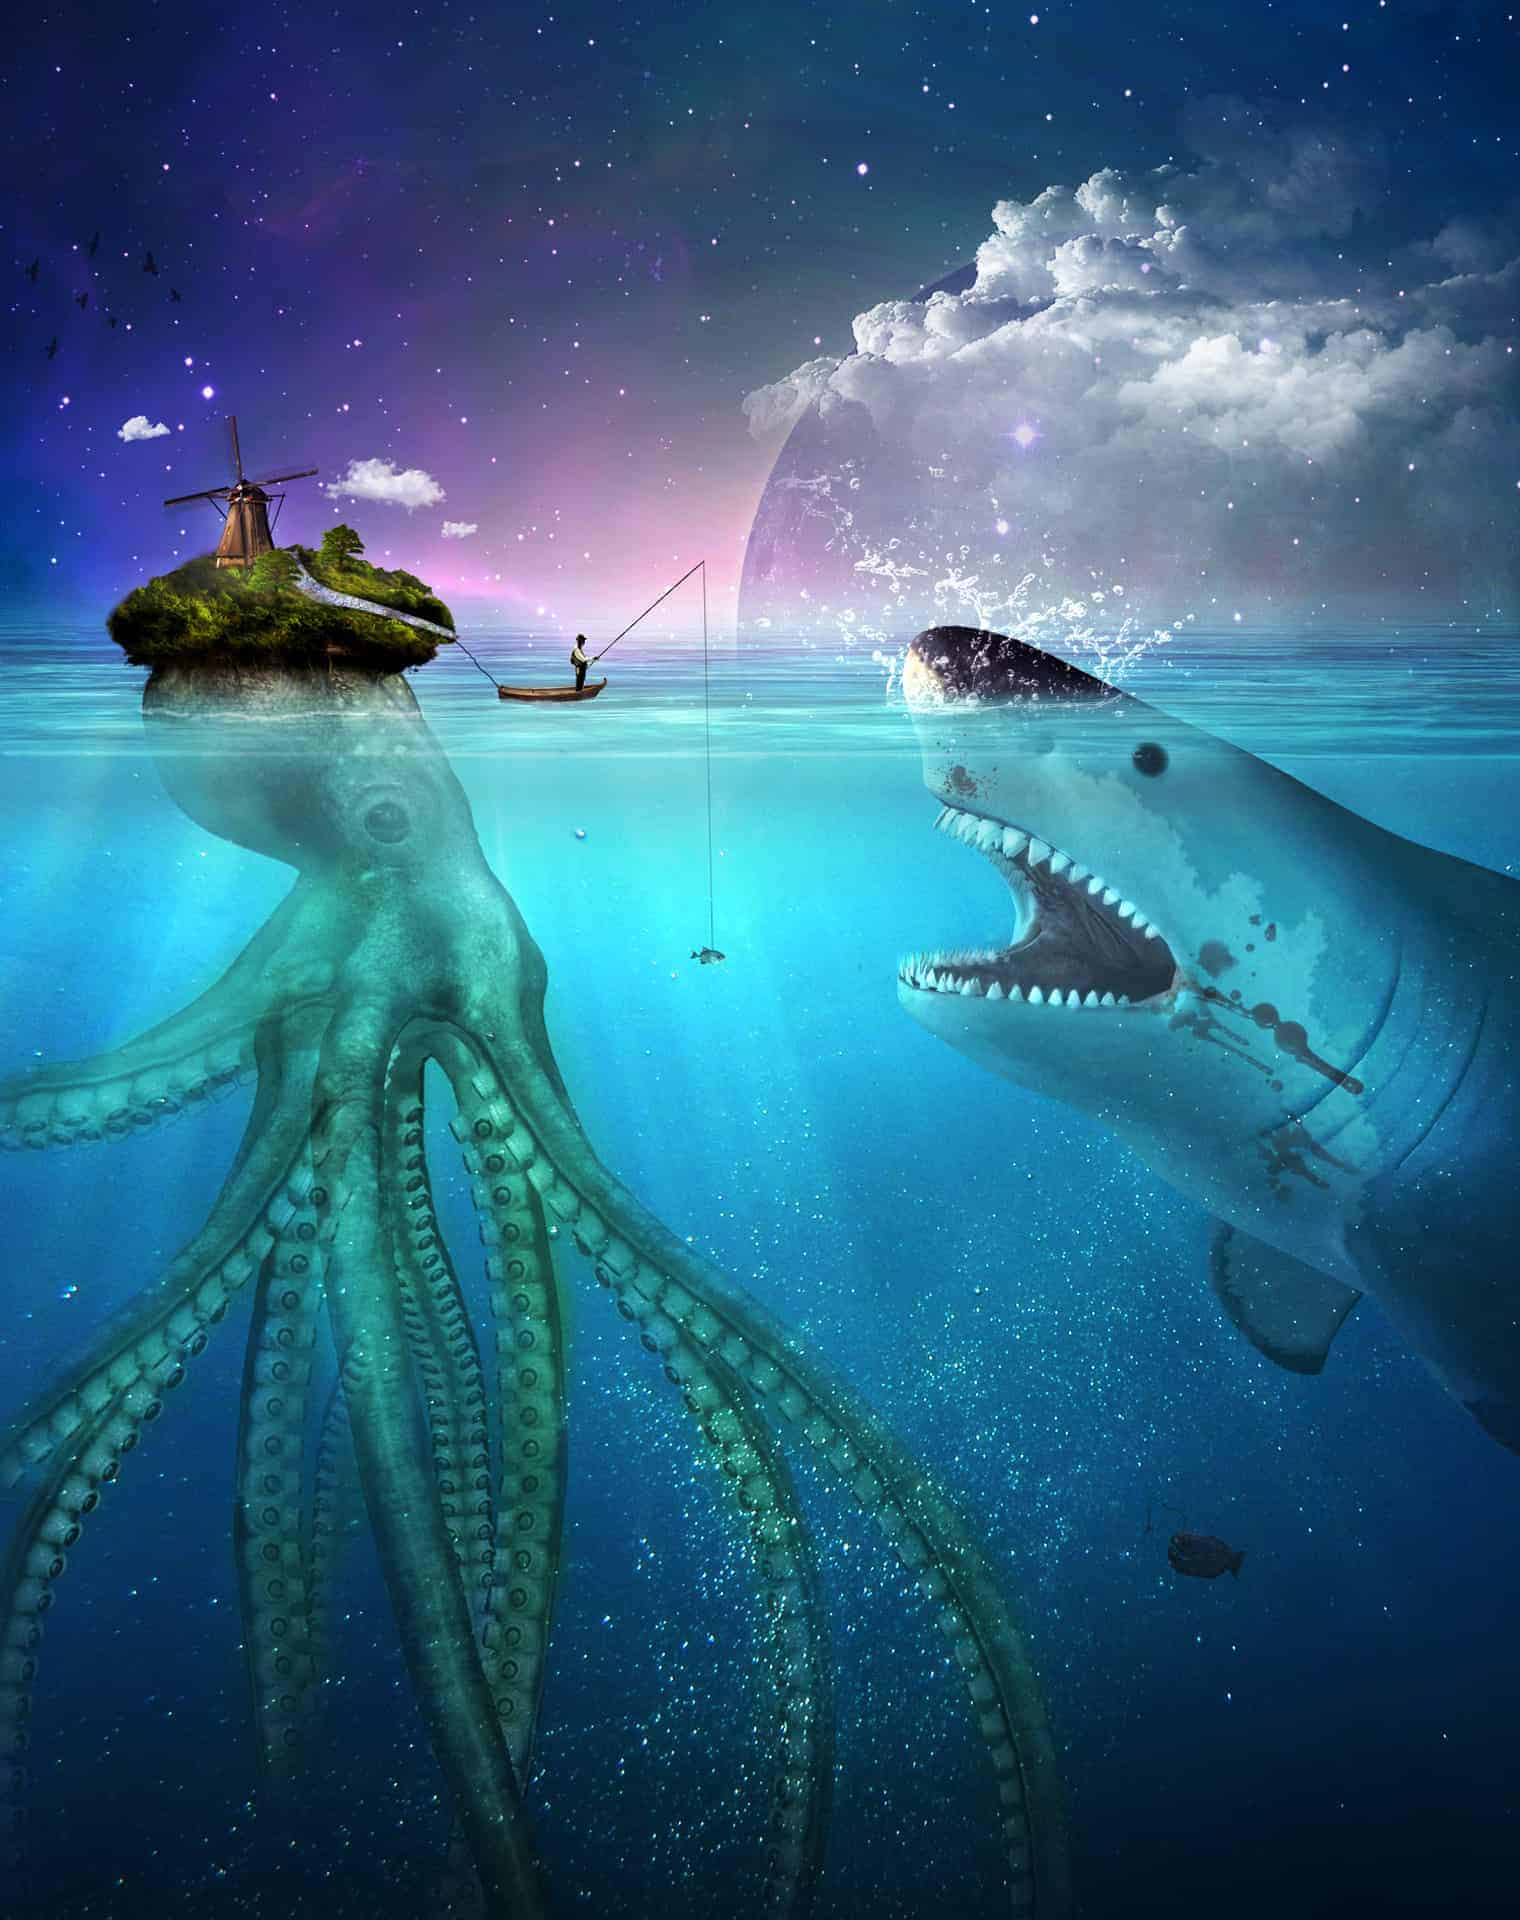
Leave a Reply