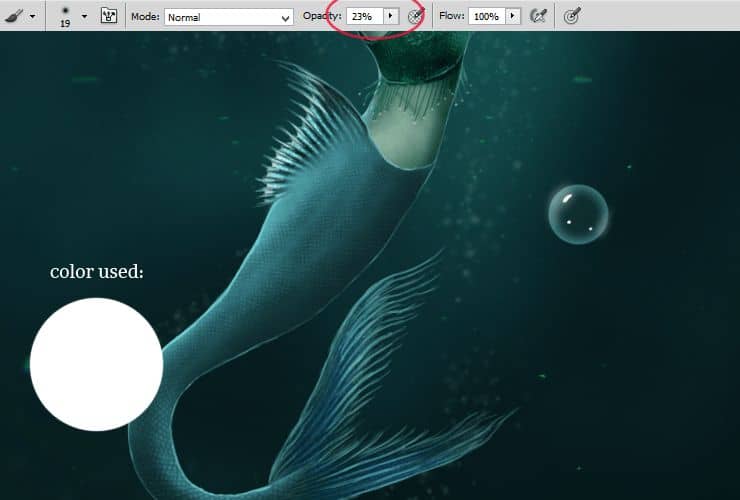
Step 49
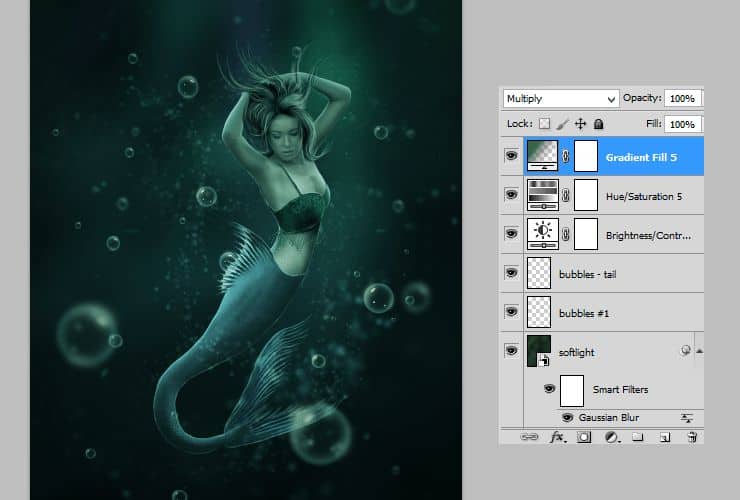
Now your bubble is ready. Convert it to Smart Object, for making endless transforms :). Click on this layer with RMB and choose Convert to Smart Object.
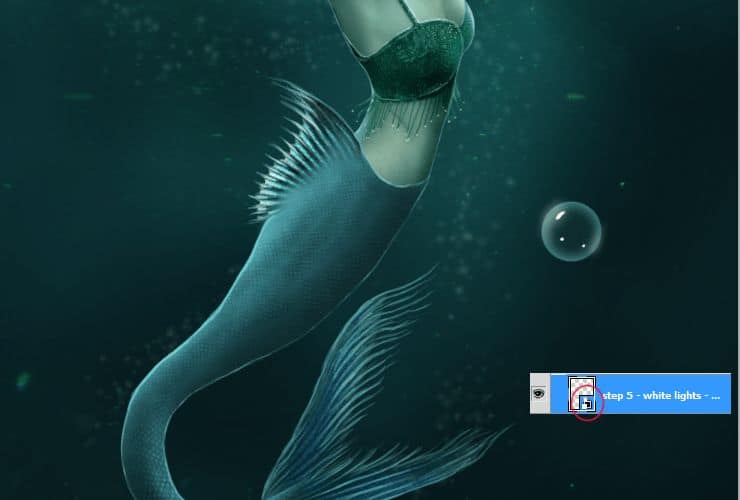
Step 50
Now duplicate your bubble (drag and drop layer to “New layer” symbol) then transform duplicated layers (Ctrl + T). Repeat it a few times.
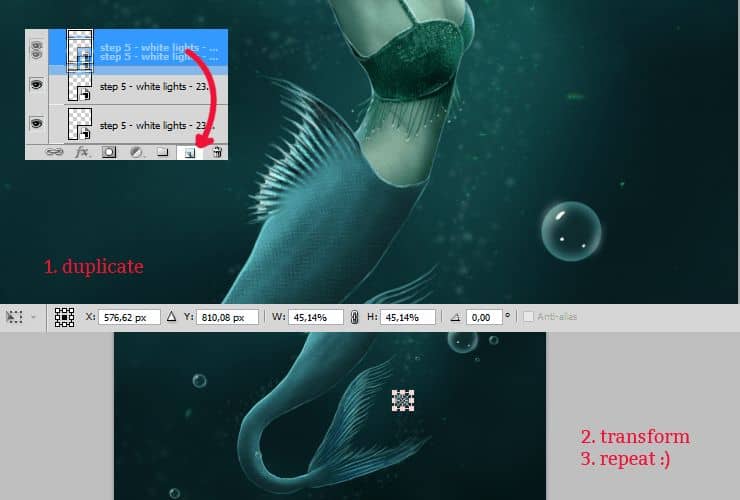
Step 51
If you have too much layers, just click on some with holding ctrl. Then click on chosen layers with RMB and pick “Convert to Smart Object”. You can freely transform group of bubbles.
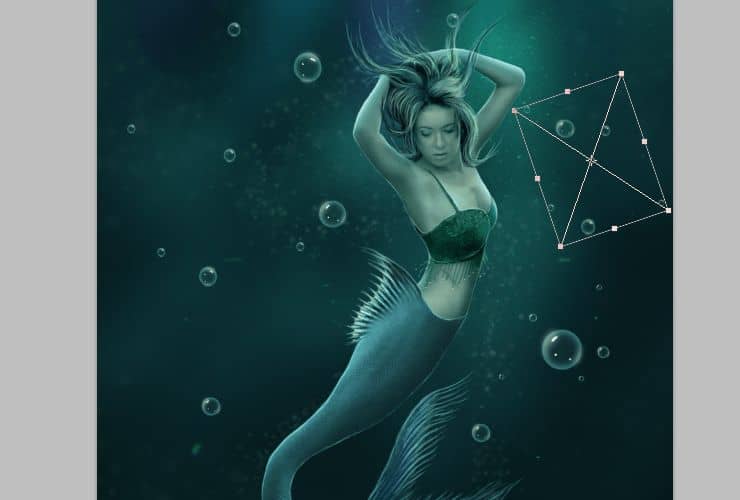
Step 52
You can also play with smart filters. I’ve used from top menu Filter > Blur > Gaussian blur…
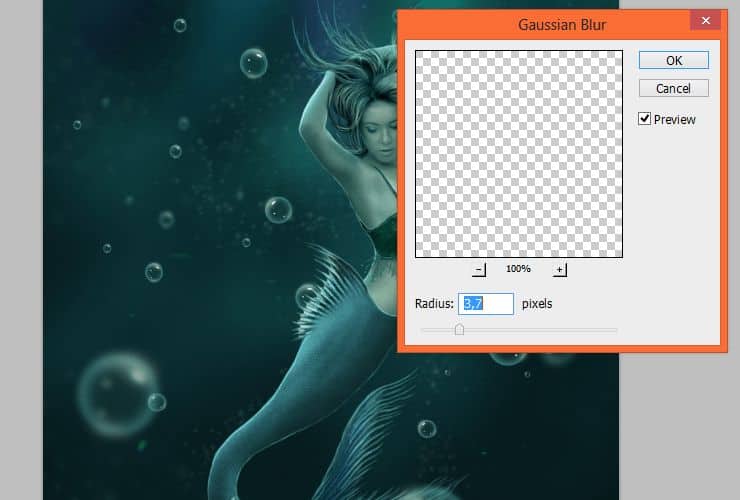
Step 53
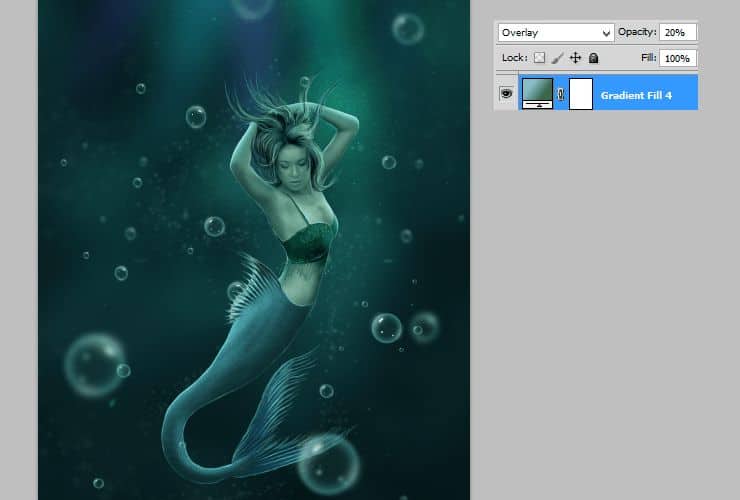
Now, for making colors good, add adjustment layer with Gradient fill.

Change blending mode to Overlay, decrease opacity to 20%.
Step 54
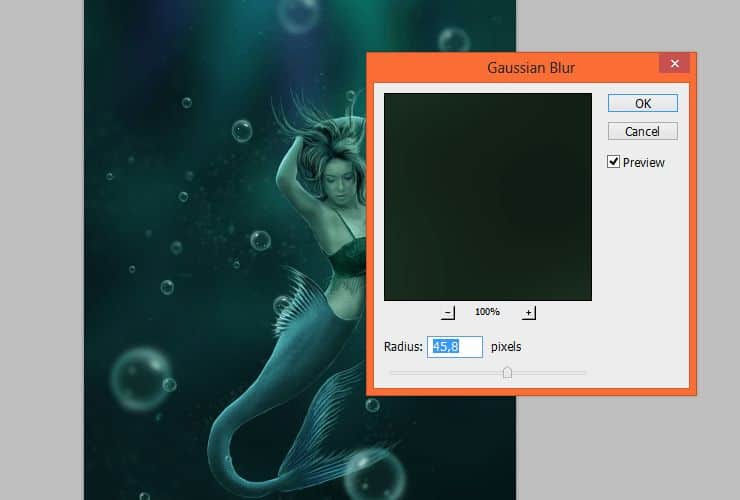
I’ll show you, how to make your image deeper. Add new layer. In your color picker set green and black colors. Then, from top menu choose Filter > Render > Clouds.
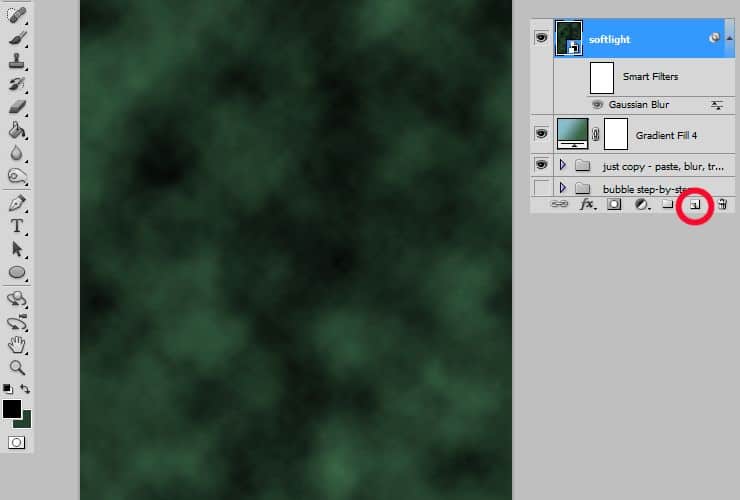
Change blending mode to Soft Light, also decrease opacity to 20%.
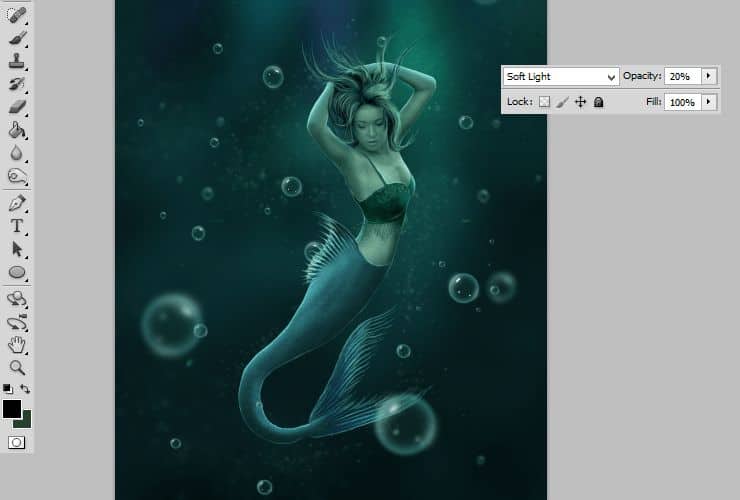
Then, from top menu choose Filter > Blur > Gaussian blur…
Step 55
This step is optional. Add new layer. Pick Sparkles brush and draw some sparkles around your mermaid. Use white color.
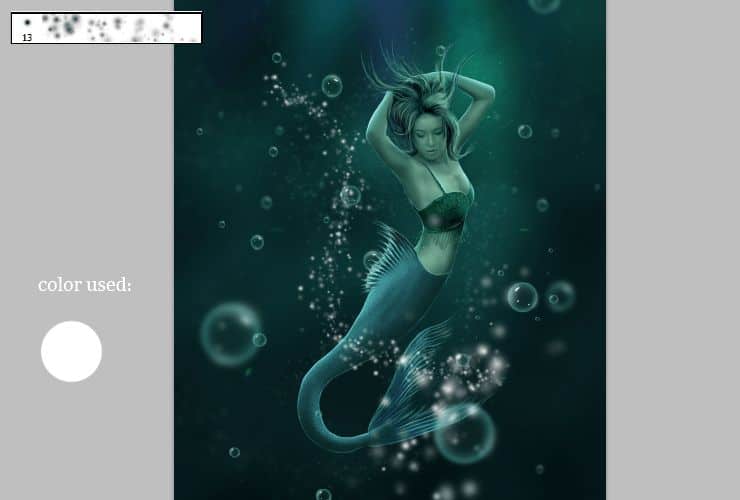
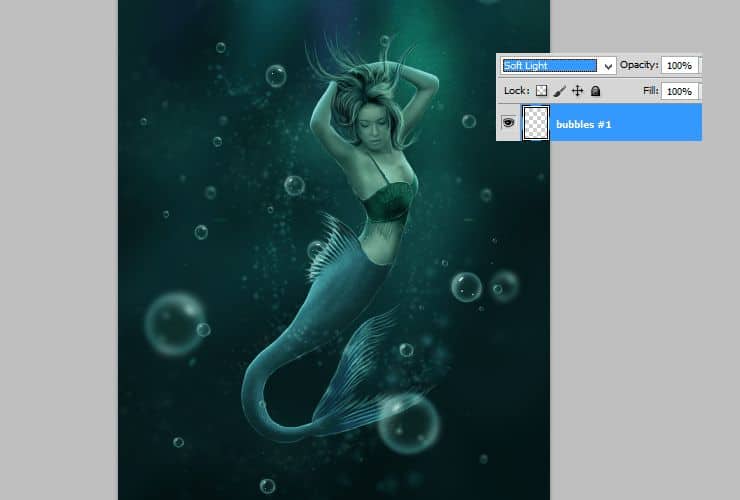
Set blending mode of this layer to Soft light. Layer will inherit colors of the rest of image.
Step 56
Again add new layer. Use the same brush (Sparkles, white color) and set bigger size. Draw some strokes around tail.
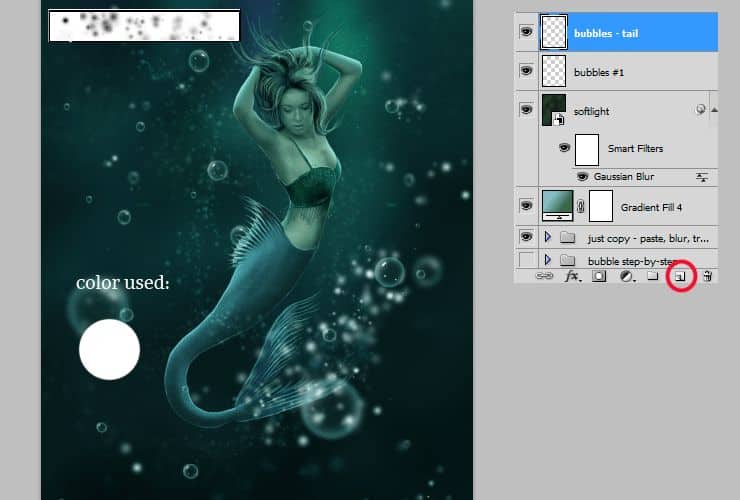
Now set blending mode to Vivid light. Decrease opacity to 33%..
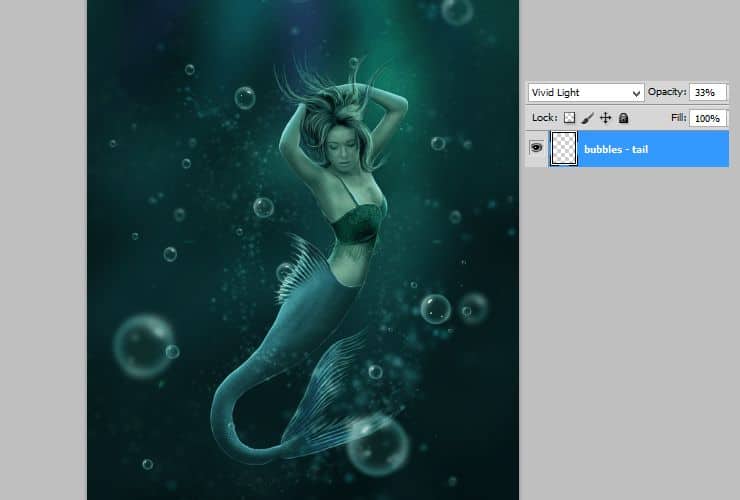
Step 57
You should fix Brightness/Contrast. Add Adjustment layer.
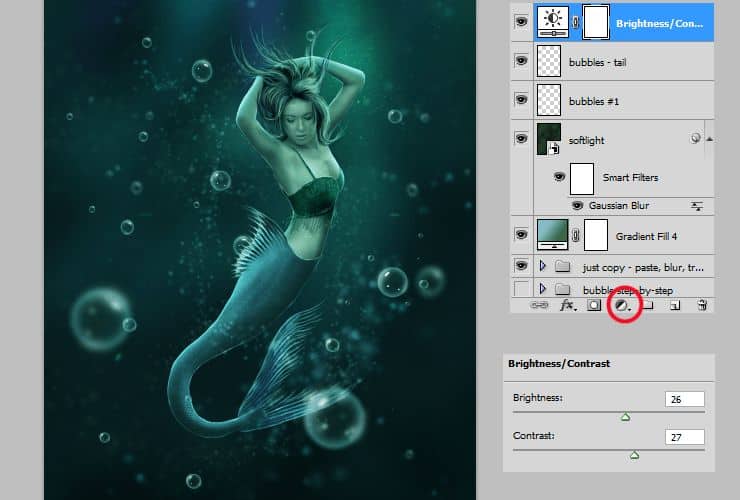
Step 58
Optional – add Hue/Saturation adjustment layer. It will fix all colors.
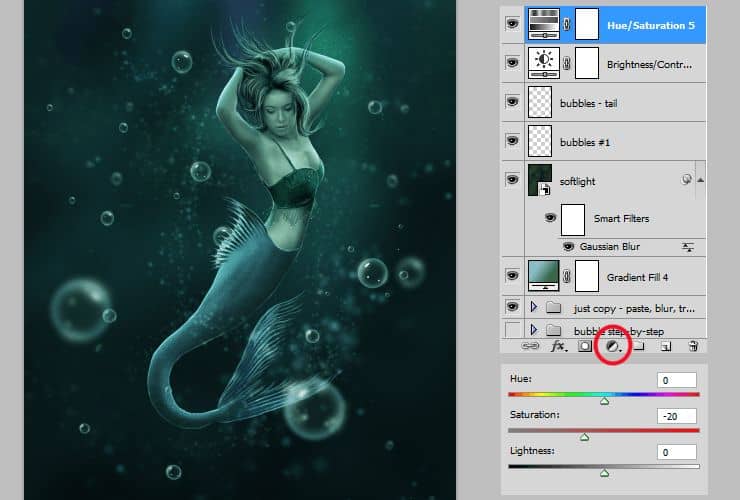
Step 59
In your color picker set as primary color some green or blue (as your wish!), add adjustment layer with radial Gradient fill.
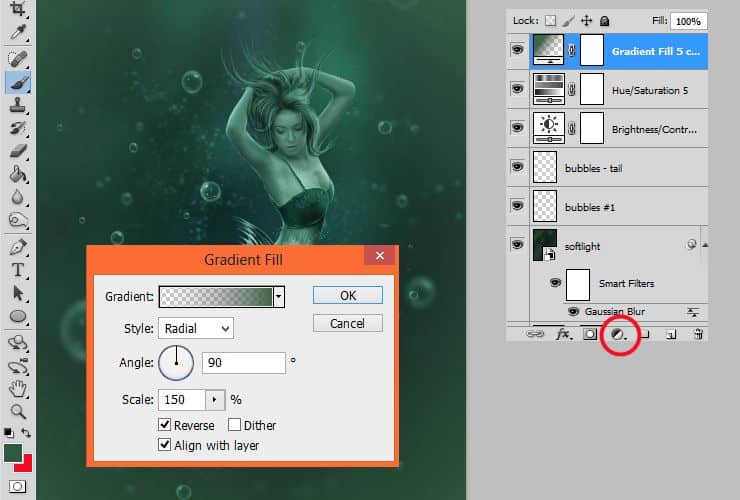
At the end, change blending mode to Multiply.
Final Results
![final-results[1] final-results[1]](https://cdn.photoshoptutorials.ws/wp-content/uploads/2014/08/finalresults11.jpg?strip=all&lossy=1&webp=82&avif=82&w=1920&ssl=1)
Download the PSD
Tutorial by msRiotte
10 responses to “Create an Underwater Scene of a Mermaid”
-
thank you!!
-
How do you download the brushes.
Thanks -
MsRiotte DigitalArt :)
-
This dosent take too long and looks awesome! Saved my grade in photo class
-
thanks :D
-
Next time I am looking at some downtime with photoshop, I will be trying this tutorial out. Thanks for posting the steps so clearly!
-
its really helpful for new learners like me..
-
That’s totally amazing! I want to try to make one tomorrow. If nothing else, I’m going to learn a ton of new stuff about adjustment layers (haven’t been using photoshop for many years, and never knew about them). Thanks a lot for your effort in making this tutorial!
-
Vicky tu trouve pas quelle ressemble a annabelle?!
-
Oui a la des airs :)
-


 Thank you for following this tutorial! You are amazing. Write if you have questions! :). Personally I am graphic designer from Poland. See my portfolio here:
Leave a Reply