Step 28
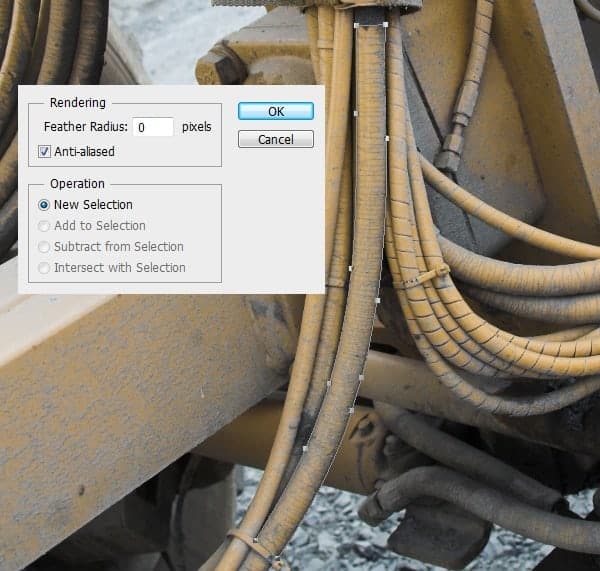
Keep adding more details. Now we’re going to add some wires next to our Props. Open the Wire image. We are going to extract the part of this wires from the image using the Pen tool(P) and start tracing the wire until you get them right.Now once you are done with it, go to the Paths panel, right click the path we created, and choose Make Selection. Leave the Feather Radius to 0. Copy the selection (Ctrl+C), and Paste (Ctrl+V) it to our canvas. Add a couple of adjustment layers below to fix the tone properly and use the technique in the previous steps to bend the wire and to create shadows.


Step 29
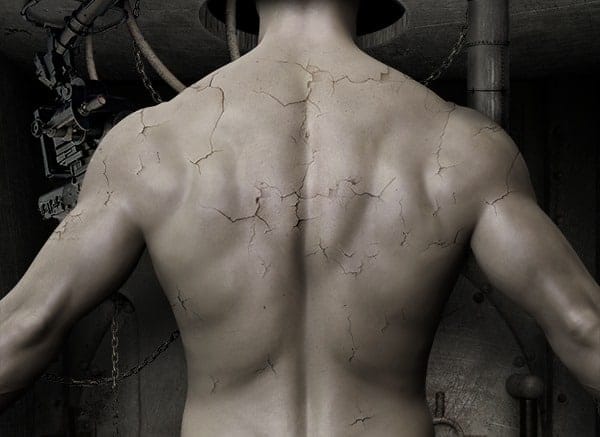
Let’s now focus on the body. Import the Crack texture into our canvas, and press Shift+Ctrl+] to bring the layer to the very top of the stacking order. Create a new adjustment layer in the Layers panel and select Hue/Saturation. Make sure the clipping mask button is turned on. Then slide the Saturation down to -100 to remove its color, and change the layer Blending Mode to Overlay.

Step 30
Add a layer mask. With the soft Brush Tool (B) carefully erase the unwanted parts of the crack. Try to preserve as much detail as possible. Adjust your brush size to reach very small areas and use the X key to switch between black and white as you paint. Copy the layer and repeat the process to the other parts of the body.

Step 31
Next, we are going to add another details to the body. Import the Metal Texture 2 image, and with the Lasso Tool (L) select a portion of the image, then click on the Add layer mask button in the Layers panel. Create a new Hue/Saturation adjusment layer and turn down the Saturation to -100, then Set the Blending Mode to Soft Light and reduce the Opacity to 66%. Copy the layer and place it in some other parts of the body. The Opacity depends on the which part of the body you are going to put the texture. In the darker area, reduce the Opacity to 30% to lessen the effect. Now grab the Brush Tool (B) and with the soft-edged brush, erase the unwanted part of the texture.

Step 32
Before we finish this piece I thought it would be nice to add one more little detail that would make the piece little bit more interesting. Open the Rivets image, and with Rectangular Marquee Tool (M), select the rivets and drag it to our canvas. Bend it just a little bit with the Puppet Tool to follow a curve of the body. Press Shift+Ctrl+U to desaturate the image and set the layer’s Blending Mode to Overlay. Also, erase the edge of this layer with soft eraser, so only the rivets part of the image remains. We can duplicate the layer to enhance the effect and play with the opacity to get the desired effect.
8 responses to “Create an Unnerving Surreal 3D Room Scene in Photoshop”
-
mas ariga yada. akun sosmed nya apa??? please reply.
i am your fans.
-
censored
-
He thick!!!!
-
Thank you for the creative lesson. I was interested in joining the parts. to get the camera with the robot, and proved very useful both to make the holes. I do not know how to .thank you. It’s my pic http://j-p-g.net/if/2015/09/17/0842755001442497686.jpg
-
Awesome work. Only drawback is, I don’t have Shutterstock, so I couldn’t get the body.
-
parece del Siglo 22 en una Gran tribulacón
-
Que foto tan Cruel
-
This is CRAZY. Thank you!


Leave a Reply