
Step 33
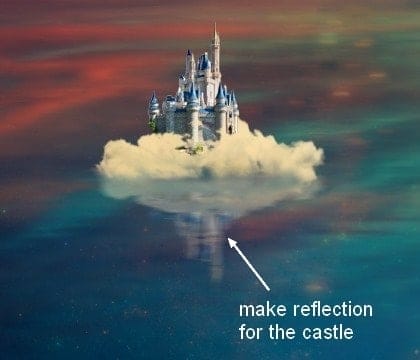
Cut out the castle and place it onto a left cloud. Pick a cloud brush (I chose the number 1369) to blend this castle with the cloud:
Step 34
Now come back to the clouds group. Select the mask of the cloud’s reflection mentioned in previous step. Choose the cloud brush you used to mask off the castle and press F5 to flip its position:

Step 35
Group the castle and its reflection layers. Use Color Balance to add some warm color to them: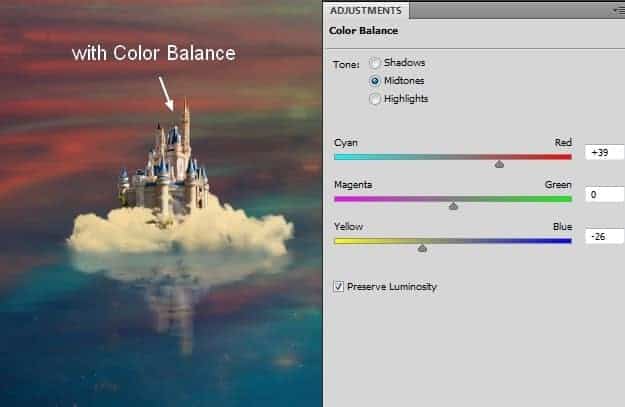
Step 36
Use a Curves adjustment layer to darken them a little:
Step 37
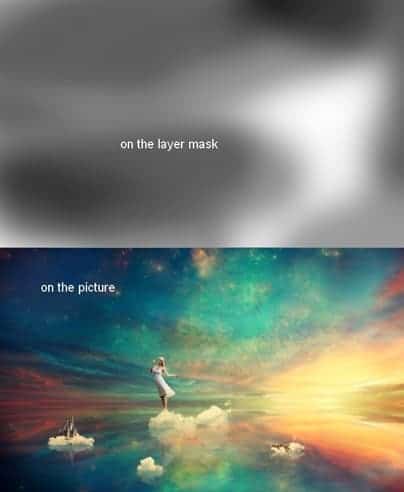
To change the contrast of the whole scene, make a new layer on the top . Active the Gradient Tool (G), choose Radial Gradient with default colors (black and white). Change the mode to Soft Light 100%:
Step 38
In this step I use a soft brush with the color #ecc886 to paint over the model and her reflection to give them a glowing effect. Change the mode to Overlay 70%:
Step 39
Open the light 1 images pack. I chose “starry4” to cover the working image then set the mode to Screen 100%:

Step 40
I used Hue/Saturation to turn some of the glowing dots on the lake into blue:

Step 41
Duplicate this light layer and lower its position at the center. Apply layer mask to smoothly blend it with the scene: :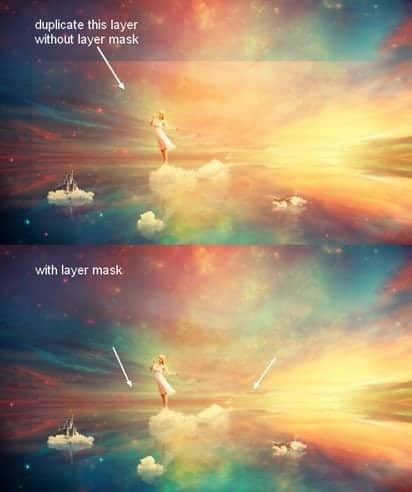
Step 42
After duplicating it again , move it to the top right and erase gently this effect with layer mask:
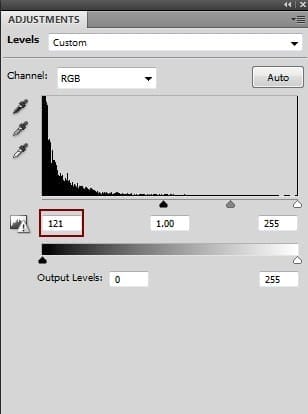

Step 43
Add this texture to the part around the paper boat:
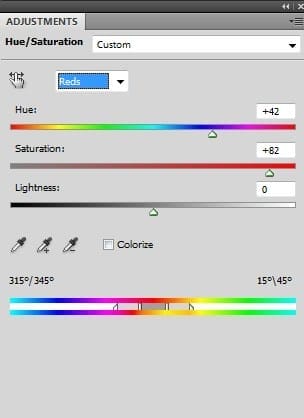

Step 44
Place the nebula 2 image at the model position. Use the Warp Tool (Edit > Transform > Warp) to bend this image as shown below:21 responses to “Create a Wonderfully Colorful and Everlasting Dream Fantasy Manipulation”
-
beautiful thanks a lot
-
Amazing tutorial!!
-
beautiful thank you
-
Thank you! really great work.
-
More posts like this. Excellent
-
Yup Indeed
-
My pic http://j-p-g.net/if/2015/08/16/0941499001439726706.jpg
Thanks. I love this wonderful lesson. Author – genius. the great manipulator adjustment layers -
What a great tutorial and different to what you usually see. Thanks.
-
Dank memes brah
(look at the date) -
Thanks a lot! Loved this tutorial =) Here is my version http://milanaserk.deviantart.com/art/Sensibilia-489040508?ga_submit_new=10%253A1413571430
-
amazing!! great to see the amazing work of great experienced art directors!!
-
Awesome…
-
Thanks, really good work!
-
Thank you for the tutorial!
-
amazing…
-
super
-
-
Thank u..
-
Breathtaking picture!! I will try
-
خوب بود.ممنون
means:good thank you!! -
Final image looks amazing brilliant job !!
-
okay only…


Leave a Reply