


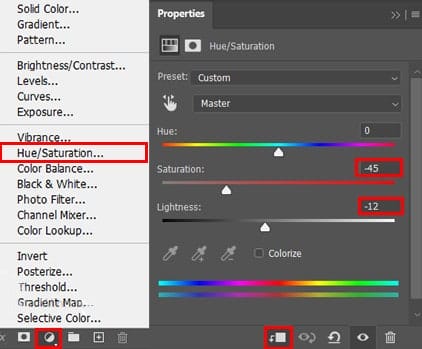
Step 10
Add Adjustment Layer “Hue/Saturation”
Step 11
Add Adjustment Layer “Curves”

Step 12
Now, select Ivy layer and go to Blending Options and check Drop Shadow.

Next go to Layer > Layer Style > Create Layer and press Ok.

Create a layer mask and press Ctrl/Cmd + I to invert. Now use Brush Tool(B) Soft Round with foreground color white and paint ivy shadow on parrots.

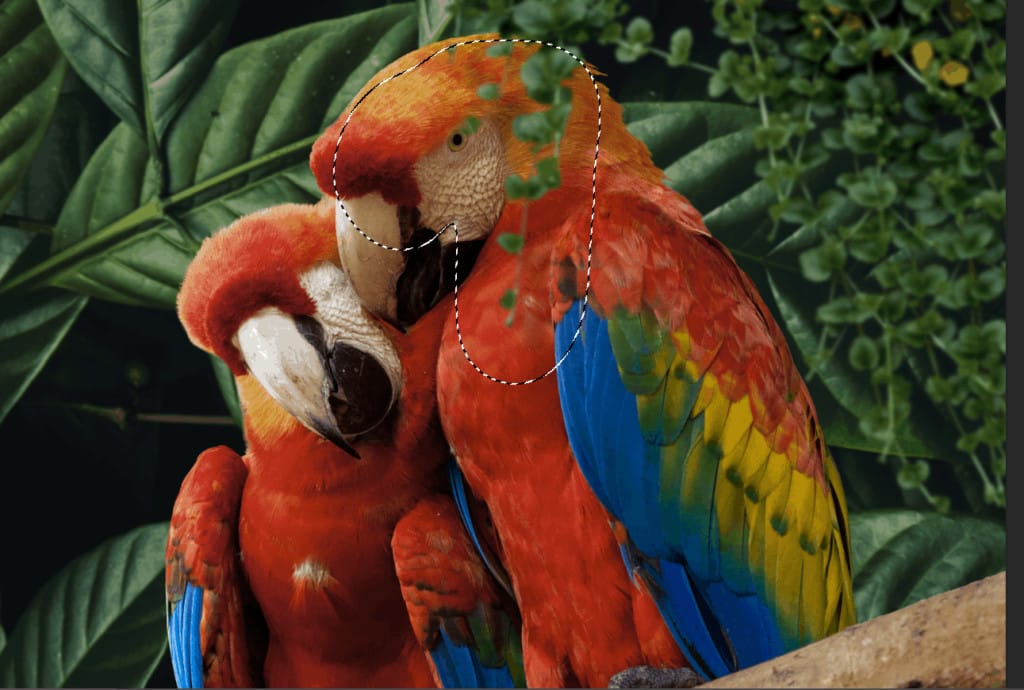
Step 13
Now go to File > Open Ivy 2 and hold Ctrl/Cmd and click on layer and after the selection area has been created, simply copy (Ctrl / Cmd + C) and Paste (Ctrl / Cmd + V) it to our work canvas. Then position the image with the transform tool (Ctrl / Cmd + T). Hold Alt + Shift and resterize like image below. In Photoshop CC only hold Alt to resterize al sides together.


Step 14
Add Adjustment Layer “Hue/Saturation”

Step 14
Next, press Ctrl/Cmd + J to duplicate Ivy 2 Layer and Go to Filter > Blur > Gaussian Blur and set to 8px.


Step 15
Add Adjustment Layer “Hue/Saturation”

Step 16
Add Adjustment Layer “Curves”

Step 17
Now press again Ctrl/Cmd + J to duplicate Ivy 2 Layer and Go to Filter > Blur > Gaussian Blur and set to 8px.


Step 18
Add Adjustment Layer “Hue/Saturation”

Step 19
Duplicate the last one Ivy (Press Ctrl/Cmd + J)

Step 20
Add Adjustment Layer “Hue/Saturation”

Step 21
Open Ivy 3 and hold Ctrl/Cmd and click on layer and after the selection area has been created, simply copy (Ctrl / Cmd + C) and Paste (Ctrl / Cmd + V) it to our work canvas. Then position the image with the transform tool (Ctrl / Cmd + T). Hold Alt + Shift and resterize like image below. In Photoshop CC only hold Alt to resterize al sides together.


Make a two more copies, Press Ctrl/Cmd + J and duplicate…

Step 22
Add Adjustment Layer “Hue/Saturation”

Step 23
Next, Open Ivy 4 and hold Ctrl/Cmd and click on layer and after the selection area has been created, simply copy (Ctrl / Cmd + C) and Paste (Ctrl / Cmd + V) it to our work canvas. Then position the image with the transform tool (Ctrl / Cmd + T). Hold Alt + Shift and resterize like image below. In Photoshop CC only hold Alt to resterize al sides together. Now create a blur effect, go to Filter > Blur > Gaussian Blur and set Radius to 8px.
One response to “Create a nature scene of Parrots Photo Manipulation Tutorial”
-

This is beautiful! Thank you!
Leave a Reply