
Do the same with the corners of the top left and bottom right.

Step 46
Make a new layer and change the brush to the tech one. Use the circuit1 brush with white color to paint on the left of the big rectangle. Add a new layer and use the circuit3 brush with the same color to paint on the part beside the circuit1 one.


On a new layer, use the circle4 brush to paint on the bottom right of the rectangle.

Step 47
Make a new layer and click Tto activate the Text Tool. Use the font Agency FB with white color and 36 ptto type the letters Loading 91%…to show the process of the load of the cyborg. Move the letters below the circuit4 one.

Create four layers and use the same brush with white color to type the numbers 35%, 12%, 8% and 5% (or any numbers you want) on some blanks on the background to show the incomplete technological process inside the room. Vary the text size depending on the distance from the viewer to the text (I’ve used 30 pt, 24 pt, 18 ptand 10 ptbut it’s up to you). Lower the opacity of these layers to 50%.

Step 48
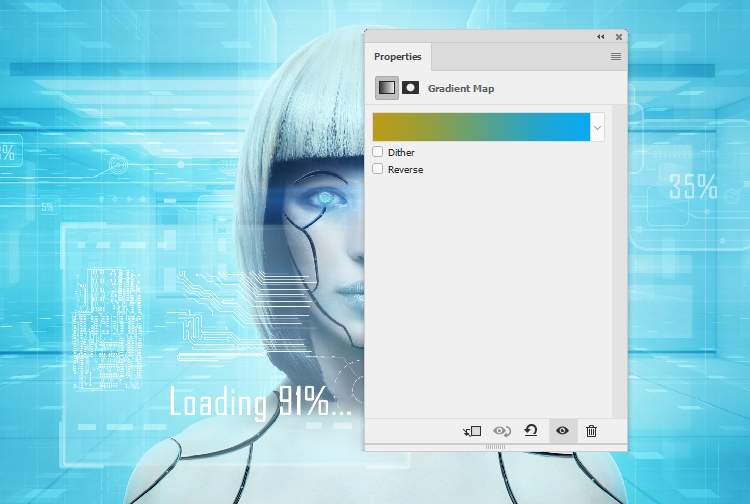
Make a Gradient Mapadjustment layer on top of the layers and pick the colors #bb9d0fand #00a9f7. Change this layer mode to Soft Light 20%.
Add a Color Balanceadjustment layer and alter the Midtonesand Highlightssettings:


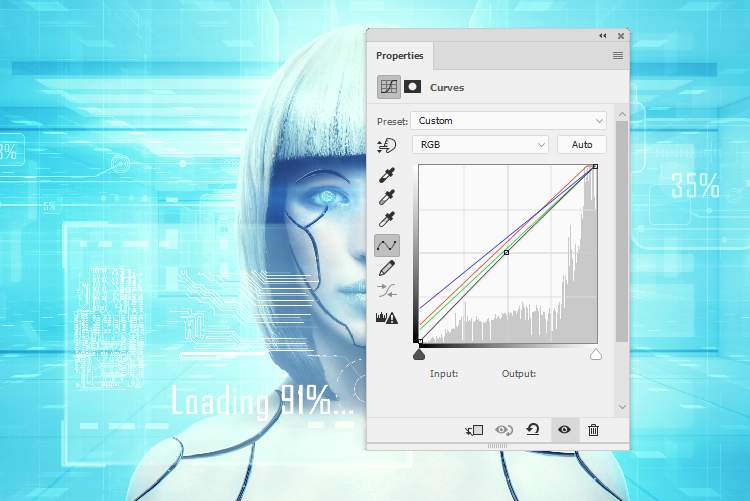
Create a Curvesadjustment layer to change light and color of the whole canvas.
Step 49
Make anotherCurvesadjustment layer to darken the edges and sides of the canvas. Paint on the rest to keep so they won’t be affected by this adjustment layer.

Add aPhoto Filteradjustment layer and pick the color #ee95d2to change the color of the background. Paint around the model to keep her color.

Use the Vibrance adjustment layer to enhance the final effect.

Final Result

Download the PSD
4 responses to “How to Create a Cyborg Photo Manipulation with Adobe Photoshop”
-

I can’t do step 22 with the pen stroke, I waste too much time on how to do it, I give up.
-
I love this tutorial but I wish we didn’t have to pay for the images… :(
-
Great editing photos I ever saw. Nice retouching for this picture.
-
Tener que comprar las fotos para el tutorial, no me parece correcto.
Leave a Reply