

Step 10
Add Adjustment Layer “Curves”

Step 11
Add Adjustment Layer Exposure

Step 12
Add Adjustment Layer Brightness/Contrast and press Ctrl/Cmd + I to invert. Then use Brush Tool(B) Soft Round with foreground color white and paint on dark parts.


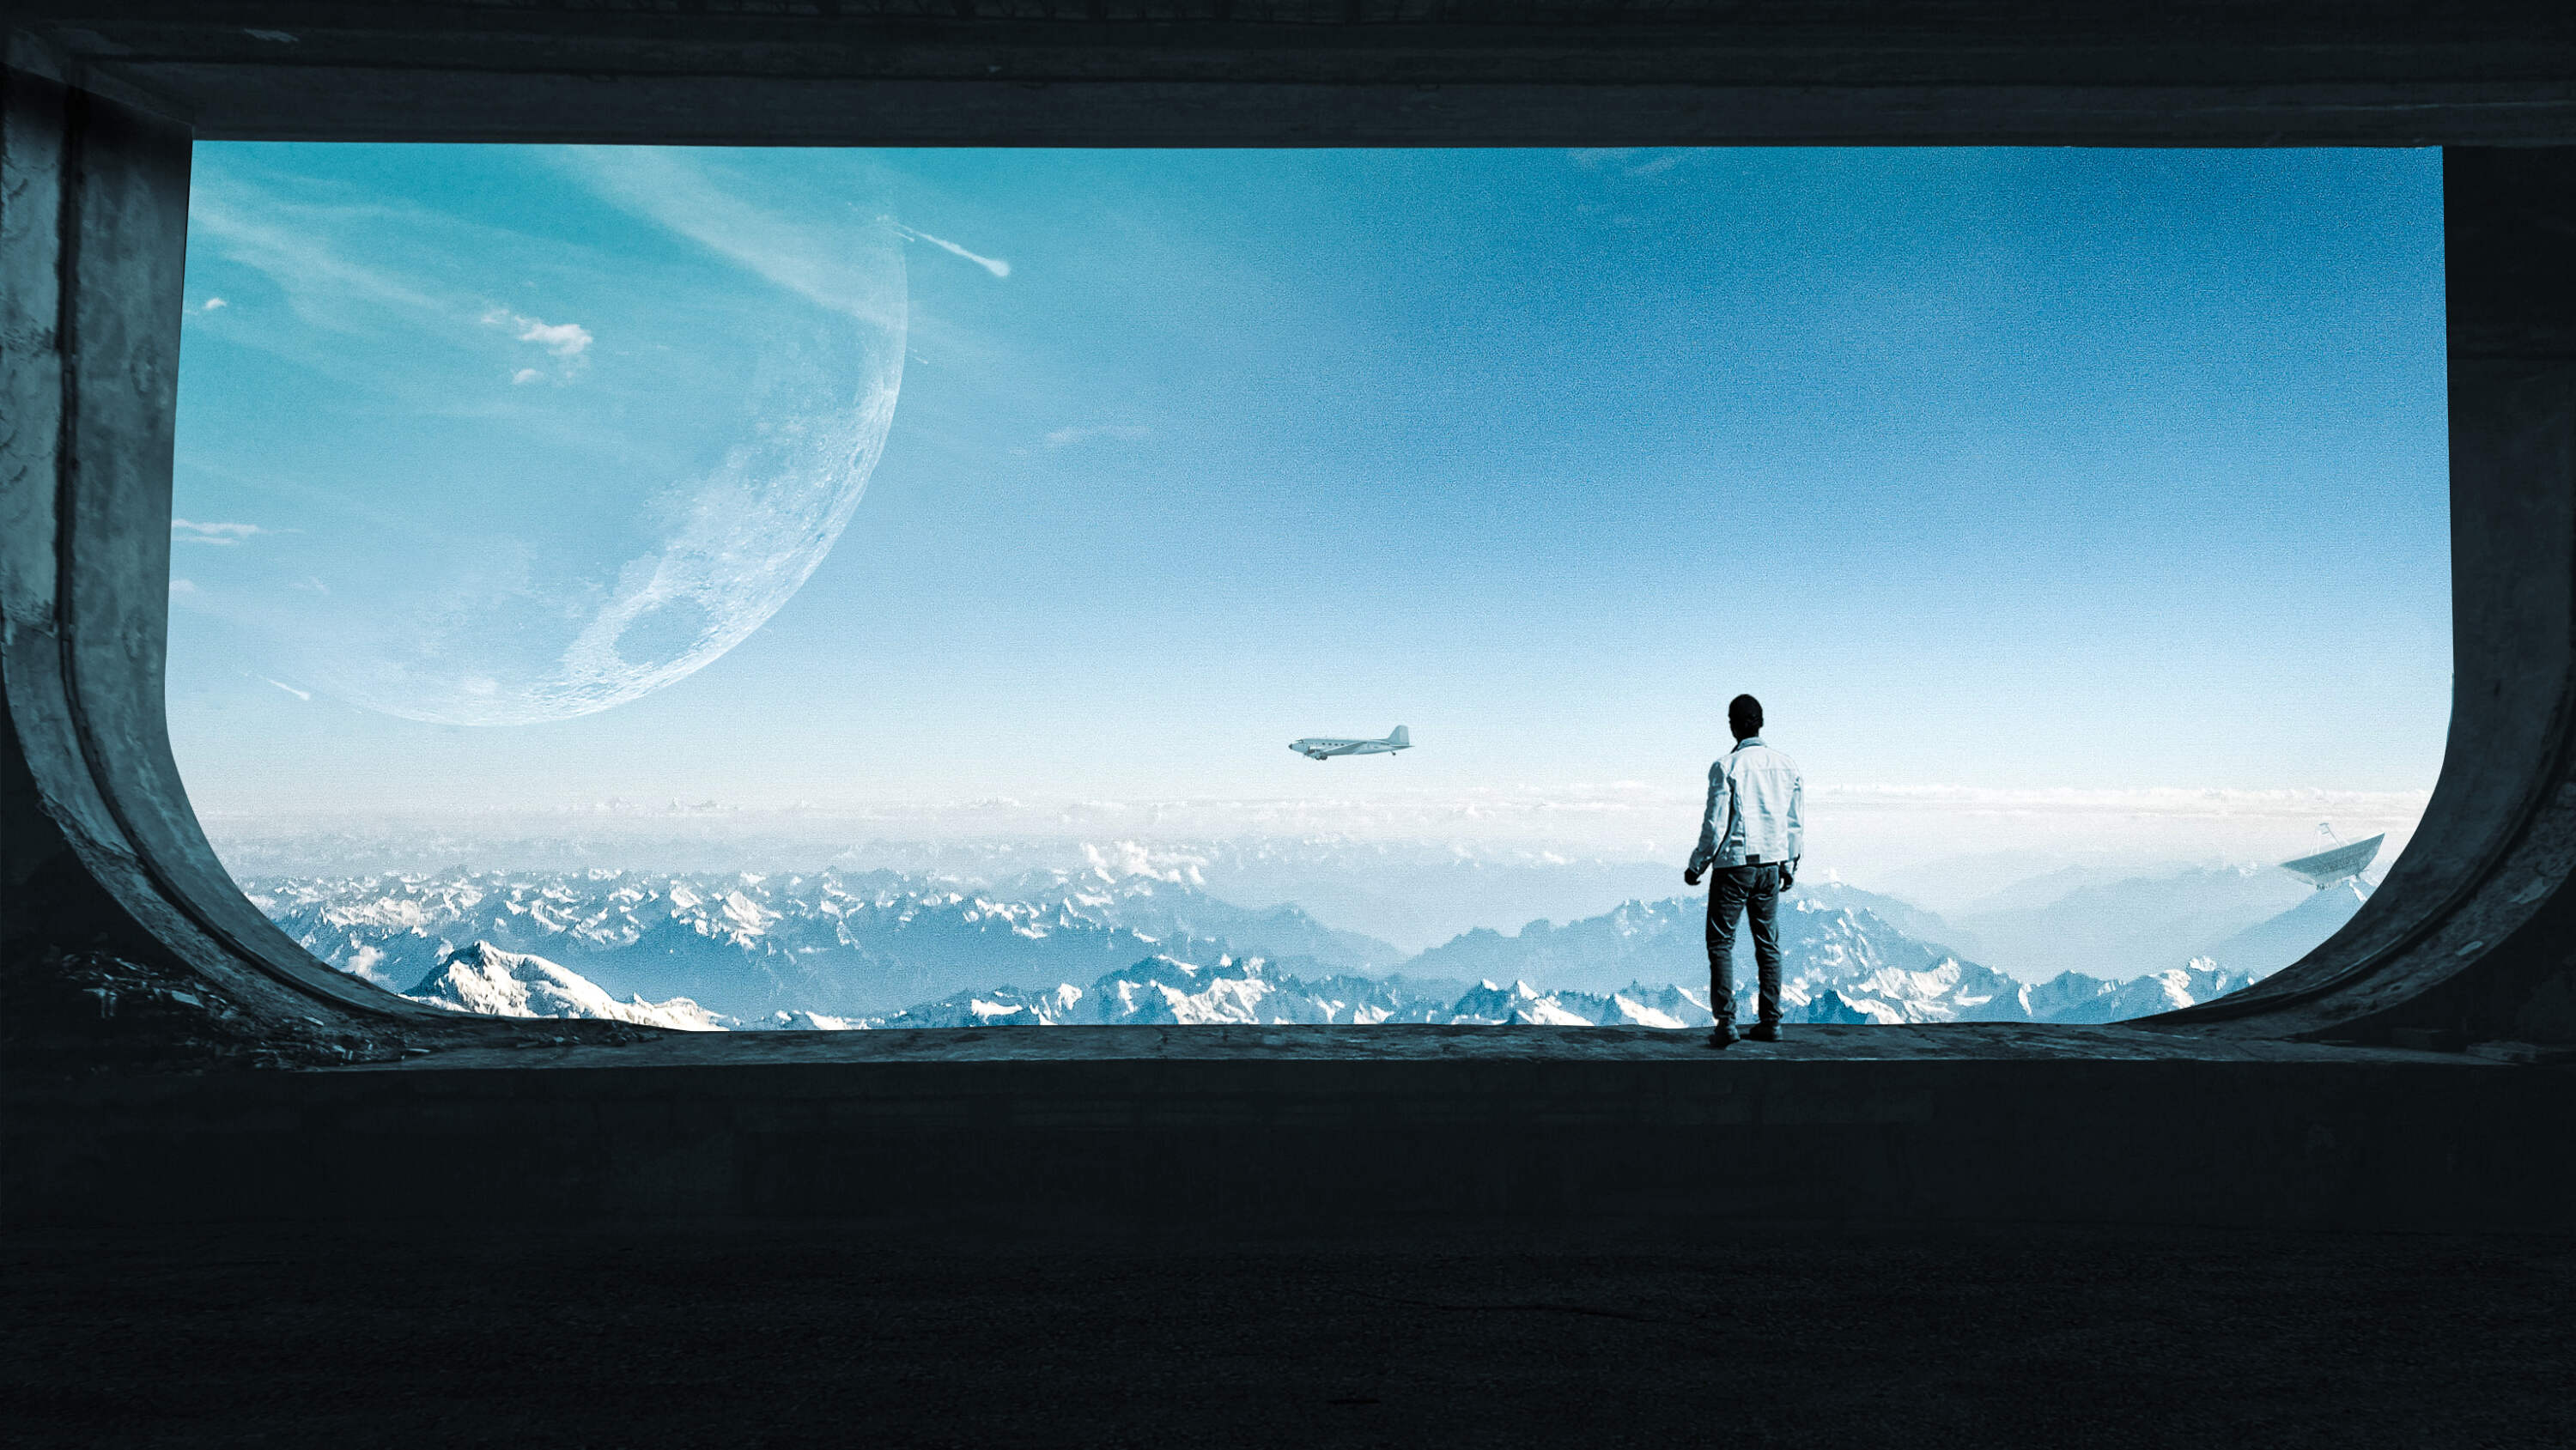
Step 13
Go to File > Open and select Plane. After you open the image, use the Quick Selection Tool(W) and select the plane. After the selection area has been created, simply copy (Ctrl / Cmd + C) and Paste (Ctrl / Cmd + V) it to our work canvas. Then position the image with the transform tool (Ctrl / Cmd + T). Hold Alt + Shift and resterize like image below. In Photoshop CC only hold Alt to resterize al sides together.


Step 14
We will now extend the left wall. First select the background layer and with Polygonal Lasso Tool select the wall then duplicate it Ctrl/Cmd + J.


Step 15
In this step create a new layer and add shadow. Use Brush Tool(B) Soft Round with foreground color black.

Step 16
Now again select the background layer and disable layer mask Ctrl/Cmd + Shift. Next, use Quick Selection Tool(W) and select roof, then duplicate it Ctrl/Cmd+ J. Then position the image with the transform tool (Ctrl / Cmd + T).


Step 17
Next, we will open the floor texture. After you open the image, use Rectangular Marquee Tool(M).

After the selection area has been created, simply copy (Ctrl / Cmd + C) and Paste (Ctrl / Cmd + V) it to our work canvas. Then position the image with the transform tool (Ctrl / Cmd + T). Hold Alt + Shift and resterize like image below. In Photoshop CC only hold Alt to resterize al sides together.

Step 18
Add Adjustment Layer “Hue/Saturation”

Step 19
Add Adjustment Layer “Brightness/Contrast”

Select all layers Shift+Left-Click and put into group Ctrl/Cmd + G

Step 20
Add Adjustment Layer “Color Balance”

Step 21
Add Adjustment Layer Hue/Saturation

Step 22
Add Adjustment Layer Curves and press Ctrl/Cmd + I to invert. Then use Brush Tool(B) Soft Round with foreground color white and paint on highlight parts.


Step 23
When we finished all this, now merge all layers into one. Select the last layer and hold CTRL/CMD + SHIFT + ALT + E. Now we have a final layer, right-click on the mouse and select Convert to Smart Object. Then go to Filter > Camera RAW Filter. At its most basic, the Photoshop Camera Raw filter allows you to use the functions of the ACR interface at any time within Photoshop.
2 responses to “Create a Destination Above the Clouds in Photoshop”
-

I hate this tutorial so much.
-
why?
-
Leave a Reply