
Step 24
Now in Camera Raw Filter, set the Value: Basic
- Exposure: -0.10
- Contrast: +5
- Highlights: +5
- Texture: +10
- Clarity: +20
- Vibrance: +15
- Saturation: -8

Color Mixer
Saturation
- Aquas: +5
- Blues: +5
Luminance
- Aquas: -8
- Blues: -6

Color Grading
- Midtones: H180 S11

Radial Filter
- Exposure: +0.20
- Highlights: +10

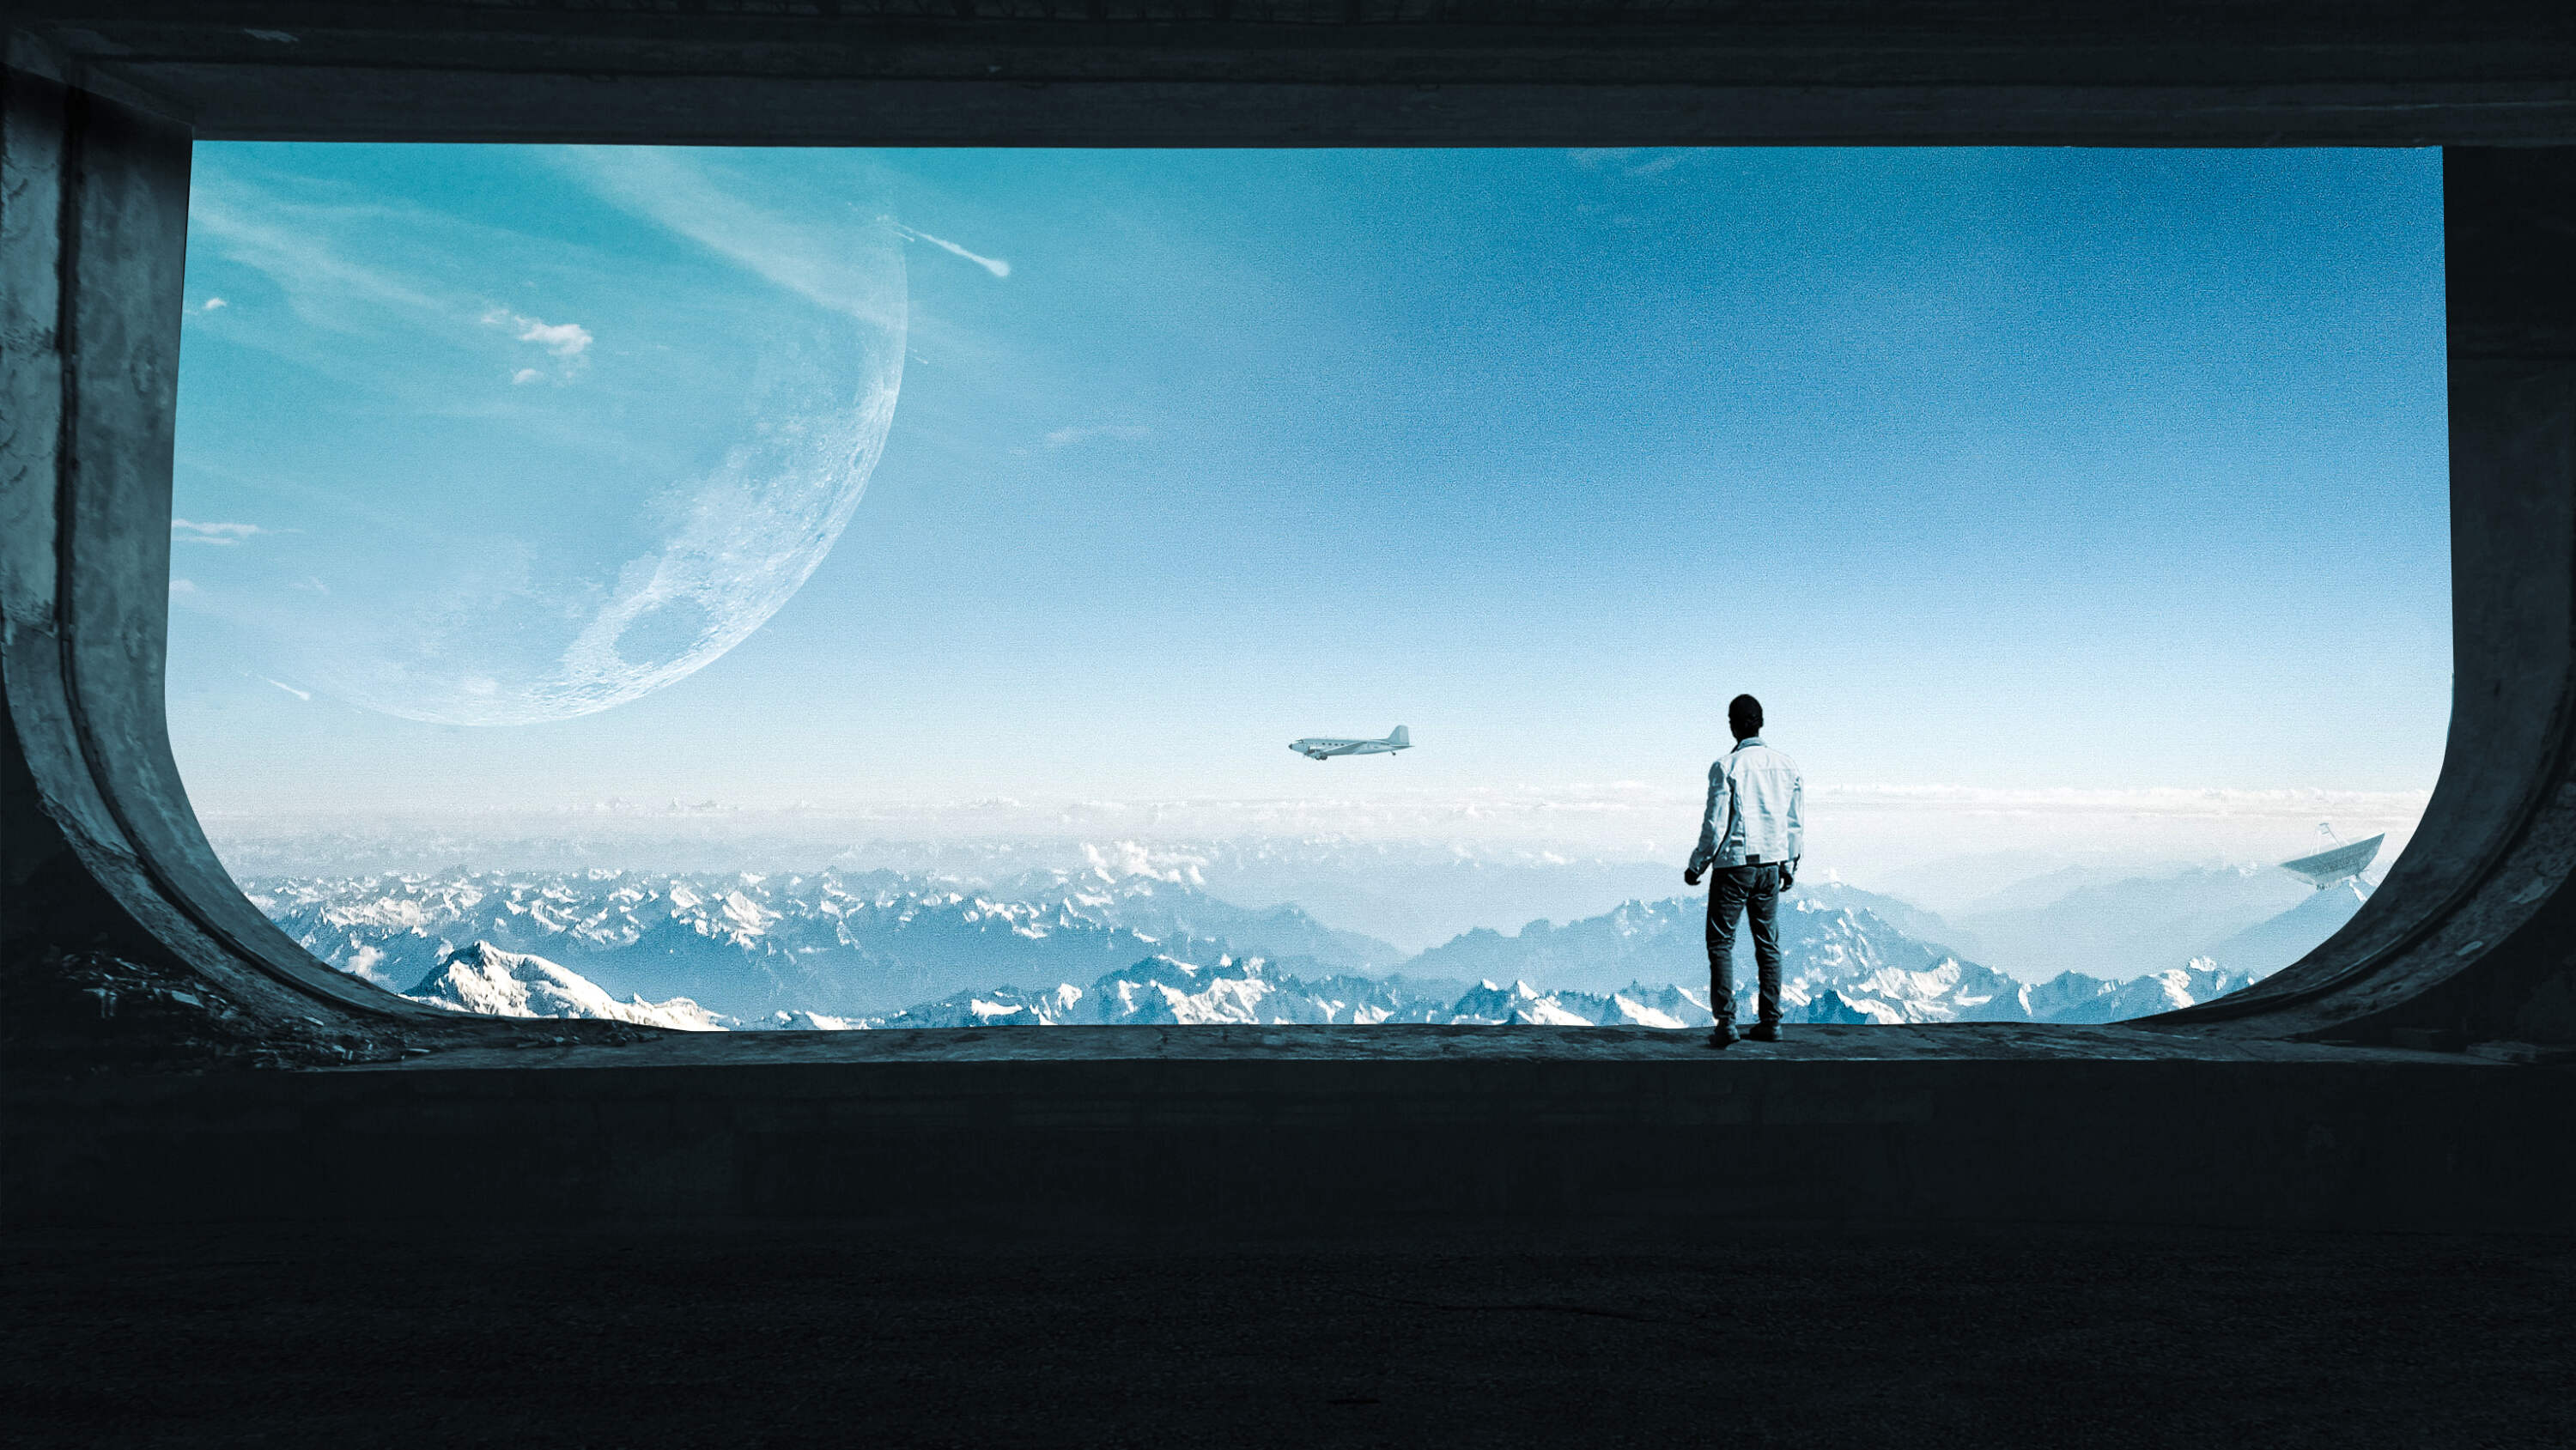
And finally, everything should look like this.

Final Results

Download the PSD
2 responses to “Create a Destination Above the Clouds in Photoshop”
-

I hate this tutorial so much.
-
why?
-
Leave a Reply