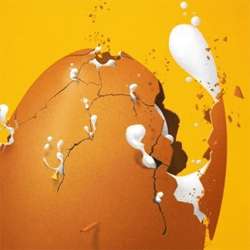
Then again use brush tool with darker color to create some shadows.

And here we go, first basic egg white done.

That’s all, just add some shadow. Repeat this step few times.


Have fun while shaping.

It takes a bit of time, but remember to be precise.

Step 50
And here comes the final, big shape that should grab full attention. Find the perfect position in layers order and again- start to shape.


That’s it. You can also change the color of the shadow underneath the egg and modify a bit global color (maybe make it more contrast and orange, just play with Adjustments).
Final words
Hopefully you have learned something with this tutorial. If so, that makes me happy. I tried to cover a lot of things, but nobody is perfect- feel free to ask then, I will try to answer to all questions in the comment section. And here is a quotation of my favorite modern writer as a final word to inspire you.
“It’s the end, what a gas,
And who’s read it is an ass!”
Witold Gombrowicz — Ferdydurke
Thank you.
Final Results

Download the PSD
Egg.psd | 7.6 MB
12 responses to “How to Break an Egg in Photoshop”
-
Grrrrreat! I applied these and thank you!
-
Thank you so much for this tutorial, I managed to do something really nice by modifying it a bit :)
I need more ! :D -
What a design tutorial. but very difficult. I want to video tutorial.
-
Awesome & nice tuts
-
Nice work. I did find the initial coloring and clipping mask steps could have used some screen shots of the layers palette. I find this makes it a little easier to follow along.
Otherwise, very cool effect. -
Hats off!
-
thank you so much! it is people like you who make it possible for the rest of us to learn and grow! I can’t thank you enough!
-
very nice
-
Loved the tutorial! I’m an ass.. I read it all!! :D
This tut taught me a lot of things at the same time it also made me recall the tricks I used to use but forgot with the time passing..Kudos. \m/
Sir Masiej Kwas.. Respect to you…Also, I was looking for some kinda tut which could teach me the way to turn a red apple into a golden one, or can say an apple covered with shiny golden foil.. If you can gimme a link of such a tut, if it’s already on internet, or post a tut on that, that would be really cool and generous of you guys..
Appreciate the hard work done by people behind this website.. :)
-
Wow! This is by far the most amazing photoshop tutorial I have seen. I realy mean it. Looking forward to trying it out sometimes. – Respect!
-
very niceeeeeeeeeee
-
wow great work


Leave a Reply