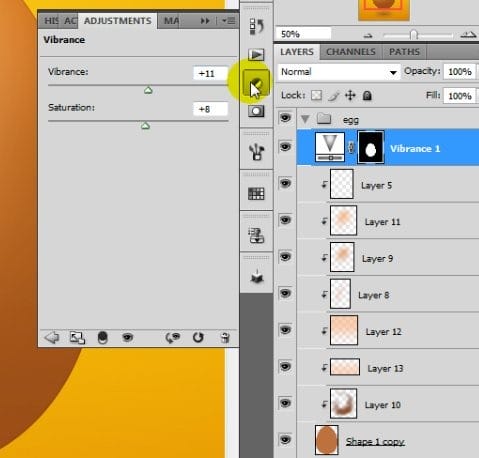
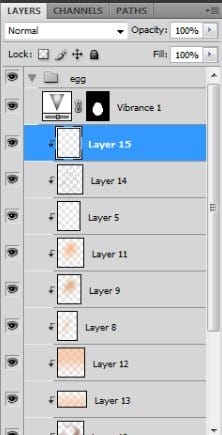
Instead of making mask you can just apply adjustment layer as a clipping layer.
Step 16
Now it is time to add some texture to our image, but before we will do so, we need to create some basic custom brush that will fill our expectations.
Create new document with about 300px by 300px in size. Grab the brush tool with very small, hard round brush and paint around on the document with black color- also, use different brush sizes like 3 to 8 pixels. Try to achieve a big shape of dot that is created from small points.
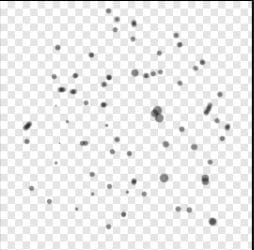
Tip: There are two simple ways to easily change the brush size. First of them- on the keyboard hit the ‘[‘ and ‘]’ key to resize brush. One click means one pixel. You can hold button so the size will jump very fast. Second one is even simpler, but I mostly use it in digital painting. While you have brush tool active, hold [alt] button, then click and hold right mouse button. Now, when you have still both buttons held, move your cursor to the left and to the right. See? Now you can change the brush size very fast and very intuitive without getting into brush options.
When you think you have done the job well, you can save you work as a custom brush. To do that, go to Edit > Define Brush Preset, input the name and hit OK. Newly created brush is now added to your active brush set. You don’t have to save this file so just close it.

Our brush is pretty useless for now, but we will enhance it a bit. All you have to do is just applying these settings to your new custom brush:

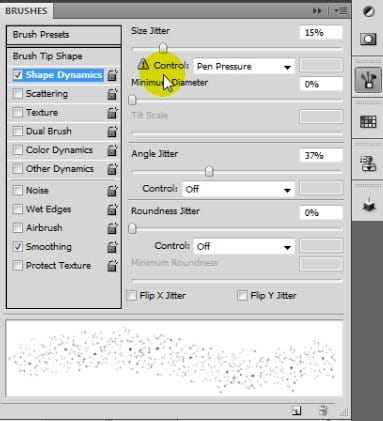
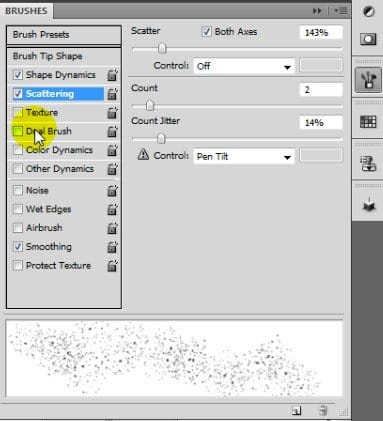
Click on this icon…

… so your settings will be saved as a new brush.
Step 17
Create new clipping layer in between vibrance and Layer 5. Choose some very dark color, could be even black and brush the egg around (set brush size to about 200-240px)…

…so you get something like this:

Now change this layer’s opacity to about 5-10% and blending mode to Multiply. And it should looks like this:

Step 18
We are continue with our texture. Create new layer on top of previous one:
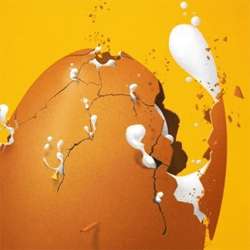
Choose some semi-dark color like #7e3b0b. Now it’s time to play with brush. Change dynamically brush size in range from 90px to even 500px and brush opacity from 9% to 30%. I see that I have to change my layer’s opacity to 50%, but it could be different your document. It depends how long you have brush around. I think it should looks good with the blending mode of layer set to Multiply. Here is how it looks like in my image:
12 responses to “How to Break an Egg in Photoshop”
-
Grrrrreat! I applied these and thank you!
-
Thank you so much for this tutorial, I managed to do something really nice by modifying it a bit :)
I need more ! :D -
What a design tutorial. but very difficult. I want to video tutorial.
-
Awesome & nice tuts
-
Nice work. I did find the initial coloring and clipping mask steps could have used some screen shots of the layers palette. I find this makes it a little easier to follow along.
Otherwise, very cool effect. -
Hats off!
-
thank you so much! it is people like you who make it possible for the rest of us to learn and grow! I can’t thank you enough!
-
very nice
-
Loved the tutorial! I’m an ass.. I read it all!! :D
This tut taught me a lot of things at the same time it also made me recall the tricks I used to use but forgot with the time passing..Kudos. \m/
Sir Masiej Kwas.. Respect to you…Also, I was looking for some kinda tut which could teach me the way to turn a red apple into a golden one, or can say an apple covered with shiny golden foil.. If you can gimme a link of such a tut, if it’s already on internet, or post a tut on that, that would be really cool and generous of you guys..
Appreciate the hard work done by people behind this website.. :)
-
Wow! This is by far the most amazing photoshop tutorial I have seen. I realy mean it. Looking forward to trying it out sometimes. – Respect!
-
very niceeeeeeeeeee
-
wow great work

Leave a Reply