
Step 40
Change this layer to Multiply with an Opacity of 39%. Once you have done this place all of these layers except the background in a Group (folder icon)

Step 41
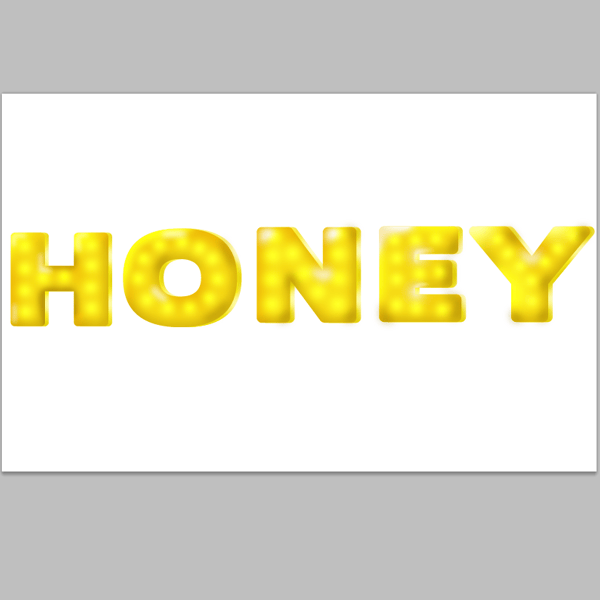
Now we are finished with our letter ‘H’ repeat these same steps for all the other letters.
Step 42
Now transfer your letters over into your honeycomb

Step 43
Create a layer mask for each group of letters (square with a circle inside icon). And erase parts of the letter that you want to remain behind the honeycomb. Note: I used a 22px soft brush

Step 44 Honey Drips
Now we will create the honey drips. I made mine in Illustrator. Usually what I like to do is open my Photoshop honeycomb file in Illustrator so I know where my drips should go. Grab the pen tool and form your drips.

Step 45
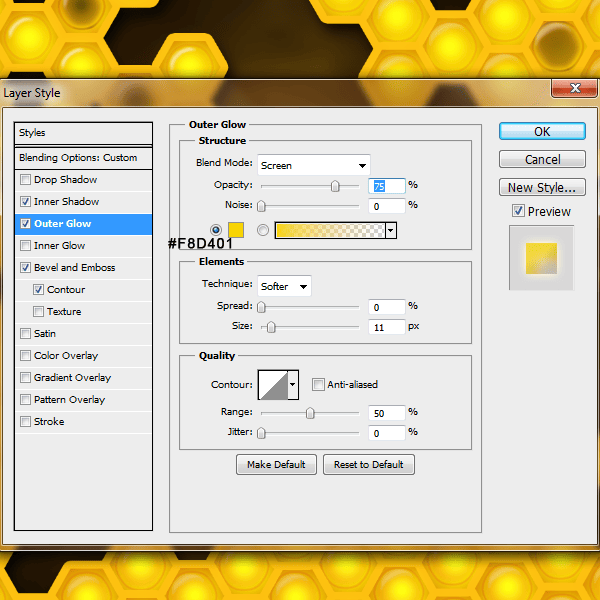
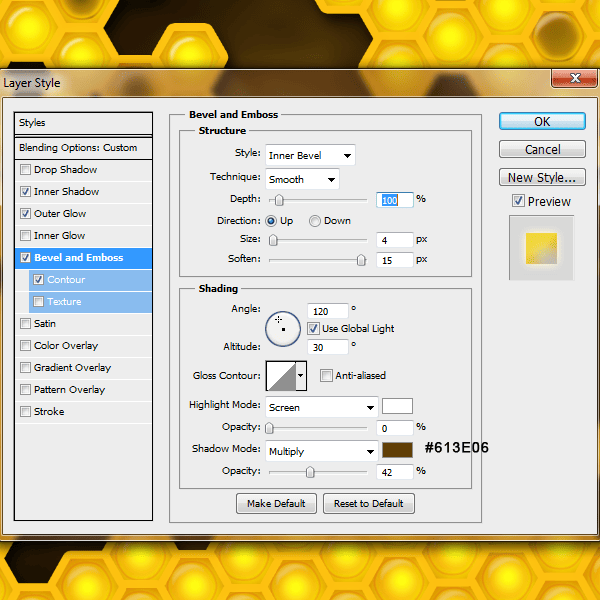
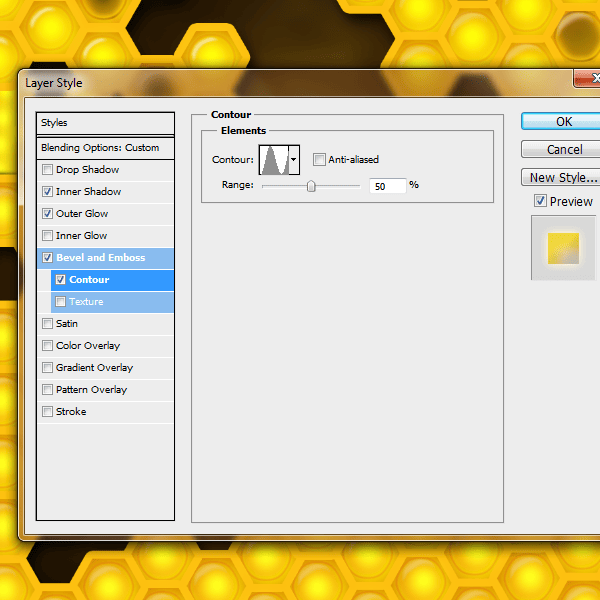
It is best to have each drip on a separate layer. Now transfer them over to Photoshop. Duplicate each drip layer. I will start with my drip on the right top corner. Select the top drip layer and add these layer styles. Note: Rasterize each layer and make sure that the top layer has a Fill of 0%

Step 46
This is how it should look so far.

Step 47
On the second layer we will fill it with #FADC0F with our paint bucket tool. Select the square next to the drip layer while pressing Ctrl then fill it in.

Step 48
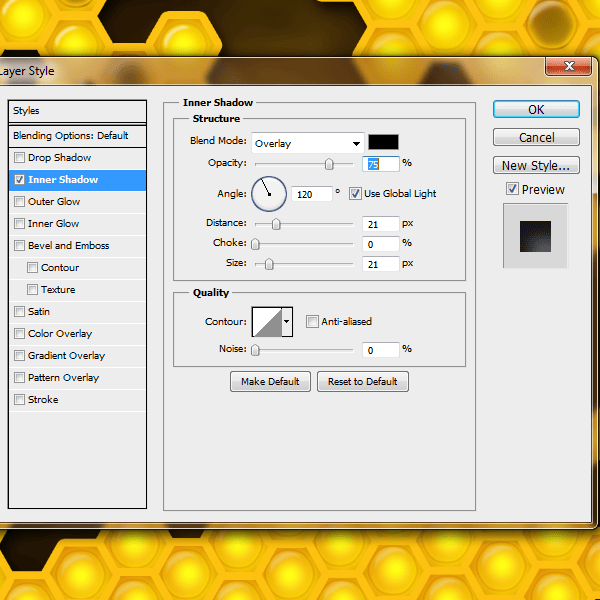
Add this Inner Shadow
Step 49
On this second drip layer create a selection around the drip (Select the square next to the drip layer while pressing Ctrl) Filter>Blur>Gaussian Blur

Step 50
Change this layer Opacity to 50%

Step 51
Now we will add some highlights to make the honey glisten. Create a New layer above both of your drips. With your paint brush tool selected (40px soft round brush #fadc0f) and paint in some highlights.

Step 52
Blur this layer Filter>Blur>Gaussian Blur

Step 53
Change this layer to Screen with an Opacity of 66%
Step 54
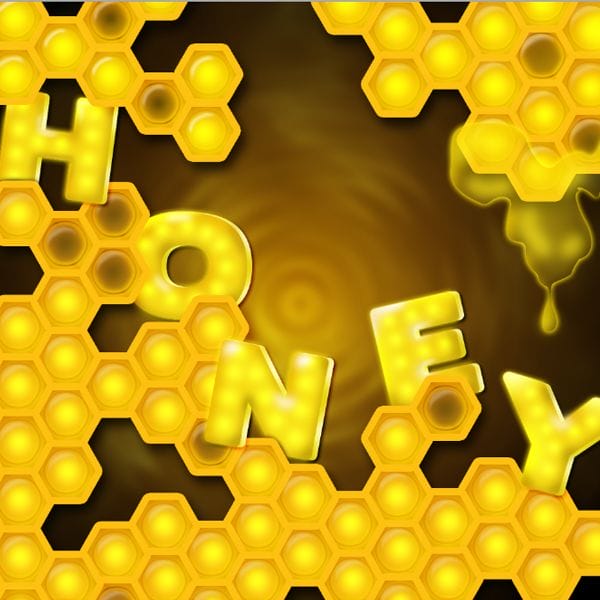
You may have to get out your smudge tool to smooth it out a bit more (67px soft round brush, Strength: 36%)

Step 55
Lets take it a step further, grab your paint brush again (8px soft #FFFFFF) and paint in some more highlights

Step 56
Grab your smudge tool and soften the lines. Change this layer Opacity to 26%

Step 57
Now we will darken some areas. With your Paint brush tool (#987b02 soft brush) add in some dark areas.
One response to “Create a Honeycomb Artwork in Photoshop”
-
really awesome except for the honey drips which are a bit too lumpy for actual honey.


Leave a Reply