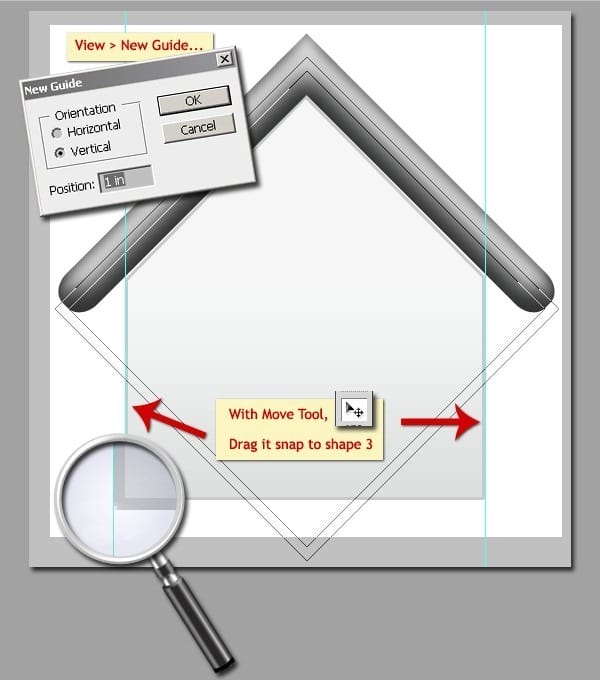
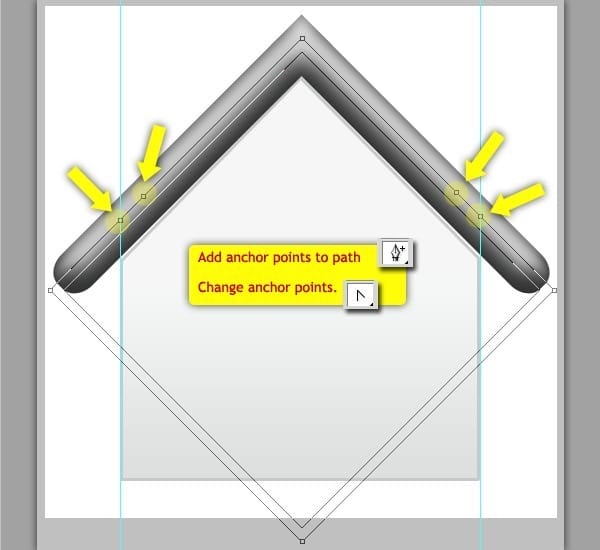
Step 23 – Modifying Path – Editing Points.
Add anchor points on new path. Then change anchor points with convert points tool.
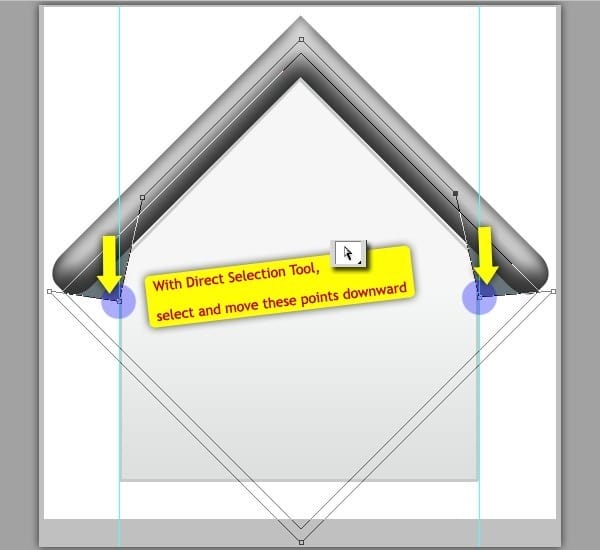
And then use Direct Selection Tool, let’s modify the points like this.

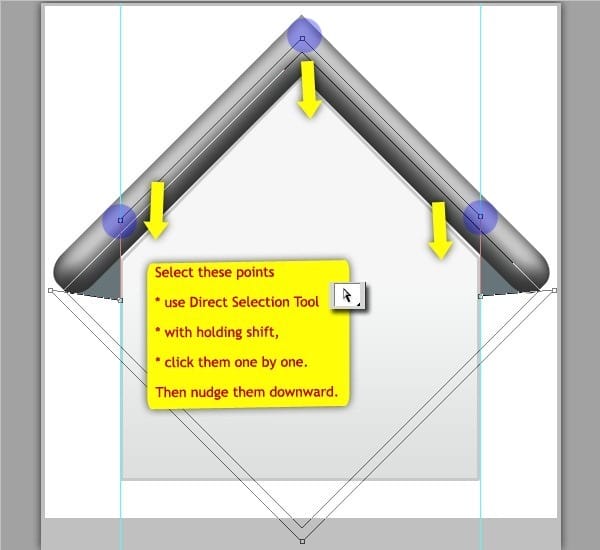

After this, we may clear the guides.
Step 24 – Adding Layer Style.
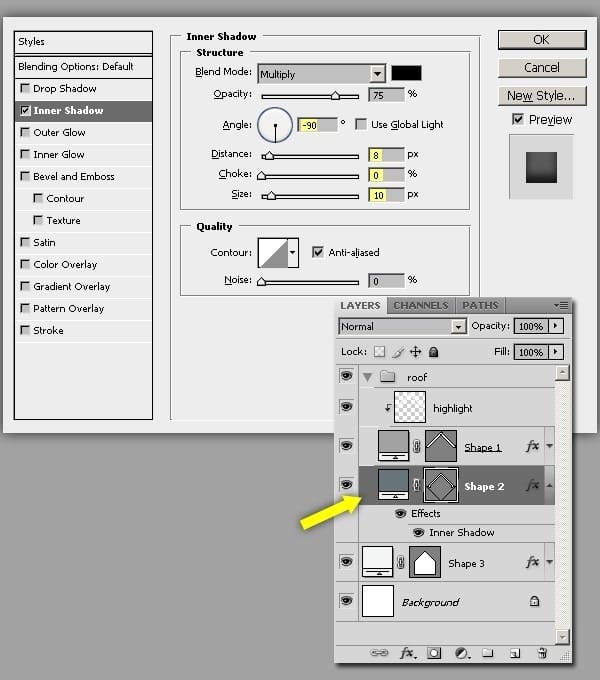
Add layer style with following parameters.
Inner Shadow
- Blend Mode : Multiply
- Opacity : 75
- Angle : -90º
- Distance : 8 px
- Size : 10 px
Step 25 – Adding Small Shadow – Creating New Clipping Mask Layer.
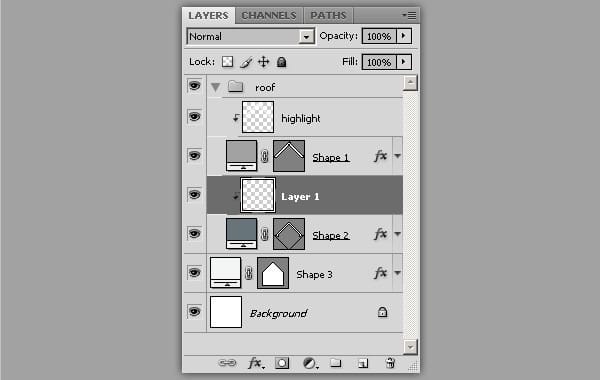
Create new layer above “shape 2” by clicking new layer icon. And then press “Cmd + Opt + G” / “Ctrl + Alt + G” to convert it into clipping mask.
Step 26 – Adding Small Shadow – Drawing The Shadow.
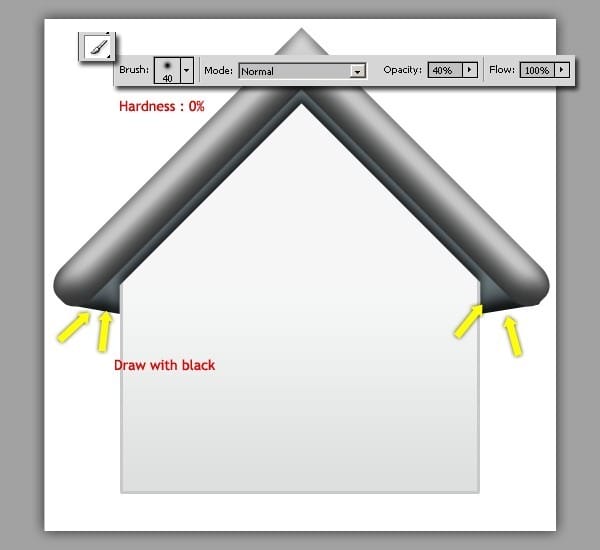
With 40% opacity and 0% hardness brush, draw black shadow carefully.
Step 27 – Adding Roof’s Shadow – Creating New Layer in a New Group.
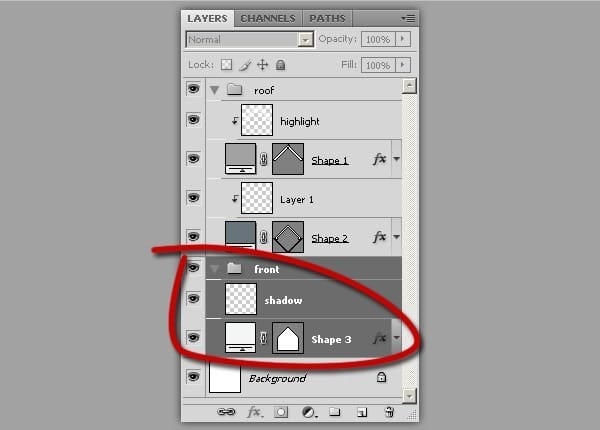
Create new layer above “shape 3”, outside the group “roof”, name it “shadow”. And then select both layer “shadow” and “shape 3”, hit “Cmd/Ctrl + G” to make them into group. Give a name “front” to this new group.
Step 28 – Adding Roof’s Shadow – Filling With Black.
Place your cursor on “shadow” layer. Hold Cmd/Ctrl and click on “Shape 1” to make selection. Fill the selection with black. Then “Cmd/Ctrl + D” to deselect.
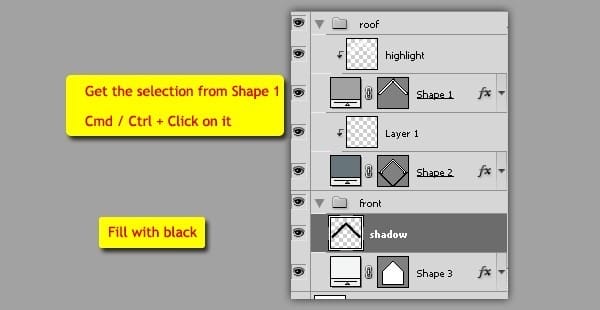
Then nudge it downward.
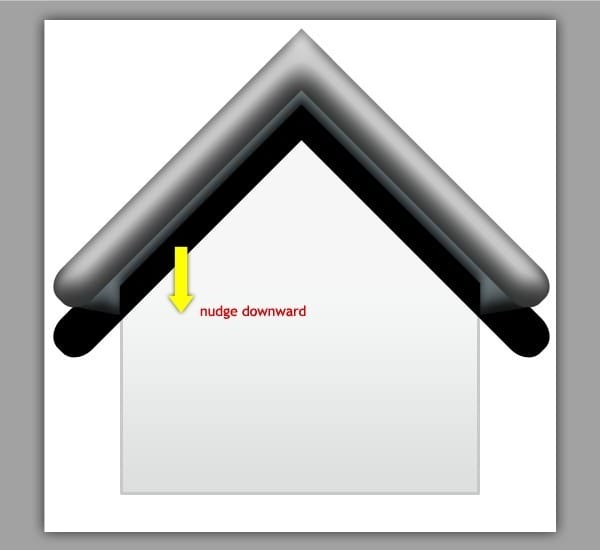
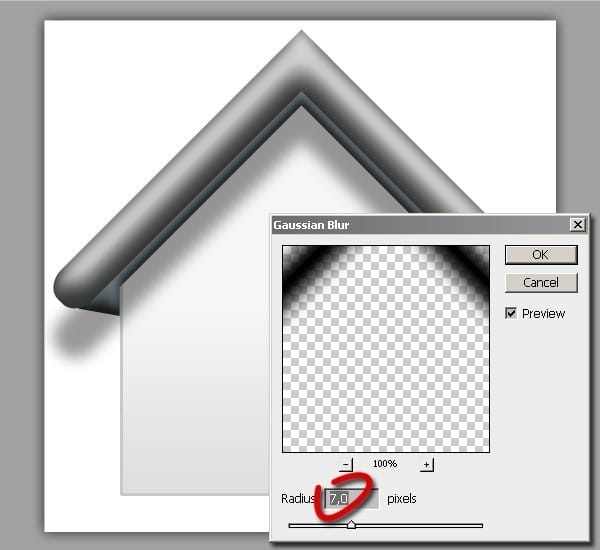
Step 29 – Adding Roof’s Shadow – Blurring.
Use menu Filter > Blur > Gaussian Blur. Set radius to 7.0 pixels.
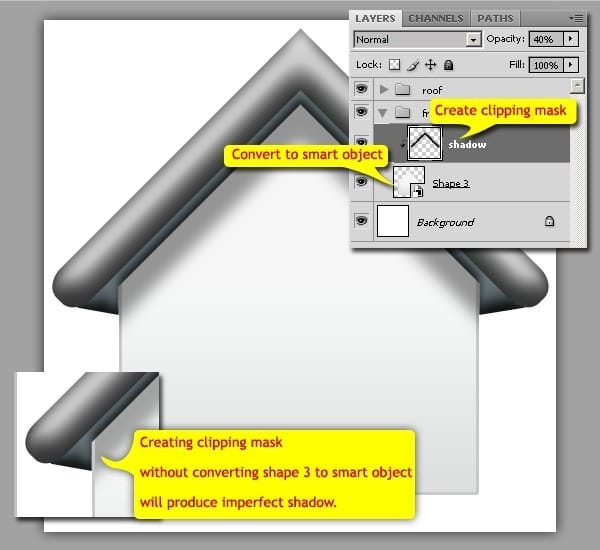
Step 30 – Adding Roof’s Shadow – Creating Clipping Mask.
Go to layer pallet, right click on “Shape 3” and select Create Clipping Mask. Then move to “shadow” layer, press “Cmd + Opt + G” / “Ctrl + Alt + G” to create clipping mask.
Note: if we create clipping mask without converting “Shape 3” to smart object, the “shadow” layer will not clipped into “stroke style” of “shape 3”. The “shadow” will be imperfect.
Step 31 – Making Back Part – New Shape on New Group.
With Rectangle Tool, draw a #a2a2a2 colored rectangle above “background” layer or underneath “front” group. Then group it named “back”.
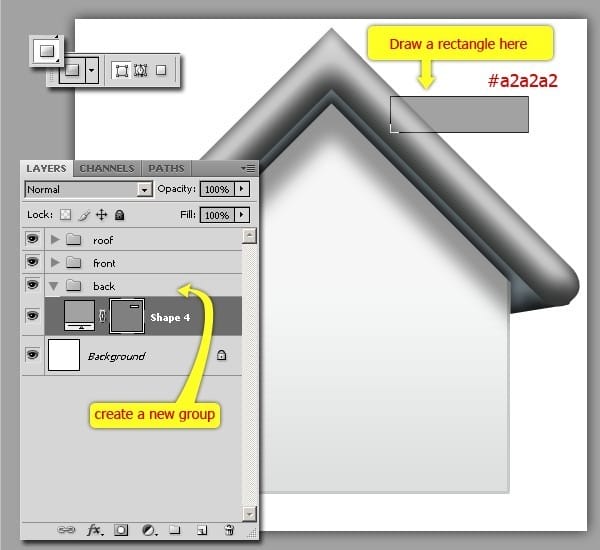
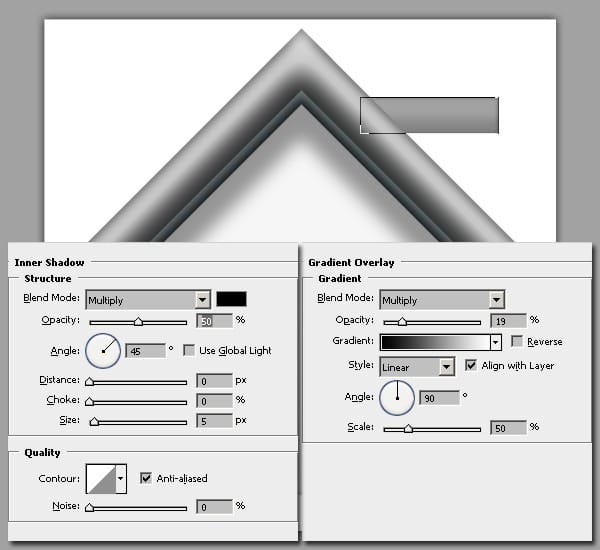
Step 32 – Making Back Part – Adding Layer Style.
Add layer style with parameters shown below.
Inner Shadow
- Blend Mode : Multiply
- Opacity : 50%
- Angle : 45º
- Distance : 0 px
- Size : 5 px
Gradient Overlay
- Blend Mode : Multiply
- Opacity : 19%
- Gradient : Black to White
- Style : Linear
- Angle : 90º
- Scale : 50%
Step 33 – Making Back Part – New Shape.
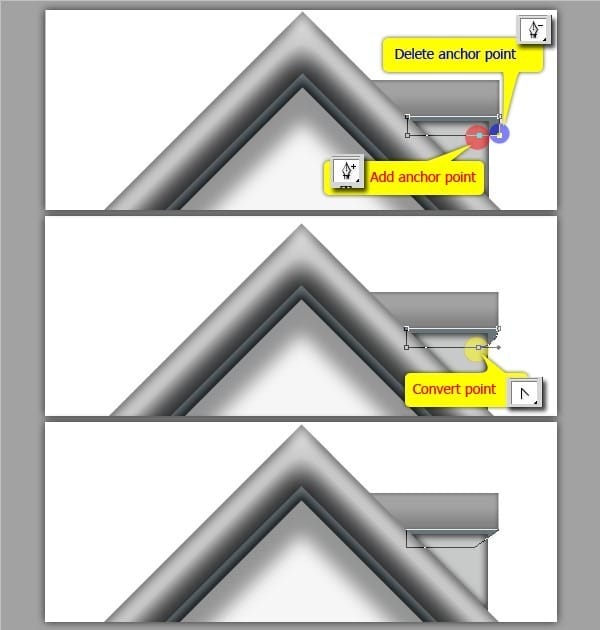
Create a shape again. With Rectangle Tool, and set color to #c8caca. The shape layer must inside of “back” group.

And then delete anchor point. Just like this.

Step 34 – Making Back Part – Adding Layer Style.
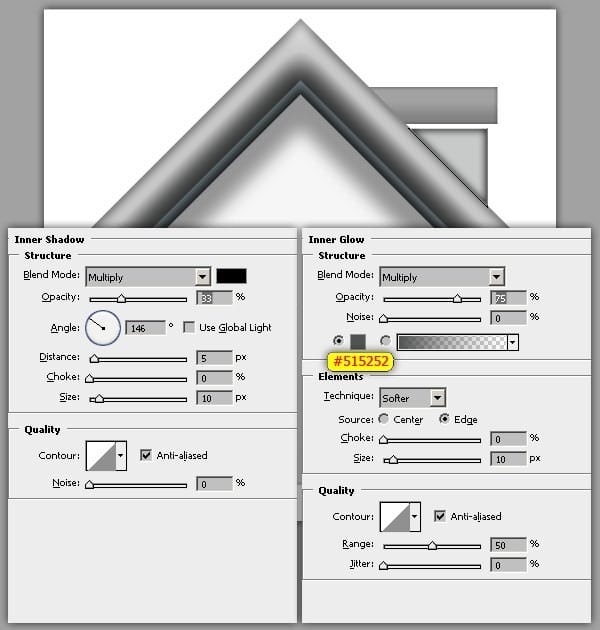
Add layer style with parameters shown below.
Inner Shadow
- Blend Mode : Multiply
- Opacity : 33%
- Angle : 146º
- Distance : 5 px
- Size : 10 px
Inner Glow
- Blend Mode : Multiply
- Opacity : 75%
- Color of Glow : #515252
- Technique : Softer
- Source : Edge
- Size : 10 px
Step 35 – Making Back Part – New Shape Again.
Use Rectangle Tool to create a shape again, and set color to #677479. This shape not only must inside of “back” group, but also under all layers inside it.
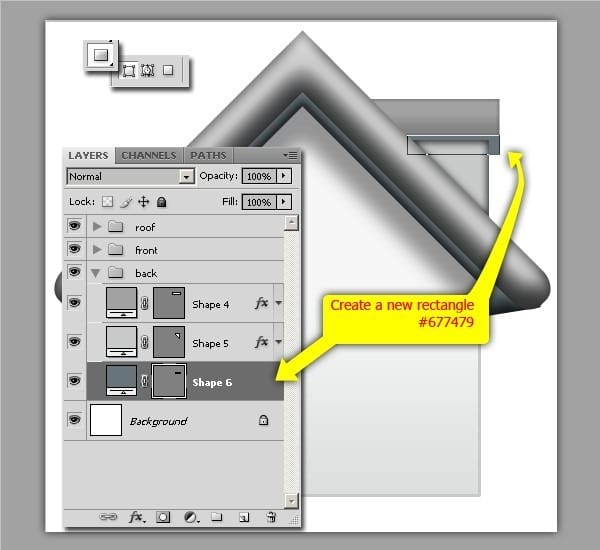
After that, we’re going to edit this “shape 6” before applying layer style on it. Shown below.
Step 36 – Making Back Part – Adding Layer Style.
Add layer style on “shape 6”.
Inner Shadow
- Blend Mode : Multiply
- Opacity : 44%
- Angle : 180º
- Distance : 10 px
- Size : 16 px
Gradient Overlay
One response to “Create a Mac Style Home Icon in Photoshop”
-
Hi, I am currently constructing a Christian based website. I was wondering if I could use the Mac Style Home Icon image on my site?
Thank you


Leave a Reply