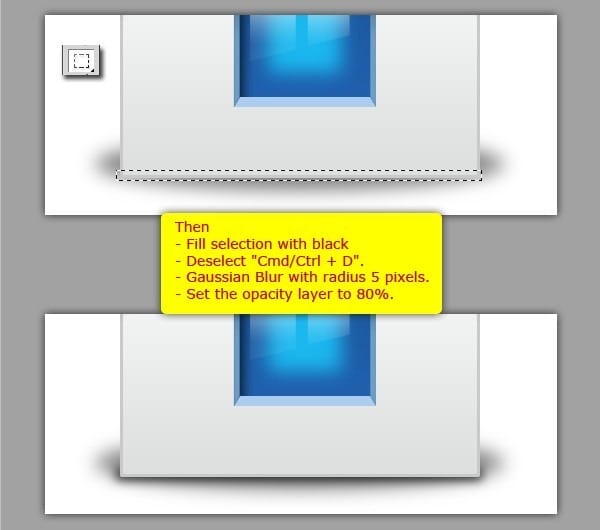
Step 50 – Creating Shadow Again.
Create new layer again above “shadow 1” layer and name it “shadow 2”. Then use Rectangular Marquee Tool to make rectangular selection on the bottom of icon. After that, fill selection with black color and remove selection (deselect) with “Cmd/Ctrl + D”. Give Gaussian Blur with radius 5 pixels. And set the opacity layer to 80%.

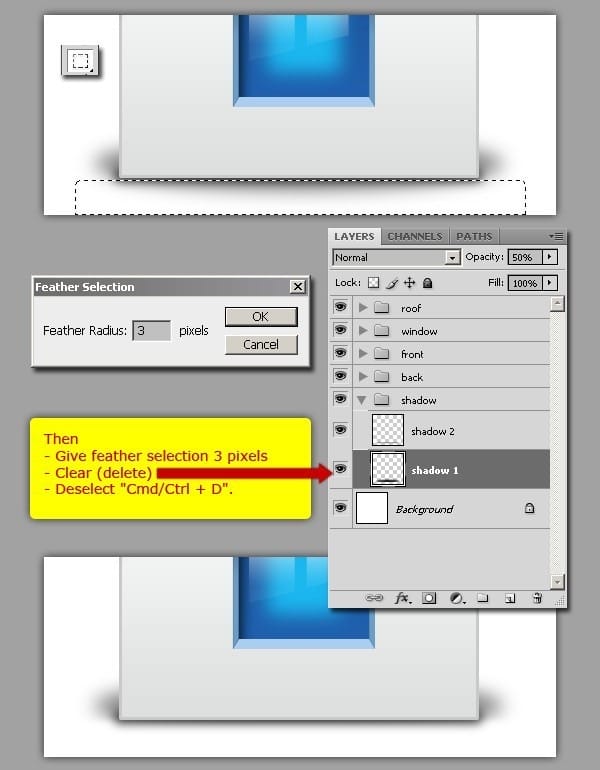
Then, let’s refine the shadow. Place cursor on “shadow 1” layer on the layer pallet. And use Rectangular Marquee Tool to make a selection like following example. Then give feather with radius 3 pixels. Hit delete to clear shadow on this selection.
And both “shadow 1” and “shadow 2” layer, group them into “shadow” group.

Final Results
![mac-style-home-icon[1] mac-style-home-icon[1]](https://cdn.photoshoptutorials.ws/images/stories/85f4a0b991ad_114F3/mac-style-home-icon1.jpg?strip=all&lossy=1&webp=82&avif=82&w=1920&ssl=1)
Authors Comment
– Mokhtaar Faqeeh.
One response to “Create a Mac Style Home Icon in Photoshop”
-
Hi, I am currently constructing a Christian based website. I was wondering if I could use the Mac Style Home Icon image on my site?
Thank you


 Thank you for following this tutorial! The techniques above are not new. But I hope, you can enjoy this tutorial. If you would be my friend, you can follow me on twitter
Leave a Reply