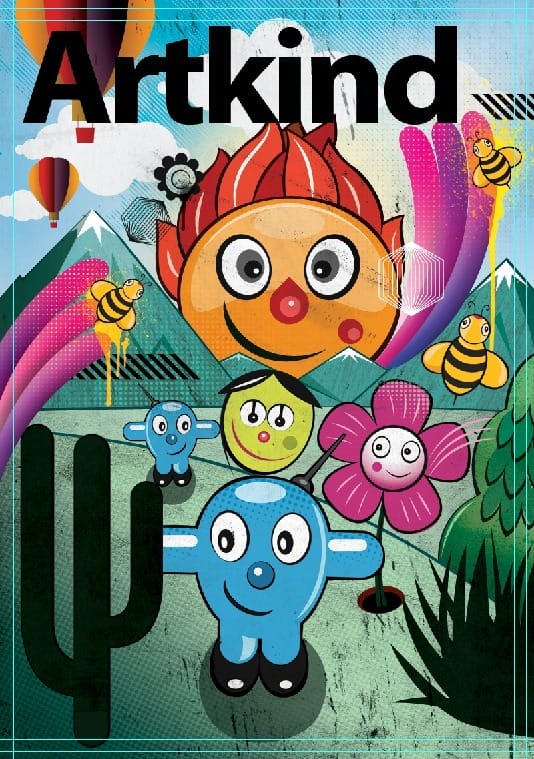
Ctrl+Click on the title layer, goto Select > Modify > Expand. Expand the selection by 9 pixels. Create a new layer below the title and fill the selection with #ffffff or white. Rename this layer as “Stroke”.
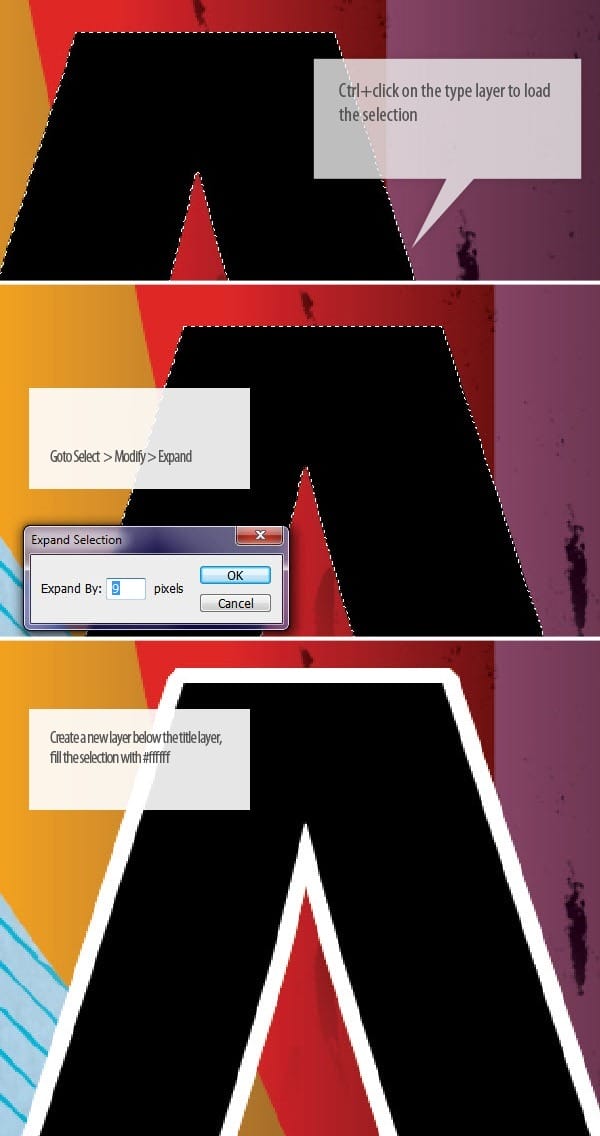
Create a new layer above the “Stroke” layer. Paint some bright greens with a large soft brush. Now clip this to the “Stroke” layer below. Change the “Stroke” layer blend mode to Lighten.
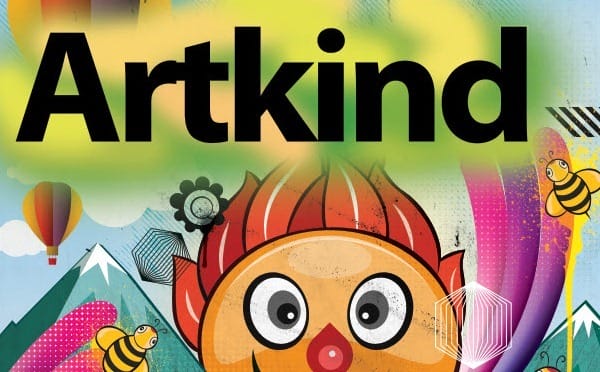
Step 27 : Caption bar
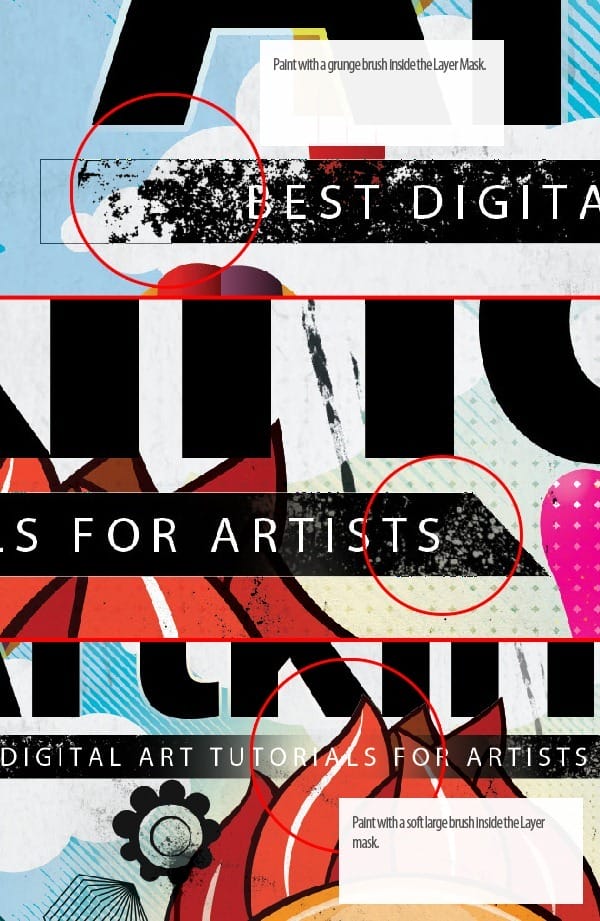
Draw this shape with the Pen Tool inside the “Title” group . Add the some caption.
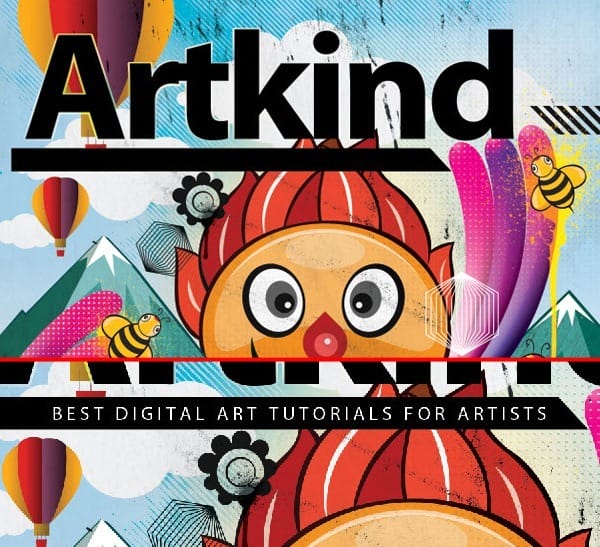
Load the “Grungy Film Brushes”. Add a layer mask to the caption bar. Press ‘D’ to set the colors to default. Pick a brush from the Grungy film brushes. Paint on the either edges in the Layer mask to get this grungy look. Pick a large soft brush and paint in the middle of the caption bar. Follow the image.
Step 28 : Text
Create a new group called “Text” below the “Title” group. Add strips. We will add text on top of the strips.
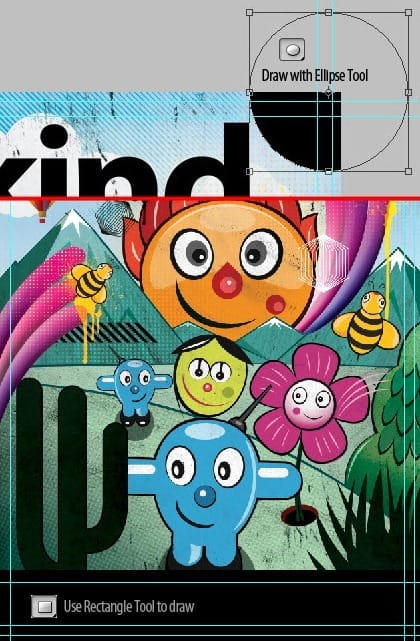
Add Month & Year. I used Myriad Pro Condensed.

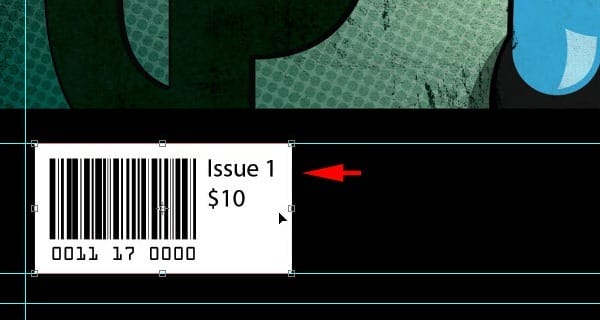
Copy and paste barcode from the resources file into “Text” group. Reposition it like below.
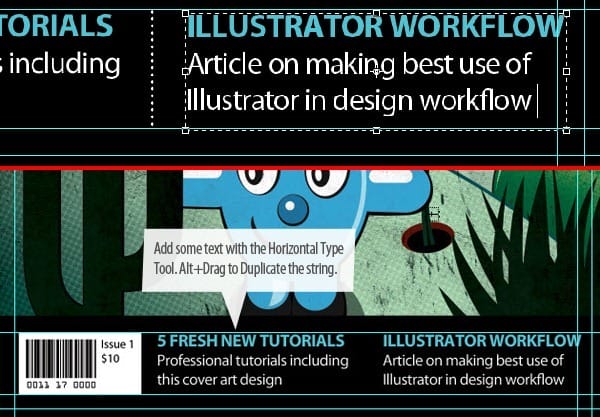
Add some text with the Type Tool.
Add a divider. You can create it very easily in Illustrator.

Step 29 : Finishing Touches
Now add a vignette. Create a new layer below the “Text” group called “Vignette”. Pick a large soft brush with #000000; paint on the edges of the document.
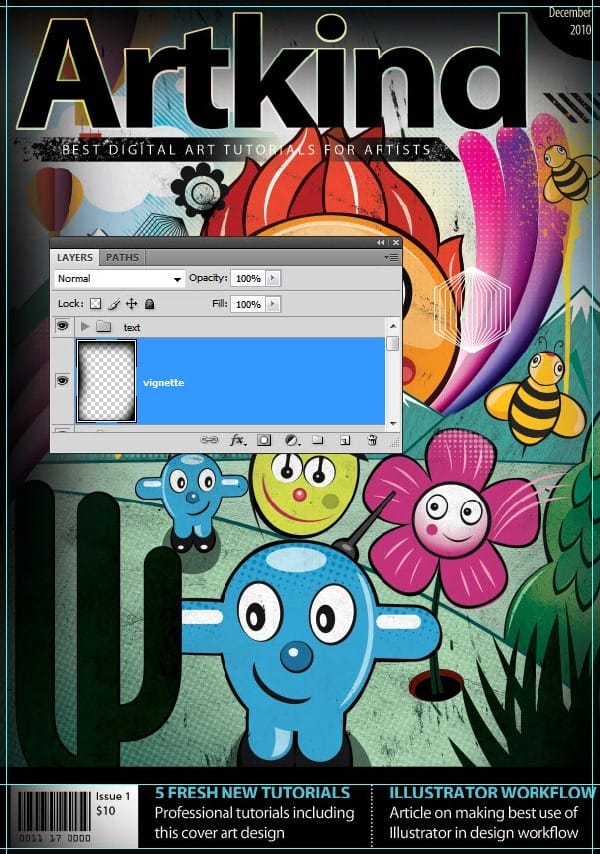
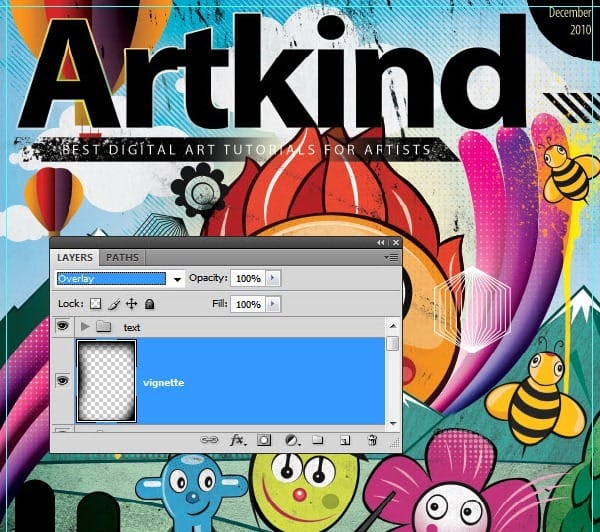
Change the layer Blend mode to Overlay. The effect is a bit strong on the lower part. Add a Layer mask to hide the effect.
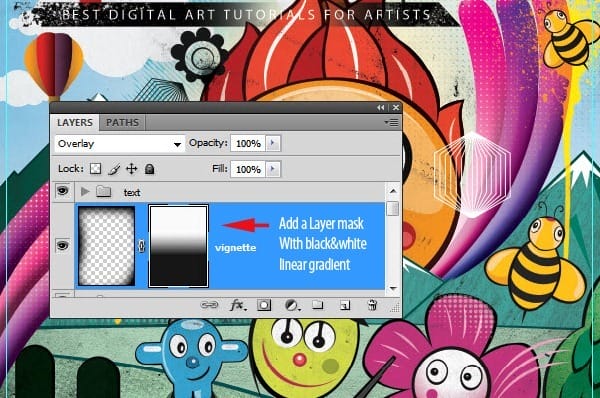
Draw with a black&white gradient inside the mask. Make sure white is at top.
Create a new layer above the title layer. Add a nice pink color with a soft brush. Clip it to the title layer. Grab the Eraser Tool. Select a grunge brush from the “Grungy Film Brushes”. Erase a bit.
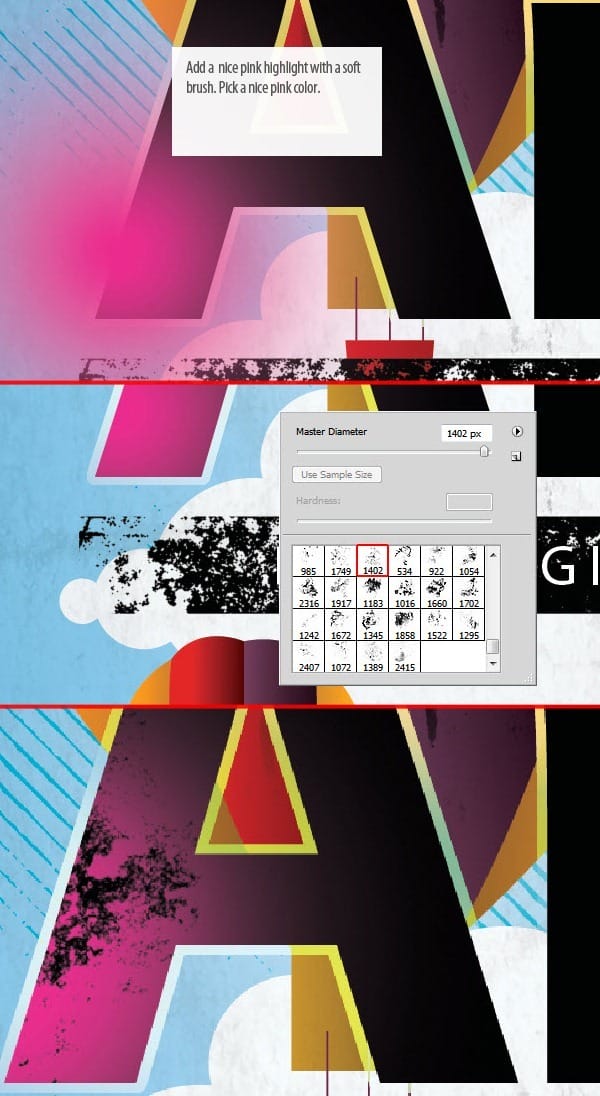
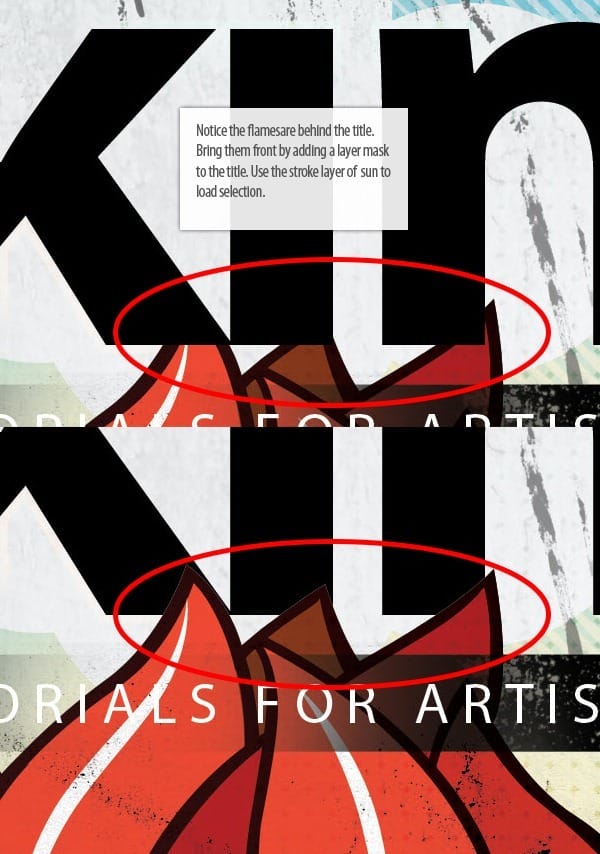
Load selection from the sun’s outline layer and click on the title layer, click on the Add layer mask button. See the result.
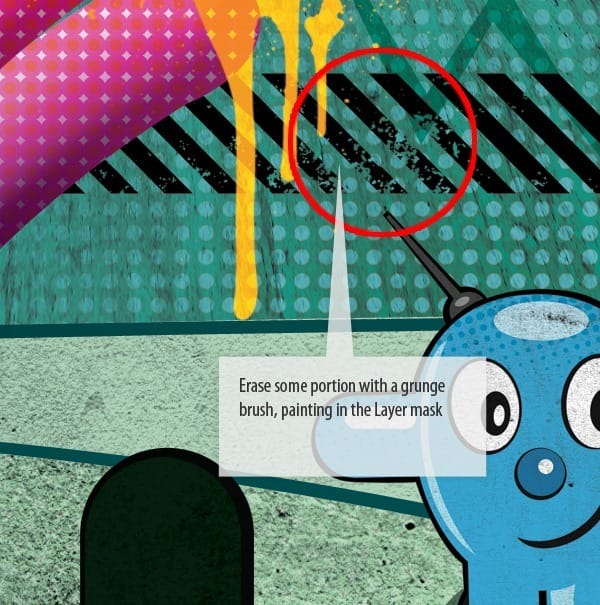
Add grunge effect to the stripes. Add a mask. Use a grunge brush to erase.
Preview of Final Results
![final-results[1] final-results[1]](https://cdn.photoshoptutorials.ws/images/stories/cba1361524db_1458/final-results1.jpg?strip=all&lossy=1&webp=82&avif=82&w=1920&ssl=1)
Download the PSD
Artkind.zip | 13 MB
Authors Comment
8 responses to “Create a Vector Style Magazine Cover in Photoshop”
-
You would do anything in your power to make your best friend’s day even better. That could mean picking up their go-to coffee in the morning, or sending a funny TikTok you know will make them LOL. It could also mean that whenever they post a cool pic, you’re the first to like it. As their No. 1 fan on social media, you’ll also need the best comments to leave on Instagram for your bestie as well. After all, you know you can’t just drop them a like. A stunning selfie in their OOTD or foodie pic of their lunch order deserves all the love with some funny Instagram comments from yours truly.
-
Hello Niranth, this was truly a fun filled tutorial!!!! Thank you very much for supplying such a detailed and organized project. I have recently finished this tutorial and was wondering if I could post this on my portfolio site? I would be sure to give you credit. Just let me know if you ever have the chance. <3
Sincerely – Auzurial
-
you took my name
-
Learn to type friend
-
can u plz mail me d psd file as ders some downloading error wic im facing..plaeas do it by 2mrw…its really very urgent
-
You are amazingly talented … wow, I loved that. Makes me proud to be an artist. Thanks!!!!
-
Nice idea and a wonderful lesson
-
no
-


 I am a Graphic Designer and a wannabe VFX artist. A few months ago I was approached by a client for a magazine cover page design and that gave me inspiration to write this tutorial. Hope you had fun and find this tutorial useful.
Leave a Reply