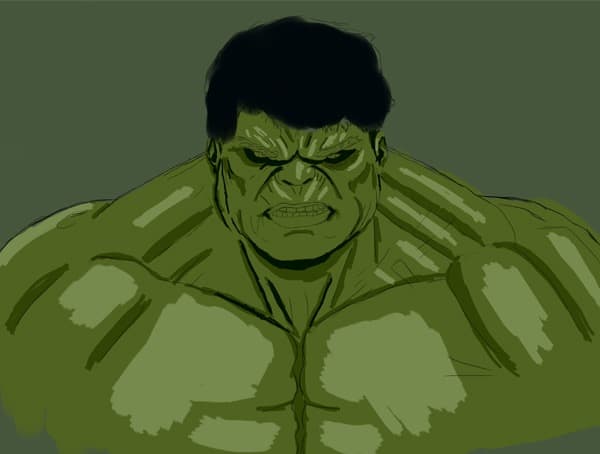

Step 5
Change the brush size to 3 pixels and add some more details in the character to get all features you want. Add more wrinkles to face to get perfect expression. Duplicate sketch layer two-three times to make your light strokes in the sketch visible. Now we are ready to add colors to it.

Step 6 Choosing a color palate
Choosing a color palate is an important step that help choosing right color for your artwork. Hence, decide your colors early would be helpful. Set some neutral color like #46563c as background and choose a soft round brush. Now start adding colors with large soft round brush. Try different colors for lights, shadows, hair areas then pick colors from color picker tool to create your colors palate. Don’t worry about roughness or imperfection because we are not coloring our character right now, but deciding right colors palate to start with. Here, I created my color palate in the same way.

Here I created my color palate in the same way.

Step 7 Blocking the color
Now we have our color palate and we can start adding colors to our character. Delete the layer in which you added colors to make your color palate. Select a default chalk brush of size 44 pixels, set its color to #506320 and add this color to character as base color. Change the brush color to #01080b and define the hair area. Change the size of brush where needed to speed your coloring process.

Step 8
Change the brush color to #314305 and start adding shadows. Reduce the size of brush to create shadows in face, eyes, neck, etc.

Step 9
Create a new layer and add some dark shadows to the character for this set your brush color to #001500 and paint some shadows around eyes, chin area, ears, neck. Avoid using pure black or white or pure green color for better results.

Step 10
Set your brush color to #768a4e and add some lights to your character. Change your brush size where needed that would speed your process. Create several layers while coloring that would give you a control on your process and you can go back at any time if something goes wrong.

Step 11 Blending colors
Next step is blending of colors, but before we start we need to tweak our brush a little to get desired results. Open brush panel by pressing key ‘F5’ and set “Opacity Jitter” to “Pen Pressure” by its drop-down menu.
21 responses to “Create an Amazing CG Illustration of The Incredible Hulk”
-
How do you download blur’s good brush 4.1 pro :(
-
güzel video abone oldum oh
-
bu video mu gerizekalı
-
-
k
-
Stuck in step 12 :(
-
What are you stuck with? If you’re using a mouse, the pen pressure won’t work. So you’ll need to adjust the brush opacity manually.
-
-
Dude you’re insane … i love your work. I followed this with procreate because the concepts are the same.
-
Tengo un problema con Photoshop me. Podrían ayudar es sobre el error 22
-
Please Sir photoshop serial number
-
Who else loves unlocked cell phones ?
-
I do pls aw can i get access to it
-
-
That is one badass hulk drawing!
-
Ye bina Pen Tablet ke kaise draw hongi starting lines, Please jaldi batana mujhe ek Digital Painting jaldi banani hai.
-
These are amazing. Super creative and imaginative and all things that are good.
-
how do you do step #6.. I cant find the color palate.. help
-
There are very incredible themes!.Thank you for your amazing effort.
-
WoW! Thanks so much for the tutorial and specially the PSD file. I learnt a lot more than any other tutorial.
-
How the heck are ya gonna put stitches on the Hulk?
-
A good tutorial but “tablet” should be listed in the tutorial resources.
-
xalk
-
A good post with the technique of illustrator design.


Leave a Reply