
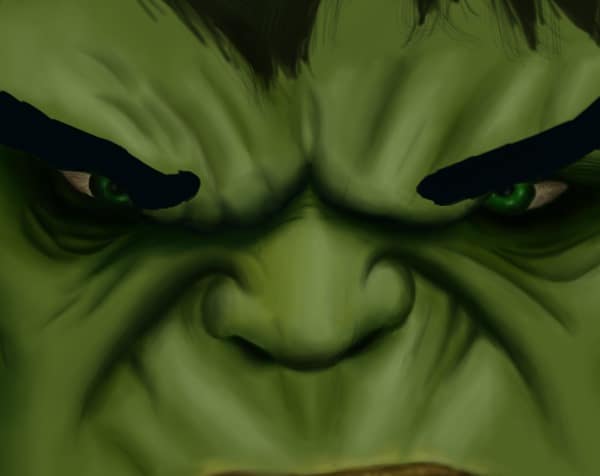
Step 47
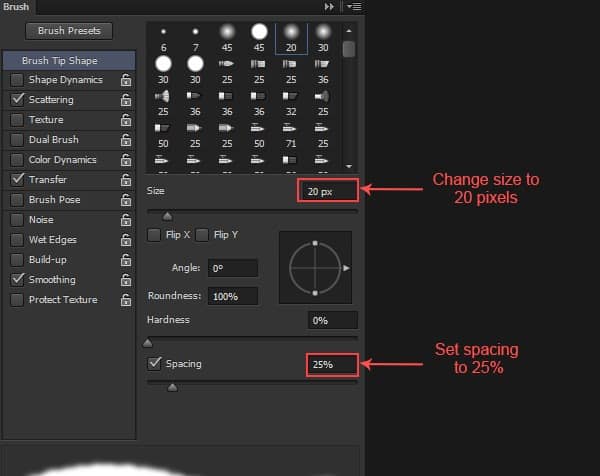
Now we will add smooth blending to the character skin. Select smudge tool by pressing N and press ‘F5’ to access brush panel. Select a brush of size 20 pixels, hardness 0% and spacing 25%. Set scattering to 38% and count to three then go to transfer and set ‘flow jitter’ to pen pressure. Don’t forget to turn smoothing ON. Save the brush and rename it to “blending”.

Step 48
Press Ctrl + A, to select whole canvas and go to “Edit” and click to “Copy Merged”. You can access this command by pressing Shift + Ctrl + C. Now paste it in a new layer, select “Smudge Tool” and select the “blending” brush that you created in previous step. Start blending to smooth then skin and get perfect skin texture.


Step 49 – Adding hairs to eyebrow
In this step we will paint hairs to the eyebrow of the character. For this, select “smoothing” brush, change its size to 2 pixels and color #0a100d and paint hairs in the eyebrow. Change the brush color to #172018 and add highlights in the hair of eyebrow. Next, change the size of brush to 10 pixels and add smoothing to the edge of eyebrow.


Step 50
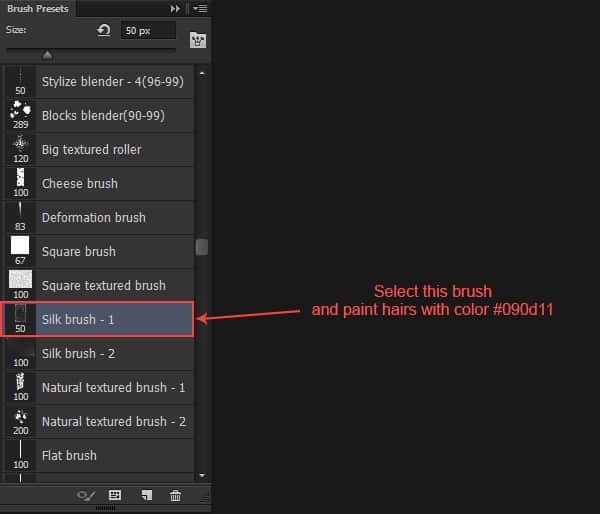
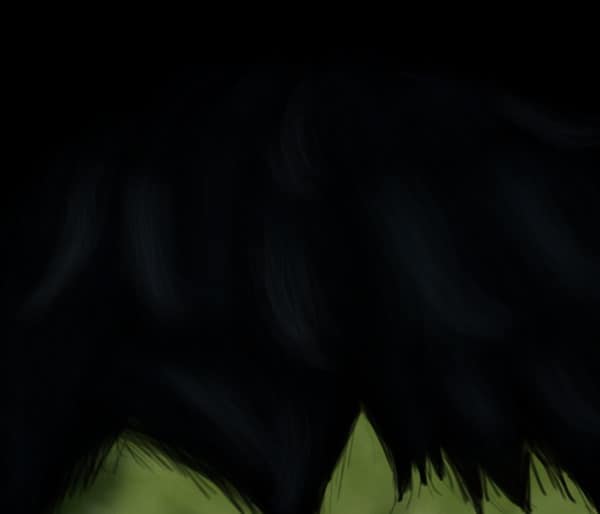
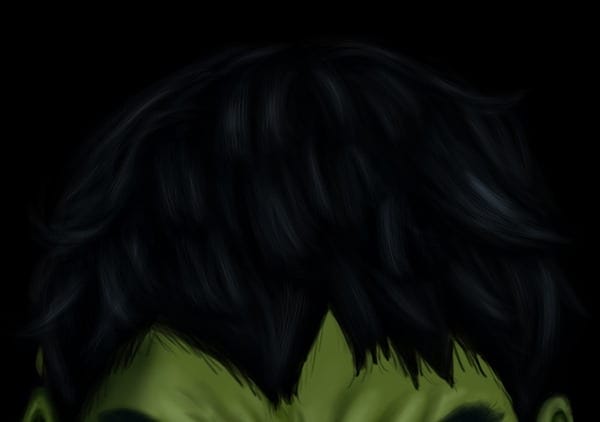
Download the “Blur’s good brush 4.0 pro” and load the brush set to brush panel and select “Silk brush – 1”. Change the brush color to #090d11 and size 50 pixels and paint the hairs in the character.
Step 51
Select “Hair – fine” brush from “Blur’s good brush 4.0 pro” brush collection, change brush color to #505e6d and paint fine hair details in the character. Change brush sizes when needed to give hairs a realistic look.



Step 52
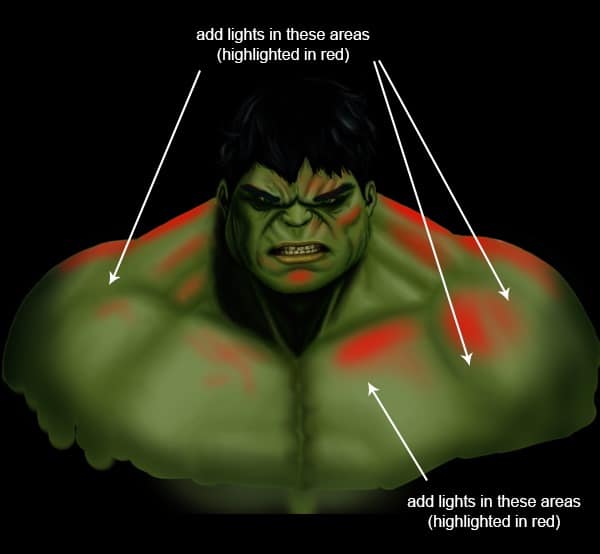
Now we will fine-tune our character. Select a soft brush and fine-tune the shadows to get perfect shadow in the character. Fine-tune the character’s muscles and chest. Change the color of brush where needed and avoid 100% saturated colors and pure black color.

Step 53
Select a soft brush of size 40 pixels and color #9aad6d and fine-tune the lights to the character.

Step 54 – Adding texture to skin
Now we will add texture to the skin of character. For this, select “Concrete – 2” brush, change the brush color to #bdbaac and start adding details to the skin of the character. Change the brush color to #394c16 and add dark texture to balance the skin texture. Reduce the texture layer opacity to 80% if needed.
21 responses to “Create an Amazing CG Illustration of The Incredible Hulk”
-
How do you download blur’s good brush 4.1 pro :(
-
güzel video abone oldum oh
-
bu video mu gerizekalı
-
-
k
-
Stuck in step 12 :(
-
What are you stuck with? If you’re using a mouse, the pen pressure won’t work. So you’ll need to adjust the brush opacity manually.
-
-
Dude you’re insane … i love your work. I followed this with procreate because the concepts are the same.
-
Tengo un problema con Photoshop me. Podrían ayudar es sobre el error 22
-
Please Sir photoshop serial number
-
Who else loves unlocked cell phones ?
-
I do pls aw can i get access to it
-
-
That is one badass hulk drawing!
-
Ye bina Pen Tablet ke kaise draw hongi starting lines, Please jaldi batana mujhe ek Digital Painting jaldi banani hai.
-
These are amazing. Super creative and imaginative and all things that are good.
-
how do you do step #6.. I cant find the color palate.. help
-
There are very incredible themes!.Thank you for your amazing effort.
-
WoW! Thanks so much for the tutorial and specially the PSD file. I learnt a lot more than any other tutorial.
-
How the heck are ya gonna put stitches on the Hulk?
-
A good tutorial but “tablet” should be listed in the tutorial resources.
-
xalk
-
A good post with the technique of illustrator design.


Leave a Reply