

Step 7
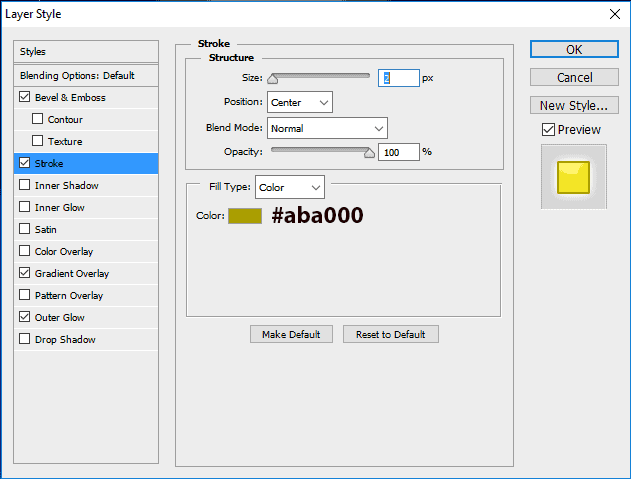
Add a Stroke layer style with the settings shown in the screenshot below.
Step 8
Add a Gradient Overlay with the settings shown below.

Step 9
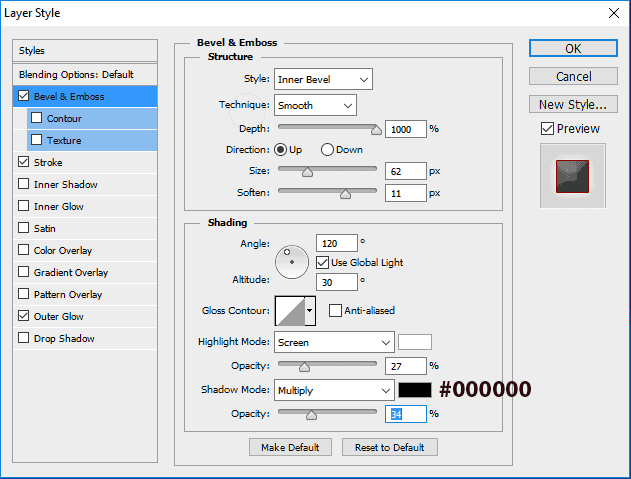
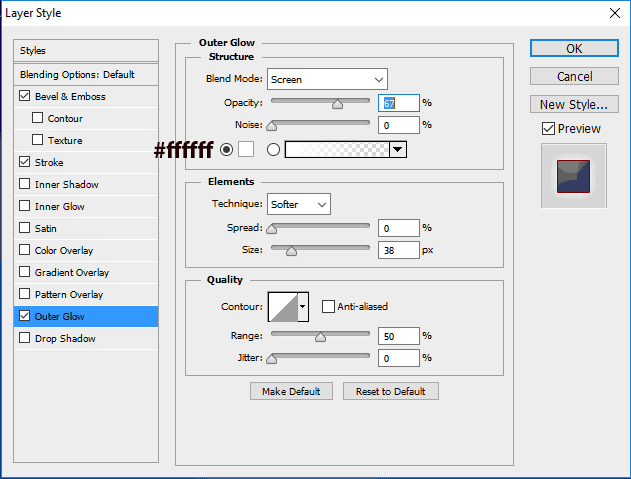
Finally, add an Outer Glow layer style.

Step 10
Now that we’re done creating the body our moon and rendering it, next up for our design will be the closed eye and mouth.
Select the Pen Tool (P) and drop an anchor on the right edge of the sketch. And click another anchor point on the other end, but this time dragging it out to make nice curve. Now connect it to the other end. Once done rename the layer eye.
We’re going to draw a smile. Locate the right edge of the mouth near the lips and drop an anchor point. Proceed to trace the mouth like in the example below.
When its completed rename the layer smile.


Step 11
Next we are going give the cheek area a little more volume by shading it with the Brush Tool. First create a new layer, name it cheek. Select your Elliptical Marquee Tool (M) and drag out nice round ellipse like in the example image below.

Step 12
Select your Brush Tool (B) and set your foreground color to dark yellow (#aba000)


Step 13
Lets travel up to our Sleeping Cap group. And we are going to trace the cap in the moon sketch.
Now select your Line Tool (U) in the shape sub-menu, make sure the color is red (#ff0000) and Stroke is 1 pt. Hold down shift + click and drag the line down from the tip of the cap.

Step 14
Now we’re going to render the sleeping cap, adding some lighting and shading to it.


Step 15
And now we’re going to create a string and ball to go with the sleeping cap. Select your Line Tool (U) set the Fill to red and Stroke to pt 1.

Step 16
Now ellipse Tool (U) in the shape sub-menu. Now hold down shift + click drag a small Ellipse out and set it under your string.

Step 17
Now its time to add some rendering to the ball of the sleeping cap.

Step 18
Its time to work on our background. Go to your “Sky Background” group and select your Rectangle Tool (U). Locate the top left hand corner of your canvas and Click + Hold drag your Rectangle Tool down to the bottom right corner. Or you can go to the Rectangle Tool menu bar at the top and change the width to 800px and height to 800px then center align your background. Once that’s done change the name of your layer to “Sky”. And now right click the layer and go to Blending Mode and select Gradient Overlay, copy the settings in example. Gradient code from left to right (#009cff #00106f #080025)
Leave a Reply