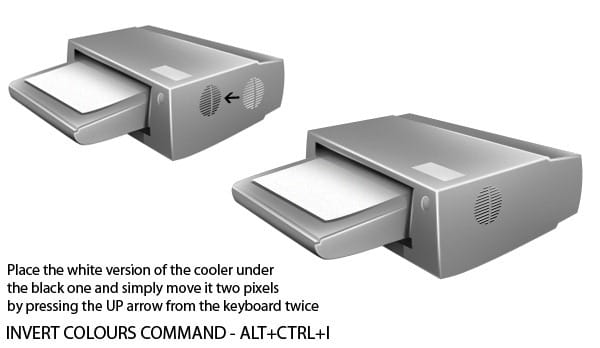
Step 9 – Draw an LED
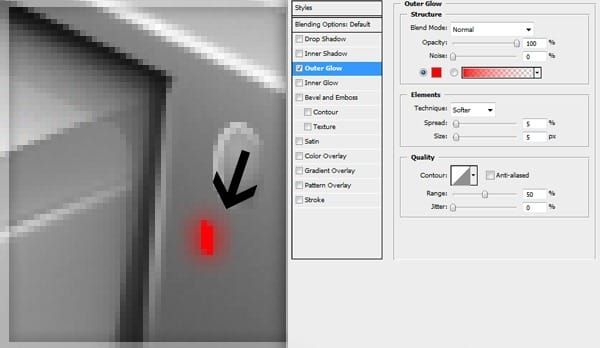
Draw a small square that should resemble the shape of an LED. Make a selection with either the Lasso Tool or the Pen Tool. Fill it with red. Make the outer glow effect with the Blending Options (see Step 7 for reference).
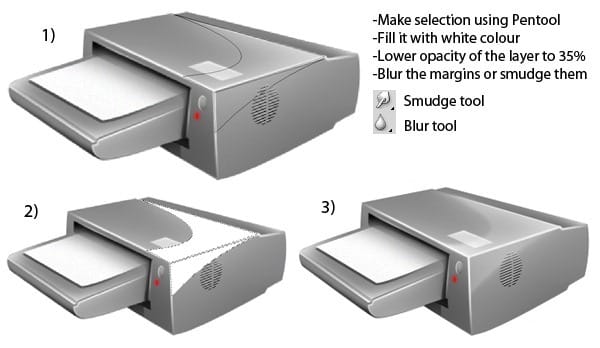
Step 10 – Final Reflections
Pick up the Pen Tool (P) and drag the lines in the same way I did in the image below. Please do follow the steps I wrote down. Blur Tool – Keep the left-click pressed and go around the margins to make them blurry. Smudge Tool – Drag the margins slowly in the opposite direction to create the feather effect.
Step 11 – Contrast/Brightness
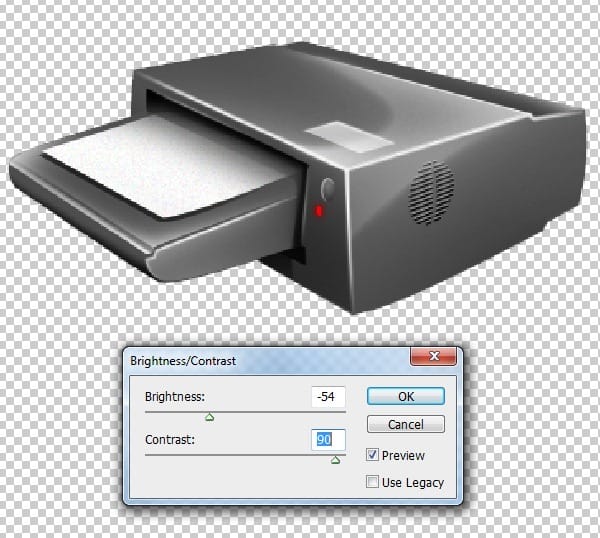
Group all the layers we’ve made so far. Make the white background hidden and select all (Ctrl+A). Click Ctrl+Shift+C and then paste. Make the group hidden and then adjust the contrast and brightness like I did.
Find Brightness and Contrast atImage > Adjustments >Brightness&Contrast.
Step 12
To make it a more prominent icon, you can adjust the Blending Options to make it darker with Gradient Overlay and add a Bevel and Emboss effect.
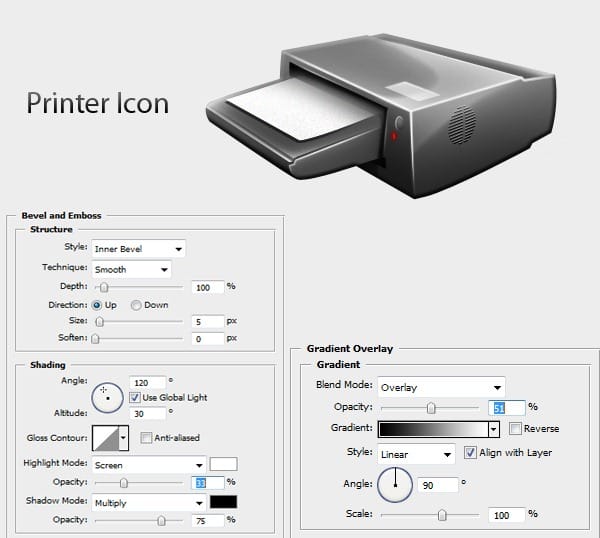
Final Results
We have reached the end of the tutorial. I wish that my explanations were clear and that the result you obtained is pretty much the same as mine! Have fun!

Download the PSD
Printer Icon.zip | 235 KB


Leave a Reply