

Step 9
Create new layer. Click Edit > Fill. Choose Use: Color and pick #765E36.

Step 10
Now select eraser tool and choose hard edge brush, harness: 95%. Use [ and ] to increase and decrease brush size. Paint on the brown color to draw holes for the bubble.

Step 11
To give a 3D look, we just need to paint white inside the holes for the highlights.

Step 12
Another highlight is needed near those bubbles. Create selection inside the coffee using lasso tool. Paint it with white using soft brush.

Step 13
We’re done with the water. Using rounded rectangle tool draw the cup’s handle. Make sure you put the layer under the cup. Add Inner Shadow, Outer Glow, and Bevel and Emboss to give it a three-dimensional look.


Step 14
Duplicate the cup’s handle. Put it under the original handle. Use same layer style but for this one raise Inner shadow to make it darker. This will add a bit perspective to the cup.

Step 15
Now, select cup handle’s tip and fill it with white. This small adjustment adds more curvature to it and make it more realistic.

Step 16
It’s time to add shadow. Hold shift and Ctrl+click all coffee thumbnail layer to select it. Nudge the selection by pressing up and right arrow a few times. Fill it with black, add Gaussian Blur, then lower the opacity to 50%.

Step 17
We’re done creating the coffee. Let’s tidy up the layers. Select all the layers and hit ctrl+G. This will automatically put every layers in a group. Name this group coffee and click eye icon to hide it. Next, we’ll focus on creating the paper napkin.
Step 18 – Creating Paper Napkin
(a) Using rectangular marquee tool, create a selection for the paper. (b) Press Q to enter quick mask mode. (c) Click Filter > Pixelate > Crystallize. (d) This filter will create torn edges effect to the selection. (e) Again, hit Q to return to normal mode.


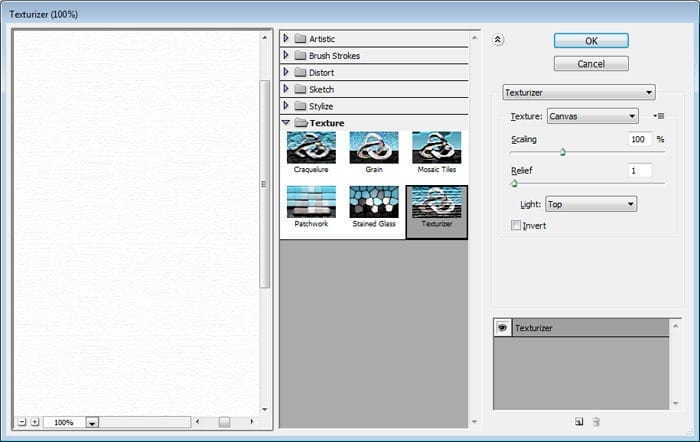
Step 19
Click Filter > Texture > Texturizer. Use Texture: Canvas with Relief: 1 then click OK.
Step 20
The paper is too clean, not so realistic. We need to make it darker and a bit dirtier. To do this, paint it using burn tool. Make sure you use low exposure and paint repeatedly to have gradual and subtle effects.
7 responses to “How to Draw a Photorealistic Coffee Cup”
-

Tutorial still valid! Tried my hand at this some time in 2011. Still using it as a great example to teach people basic photoshop. Greetings from 2021. GJ OP!
-
awesome
-
love it, thank you!
-
I had hard time following tutorial.. although am still beginner..I think steps in making this aren’t detailed enough..but will try again and see x_x
-
Don’t try. Only do.
-
-
thank you for it! greetings from Poland! =)
-
cool
Leave a Reply