
Repeat everything for ‘stripes 1’ brush. Here are settings.

And the process step by step. I think it don’t need an explanation for I am just doing all the same that I did previously.


In the end grab Polygonal Lasso tool and make selections as below:
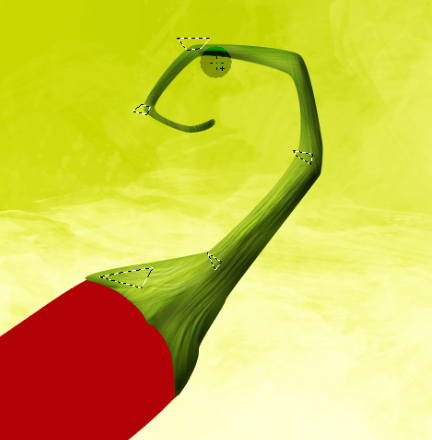
Use almost white color and with gradient tool (radial mode) fill the selections.
![step-009q[1] step-009q[1]](https://cdn.photoshoptutorials.ws/images/stories/dba5136f7e6b_41/step009q1_3.png?strip=all&lossy=1&webp=82&avif=82&w=1920&ssl=1)
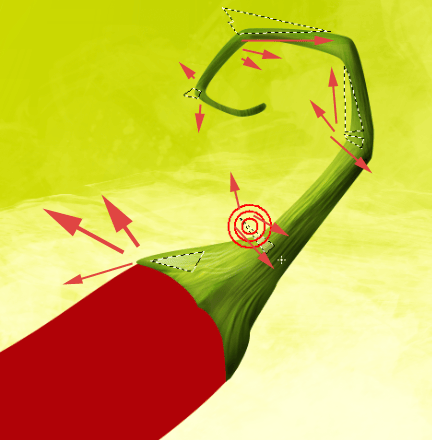
If you want you can blur them a bit and change layer’s blending mode to Overlay. I think that our stem is done.

Step 10 – Basic shadows
[CTRL] + Click on the stem base layer’s thumbnail in layer’s window so you will get a selection. Click [M] so you will get marquee tool. Doesn’t matter which one, I just want to be able to move the selection. So, move it few pixels down and left. Now create new clipping mask layer that is linked with pepper’s base layer. Fill the selection with some dark red color. You can also blur it a bit.
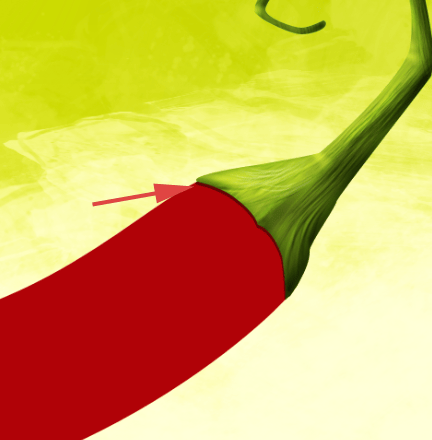
As you can see it is almost unnoticeable but important. Next, duplicate the base layer of chili and rasterize it (right click on layer and choose Rasterize layer). You can change the color with Image > Adjust > Hue/Saturation, but it doesn’t matter which one you will pick, just change it. It’s strategical layer and won’t be visible- let’s name it ‘shape 1 copy’. Then go to Edit > Transform > Warp and try to achieve something like this:

Now [CTRL] + Click on the ‘shape 1 copy’ layer’s thumbnail, so you will have a selection. You can aslo hide it by clicking this icon (hovered with arrow):

As we have a selection, go to Select > Inverse. Then to Select > Refine edge and ttr to achieve selection like mine.
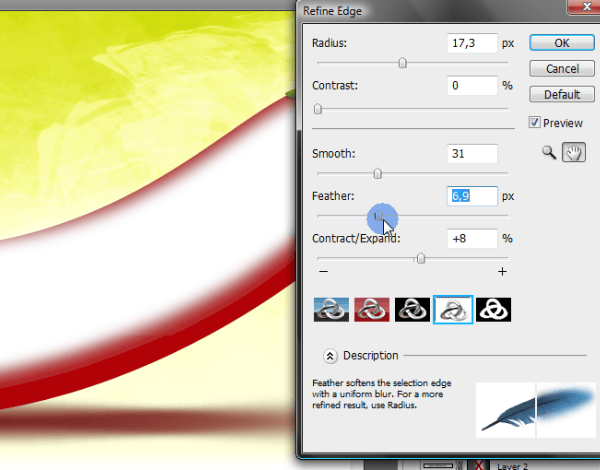
When you will have a selection, fill it ( [SHIFT] + [F5] or Edit > Fill ) with the color #740003.
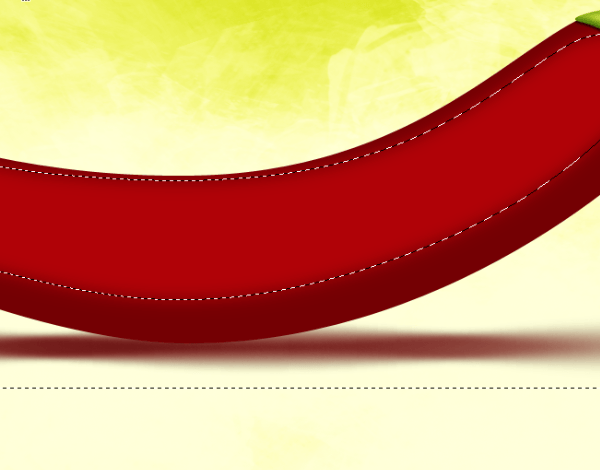
Shadows were still to hard for me, so I also blur them with Gaussian blur filter but to the point, when the hard edge was noticeable.

Also I lowered down the opacity to 65%
Step 11 – Basic reflections
Create new layer above our shadow (remember about clipping mask). Pick Polygonal Lasso tool and make a selection similar to this below:
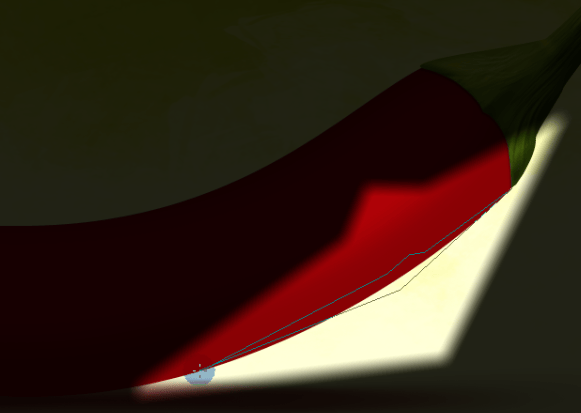
Now fill the selection with color #f8685d. You can actually blur it a bit with Filter > Blur > Gaussian blur (set the radius to about 3px). Then lower down the opacity to 70%. Yo can also play with Edit > Transform > Warp to add some smoothness to the shape.
2 responses to “How to Draw a Steaming Hot Chili Pepper in Photoshop”
-
cos pieknego:)…
-
thankssssssssssssssssss


Leave a Reply