
Learn how to draw this realistic wine bottle from scratch using Photoshop. This extensive drawing tutorial will show you how to create the shape, shade the bottle, and add realistic reflections.
Preview of Final Results
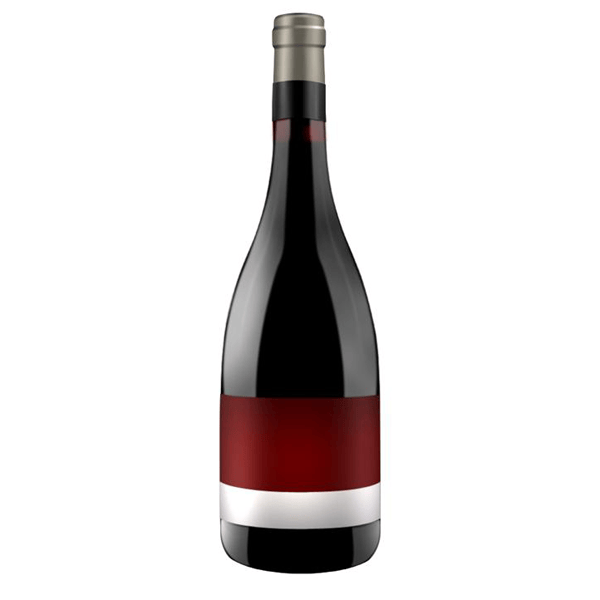
Wine Bottle Photoshop Tutorial
Step 1
Create a new document with these dimensions & settings:
- Width: 800 px
- Height: 1200 px
- Resolution : 72 px/inch
- Color Mode : RGB Color | 8 Bit
- Background Contents: White

Step 2
Make a new layer by pressing Ctrl+Shift+N or you can go to Layer > New > Layer or you can simply press the button in the image below. Rename the layer created to “Bottle”. To rename a layer, right click on it and search for “Rename”.

Step 3
For this tutorial we need some Guides so let`s do some guide lines. Press Ctrl+R to display the Rulers then make the following guide.

Step 4
Use the Pen Tool (P key), make the next path, between the middle and the right lines of the guide.

Step 5
Press Right click on this path then click on “Fill path” function. Enter these settings:
- Use Foreground Color – but here you can use black color because my foreground color was black
- Mode : Normal
- Opacity : 100%
- Feather Radius : 0 pixels

Step 6
This is what we should see after we filled the path with the settings above (from Step 5).

Step 7
Now we must duplicate the “bottle” layer. Right click on the “bottle” layer then click on “Duplicate Layer” or select the “bottle” layer and press Ctrl+J.

Step 8
We should now turn to the left of the duplicated layer. Go to Edit > Transform > Flip Horizontal.

Step 9
If we are doing everything correct so far, we should have something like this in the picture below.

Step 10
Use the Move Tool (V key) to position the duplicated layer on the left of our middle guide.

Step 11
To merge the layers, select these layers and press Ctrl+E, or right click on the layers and click on the “Merge Layers” function.

Step 12
Use the Polygonal Lasso Tool (L key) and select the top of the bottle like in the image below.

Step 13
Right click on the layer, and click on “Layer via copy”.

Step 14
At the moment we should have 2 layers except the Background layer. Lock the transparent pixels of our copied layer by pressing the button in the image below.

Step 15
Select Brush Tool and fill the layer with a gray color.

Step 16
Make a new layer by pressing Ctrl+Shift+N or go to Layer > New > Layer. Use the Pen Tool (P key) to make a path like in the next picture. Right click on the path and select the “Make Selection” function. Enter “-1px” for the Feather Radius Setting.
Leave a Reply