Step: 6 Layers
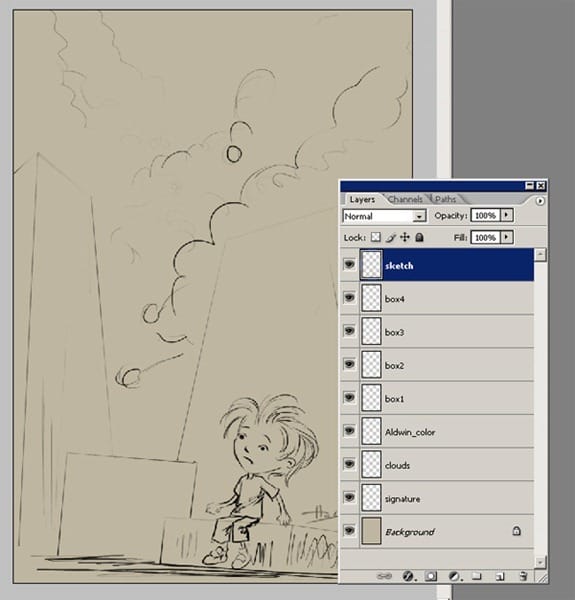
Ok. Here are layers. I named my first layer name as “sketch” And now here as you see I have 8 layers. You must do the same on your own project too. And the first layer is for my sketch work. On the next steps I’m going to create some more layers. The reason for painting on such new layers because of you need to make corrections later in the painting. It is much easier to fix errors if the main elements of your painting are separate entities.
Step 7: Working On The Background Color
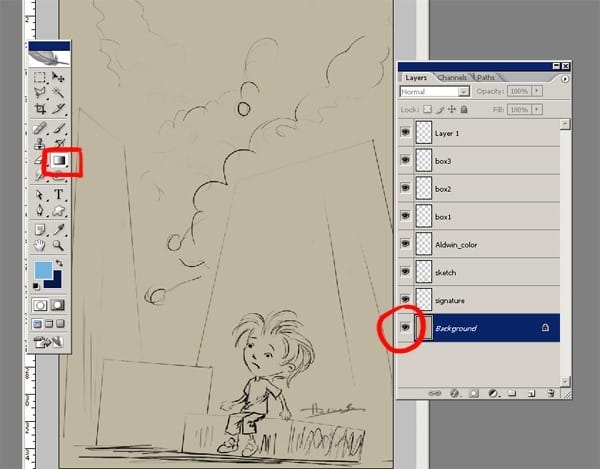
At this point, we can start coloring the sketch work. Select the Gradient Tool (G) and select the background layer.
Step 8
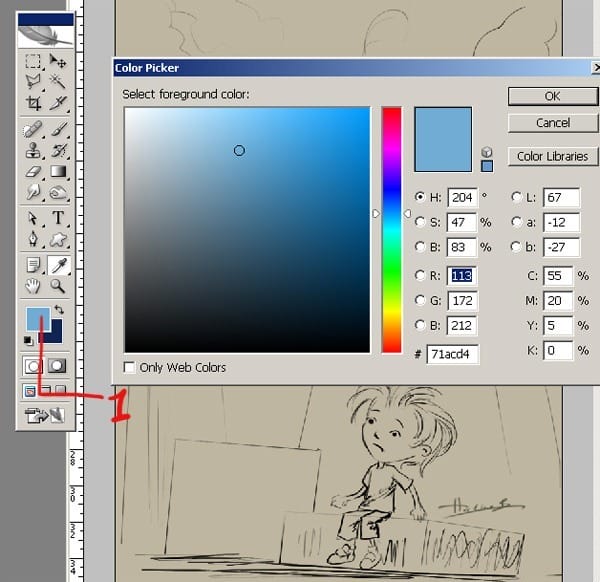
Firstly you have to choose the same color I showed you on the below picture. Make the numbers same as on the picture.
Step 9
Here is my second color for the background.
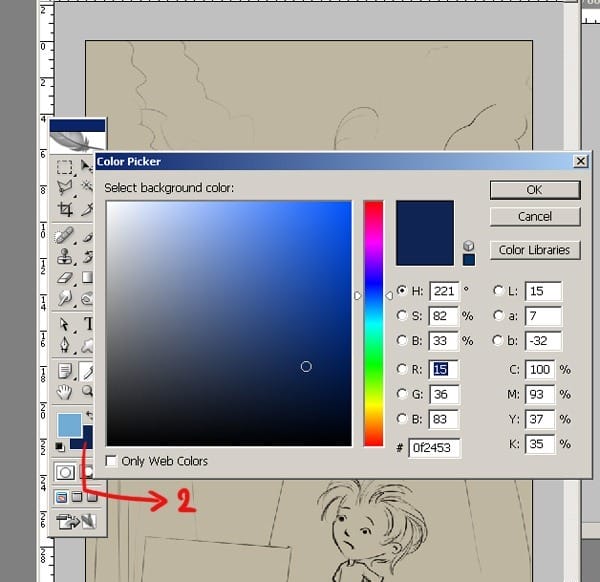
Step 10
Now is the time to determine the look of the background that you are going for. Grab the Gradient Tool (G) and fill the background with it.
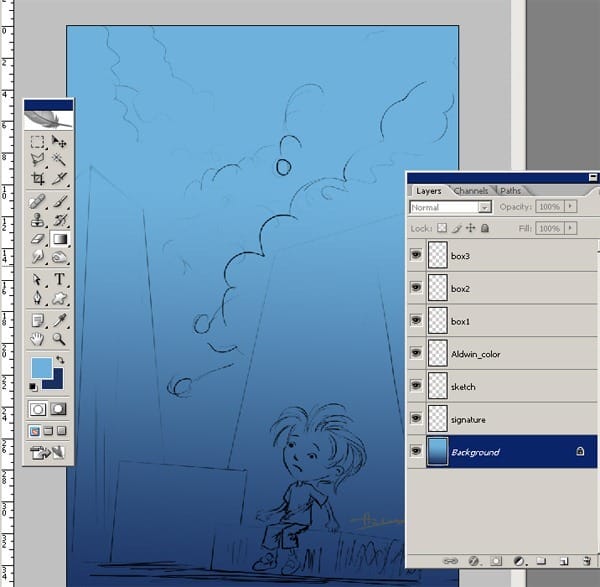
Step 11
Before continue the painting process let me show you my layer order again. I just changed the order of the layers. After you changed layers order, change the blending mode to Multiply and always keep it as the top layer so that you can see it as you’re painting.. At this point, we can start coloring the sketch work and you can define the main shapes .
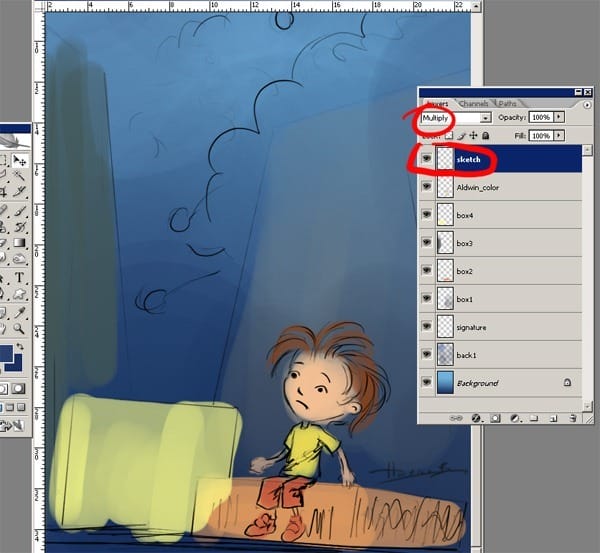
And you can lock the sketch layer if you want because you don’t want to mess it with some colors by accident. At this point, we can start coloring the sketch work and you can define the main shapes . Don’t focus in any one area, just start throwing down some shading to bring the volumes out. Then using the Brush tool (B), begin painting character and boxes on their own separate layers. Make sure that your brush has a hardness of 100%. A brush with a soft edge can produce blurry results.
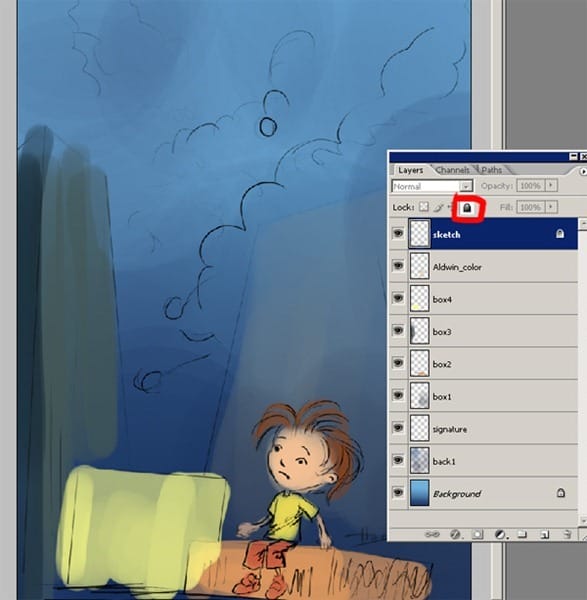
Step 12
And at this step I would like to change the size of my file because I’ll begin to add more details so I’ll need a bigger file size. I do wish my file is to be more bigger size because at this stage I do think I can’t make so much detailed painting. So I open Image/Image Size. And make the settings as you see 1500×2156
2 responses to “Paint “Aldwin Boy the Climber” in Photoshop”
-
nice…!
-
AWESOME!


Leave a Reply