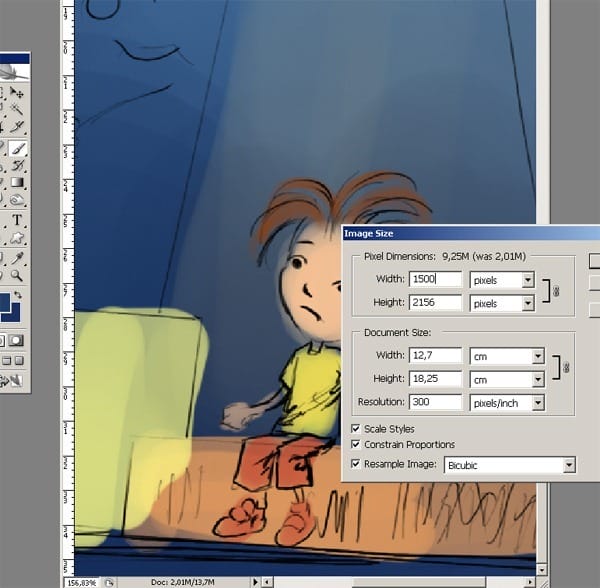
Step 13
And here I make some color painting with my character. And look at his clothing details. These details are just the main details so you don’t try to paint everything
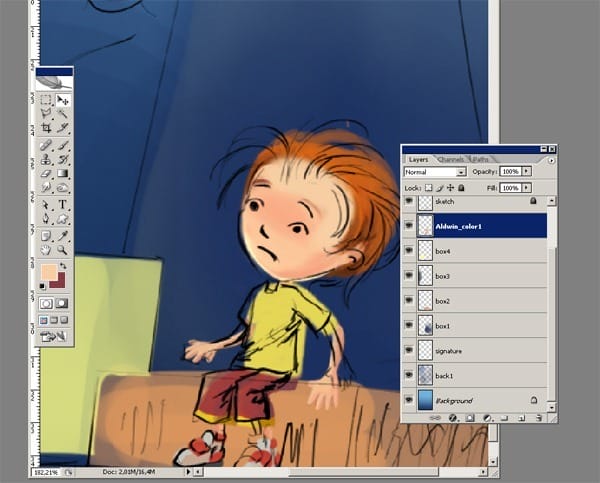
I’m adding some more colors and also I’m making some changes about sketch layer’s opacity. Here take a look at character painting. His eyes and his hairs began to look clear at this step.
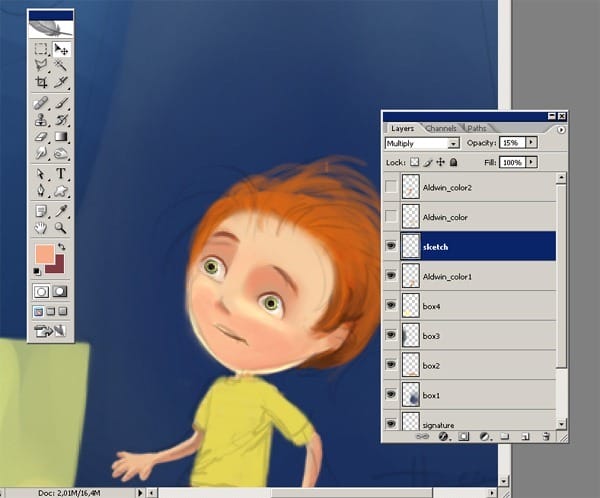
Step 14
Now here is a screenshot for the details. I’m adding some more details for his hair and his eyes.
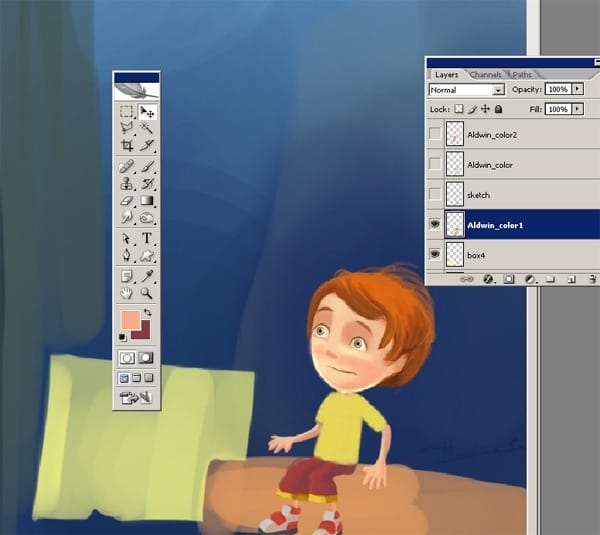
Step 15
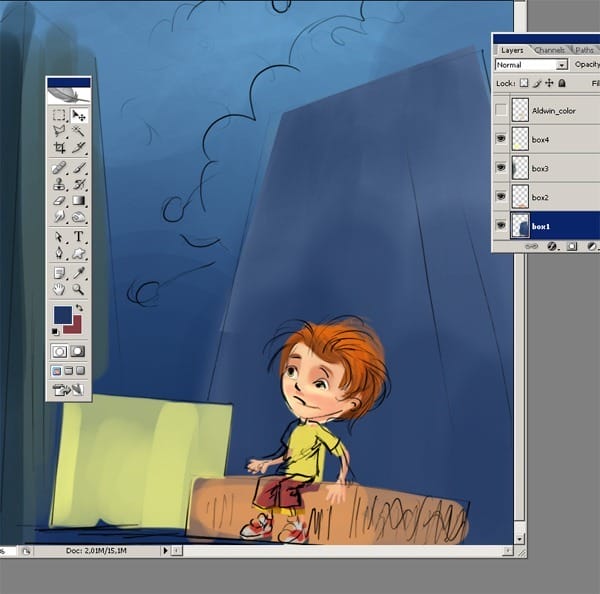
Now take a look at all details which I just make. I began to paint the the first box layer. I continue to add more details. Pay attention to my layer order. I selected the “box1” layer and after that I began to add some light and dark colors of the box.
Step 16
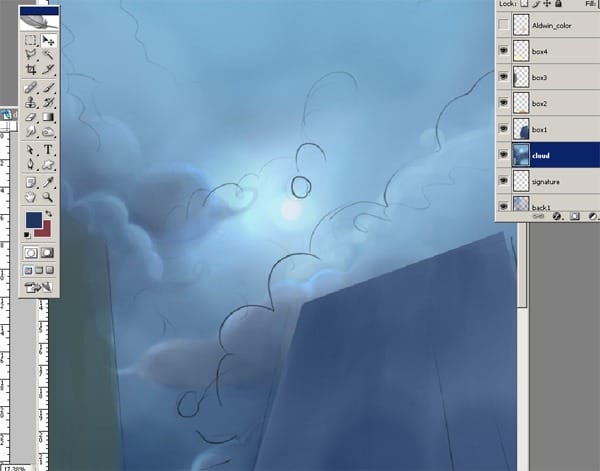
At this stage I decided to add some details for the clouds. I selected the “cloud color” layer and after that I began to add some light colors outline of the clouds. And here as you see I painted some rough shapes for the cloud and yet I’m not sure these are the main cloud shapes. Yet I’m not focusing in on any one area, I just start throwing down some shading to bring the volumes out.
Step 17
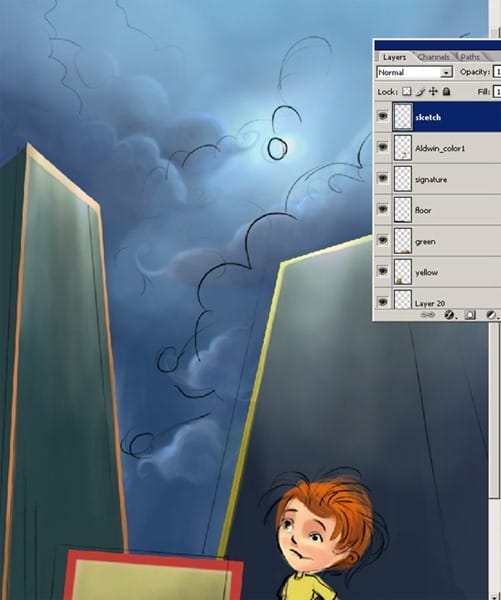
Once I’m satisfied with detailing clouds I’ll now begin to small details on the box , adding more yellow and green colors. By the way don’t forget at this step you don’t have to over detail everything. At this point I kept working on main details and lights, until I got a nice and contrast. Sometimes I have to change some colors. I am pretty much finished painting the boxes.
Step 18
I closed the “sketch” layer for you to see more clearly the details of the clouds..
Step 19
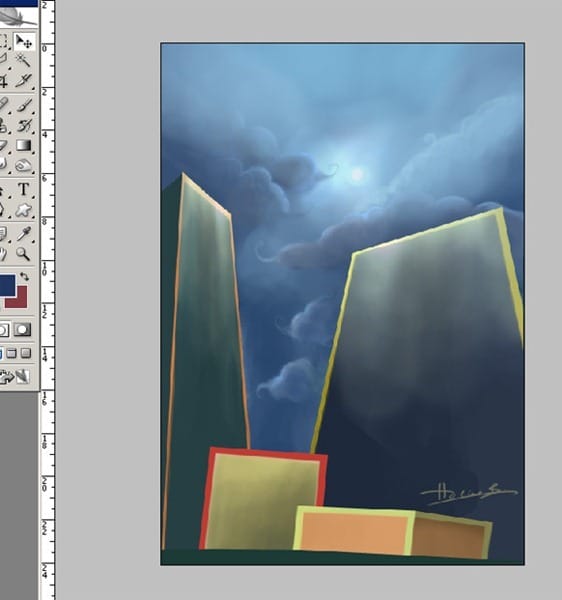
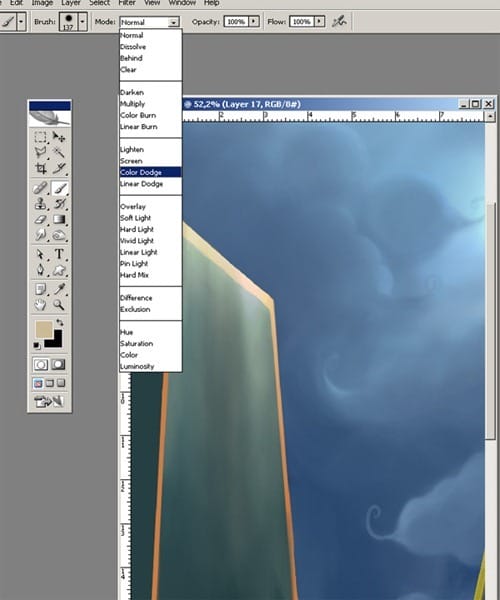
Now pay attention at the details which I just make with the color dodge option. I opened the “sky” layer for you to see more clearly the details of the clouds..
Step 20
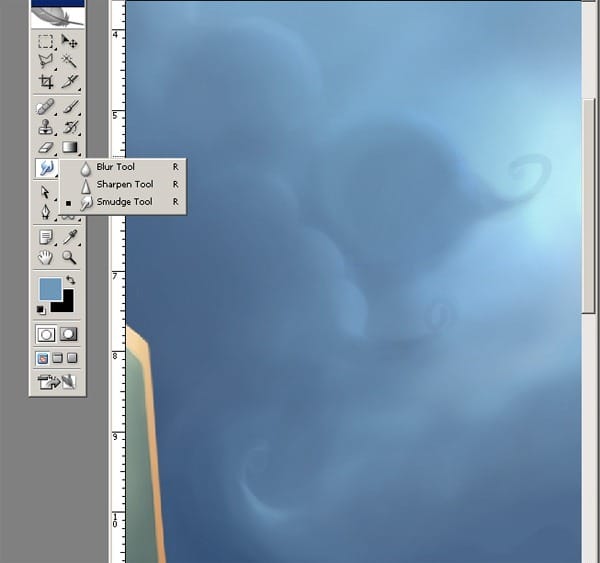
And I do add some strokes with the Smudge tool (R) too. I use this because I want to add soft areas on the clouds .
Step 21
When I do want to add some more light on the sun I am going to use color dodge tool. When you are using this option you must be very careful not to press hard on the pen of your table. With your pen tool you must very lightly touch on the tree branches. Don’t use hard strokes. I add some strokes with the Color Dodge.
2 responses to “Paint “Aldwin Boy the Climber” in Photoshop”
-
nice…!
-
AWESOME!


Leave a Reply