

Step 11
Create a new layer and use the Clone Tool to change the details of the right rock to be different from the left one.

Step 12
On the left rock layer, use the Polygonal Lasso Tool to select a part on the rock and hit Ctrl+C to copy this part. Make a new layer on top of the layers and hit Ctrl+V to paste this part into this layer. Convert this layer to a Smart Object and use the Free Transform Tool (Ctrl+T) to distort it and place onto the rock’s surface.

Add a mask to this layer and use a hard black brush to remove the edges on both sides and outside the rock to make a new clean surface for the rock.

Step 13
Select a part from the left rock again and use the same method to make a new surface for the right rock.

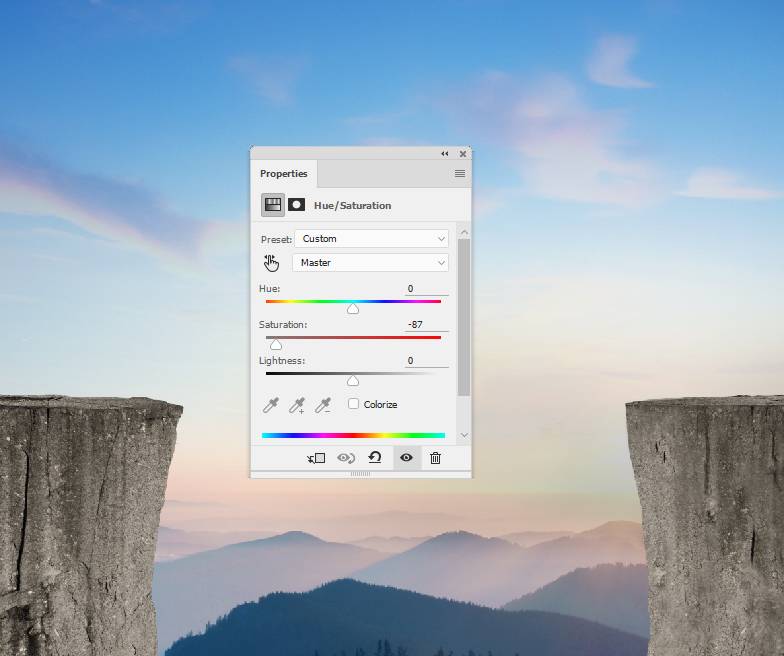
Step 14
Select all of the rock layers and cloning one and hit Ctrl+G to make a group for them. Change the group’s mode to Normal 100% and make a Hue/Saturation adjustment layer within the group. Bring the Saturation values down to -87:
Step 15
Add a Curves adjustment layer and reduce the lightness. On this layer mask, use a soft black brush to remove the dark effect on the surfaces and the contour of the rocks.
Step 16
Add a Curves adjustment layer and reduce the lightness. On this layer mask, use a soft black brush to remove the dark effect on the surfaces and the contour of the rocks.

Make another Curves adjustment layer and increase the light. Use a hard black brush to remove the light effect on the front of the rock and some areas of the surfaces.

Step 17
Make a new layer above the rock’s group, fill with 50% gray and change the mode to Overlay 100%. Select the Dodge and Burn Tool (O) with Midtones Range, Exposure about 15% to refine the light and shadow and paint more details for the right rock. You can see how I did it with Normal mode and the result with Overlay mode.


Step 18
Create a new layer and activate the Pen Tool (P). Use this tool to draw a path between the rocks as shown below:

Right click this path, choose Stroke Path with a hard black brush, the color #34393b and the size of 12 px.


Step 19
Add a mask to this layer and use a soft black brush with the opacity about 50% to blend both sides of the line with the rocks.
3 responses to “How to Create a Surreal Elephant Photo Manipulation with Adobe Photoshop”
-

Thank you! great lesson!
-
Well done
-
Excellent. I’m a regular viewer. It’s help To me. Thank you…….
Leave a Reply