

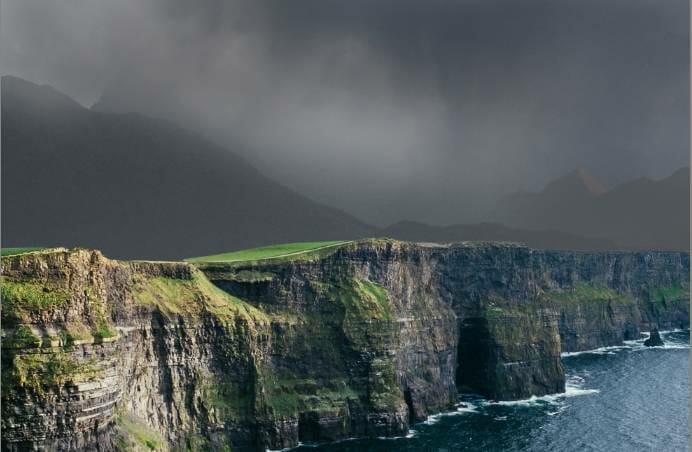
Step 9
Cut out the cliff and place it in the middle of the canvas.
Step 10
Make a Curves adjustment layer to darken the cliff. On this layer mask, use a soft black brush with the opacity about 10%, 20% and 40% to reduce the dark effect of the surface and a part of the body of the cliff.


Step 11
Isolate the rock and place it in the bottom right of the canvas.

Step 12
Go to Filter > Blur > Gaussian Blur and set the radius to 6 px. This step is to add some depth to the scene.

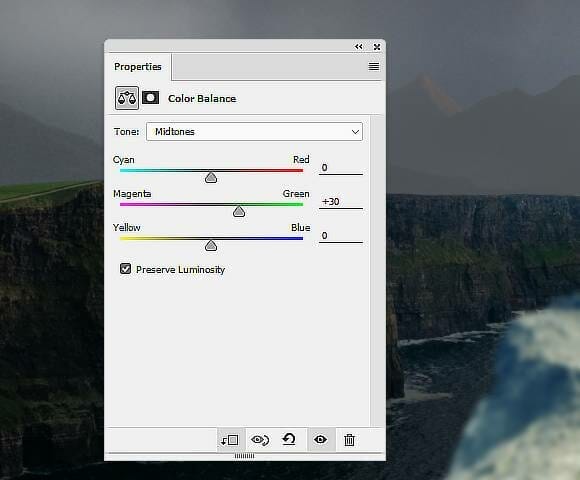
Step 13
Make a Color Balance adjustment layer and change the Midtones settings:
Step 14
Create a Curves adjustment layer to make the rock much darker.

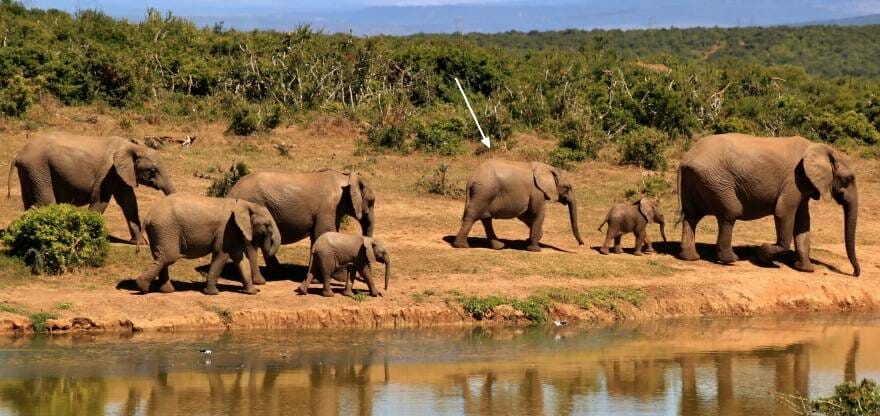
Step 15
Open the elephants image and select one in the middle to add to the middle of the cliff’s surface.

Step 16
Add a mask to this layer and use a hard black brush to refine some details on the head of the elephant (make it a bit rounder) and his feet.

Step 17
Make a new layer and use the Clone Tool (S) to remove some unwanted shadow on his legs.

Step 18
Create a Hue/Saturation adjustment layer to desaturate the color of the elephant::

Step 19
Add a Curves adjustment layer to darken the elephant. On this layer mask, use a soft black brush to reveal the lightness on the top and on the trunk of the elephant.

Sep 20
Create a new layer below the elephant’s one and use a soft brush with the color #080d11 to paint a long and thin shadow for him on the cliff.

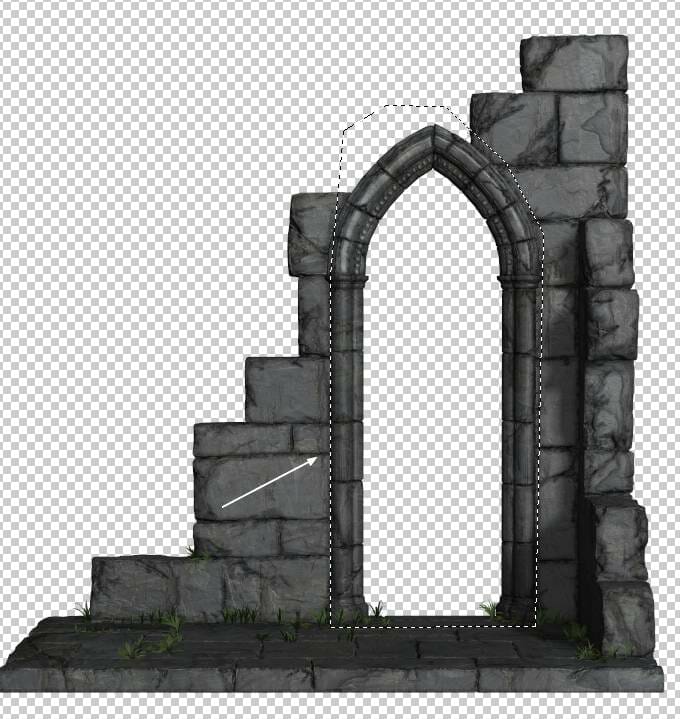
Step 21
Open the portal image and use the Polygonal Lasso Tool (L) to select the door part to add to the top middle of the elephant. Add a mask to this layer and use a soft black brush to erase the bottom and blend the door with the back of the elephant.


Step 22
Create a Curves adjustment layer to brighten the front of the portal. On this layer mask, use a soft black brush to erase the hidden parts as the screenshot below shows:

Step 23
Open the sky 2 image and use the Rectangular Marquee Tool (M) to select a sky part in the middle to add to the space within the portal. Add a mask to this layer and use a hard black brush to erase the part outside of the portal.


Step 24
Make a Gradient Map adjustment layer on top of the layers and pick the colors #041e36 and #0baffb. On this layer mask, use a soft black brush to erase the blue effect on the lower half of the canvas ( the cliff , sea and rock).
Leave a Reply