

Step 33
Isolate the child from the background and add her to the right of the pathway. Place this layer on top of the layers.

Step 34
Make a new layer below the child layer . Hold the Ctrl key while clicking the child thumbnail layer to load her selection. Fill this selection with the color #170e04 and flip it vertically. Convert this layer to a Smart Object and use Ctrl+T to distort the shadow to fit the main light source.

Lower the opacity of this layer to 50% and apply a Gaussian Blur of 3 px to soften the shadow.

Make a new layer and use a small brush with the color #170e04 to paint shadow below the child’s feet.

Step 35
Create a Hue/Saturation adjustment layer to change the dress’ color.


Step 36
Make a Curves adjustment layer and increase the lightness. On this layer mask, paint on the back of the child to keep its shadow.

Step 37
Add a new layer, change the mode to Overlay 100% and fill with 50% gray. Use the Dodge and Burn Tool to refine the light and shadow of the child to fit the light source.

Step 38
Create a new layer and use a small brush with the color #896d3d to paint the highlight for the hair.

Step 39
Create a new layer and use a soft brush with the color #e3a39a to paint on the middle of the whole canvas. Change this layer mode to Overlay 100%.


Step 40
Make a Gradient Map adjustment layer and pick the colors #e10019 and #00601b. Lower the opacity of this layer to 20%.

Step 41
Create a Color Balance adjustment layer and change the Midtones and Highlights settings:


Step 42
Use a Curves adjustment layer to increase the contrast of the whole scene.

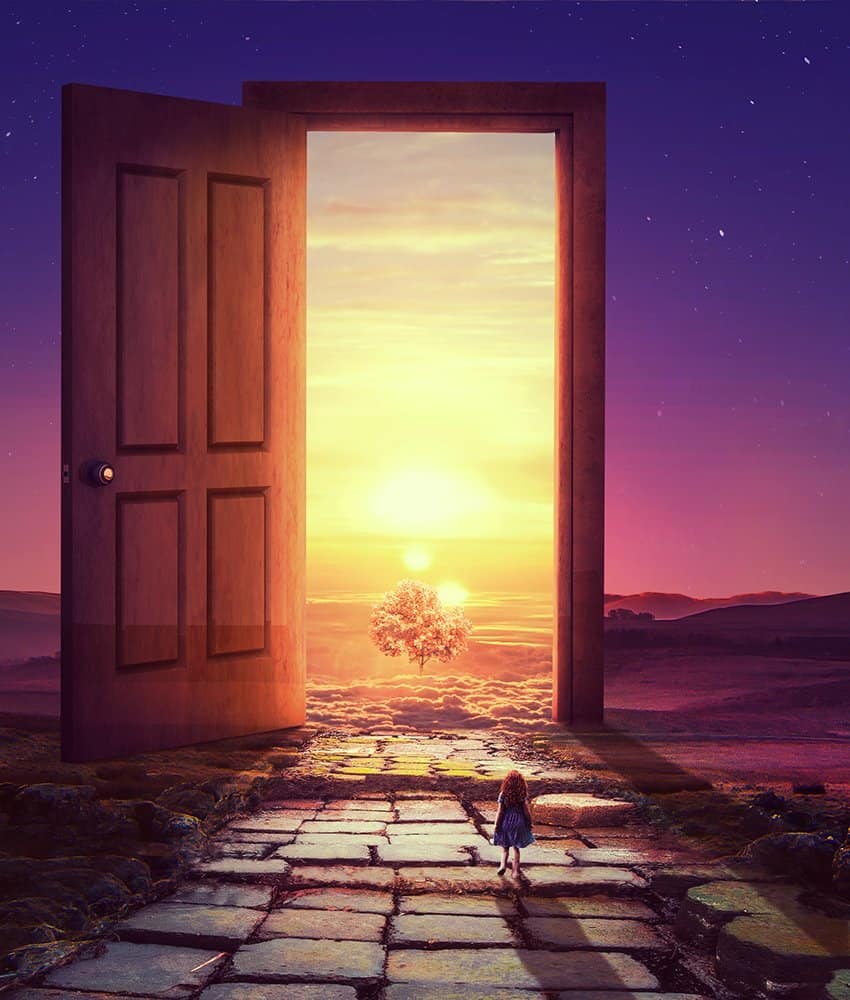
Final Result
Download the PSD
2 responses to “How to Create a Fantasy Door Photo Manipulation with Adobe Photoshop”
-

Using this with my high school photography class as a lesson in using layer masks and color adjustments! Thanks :)
-
Great, thank you
Leave a Reply