
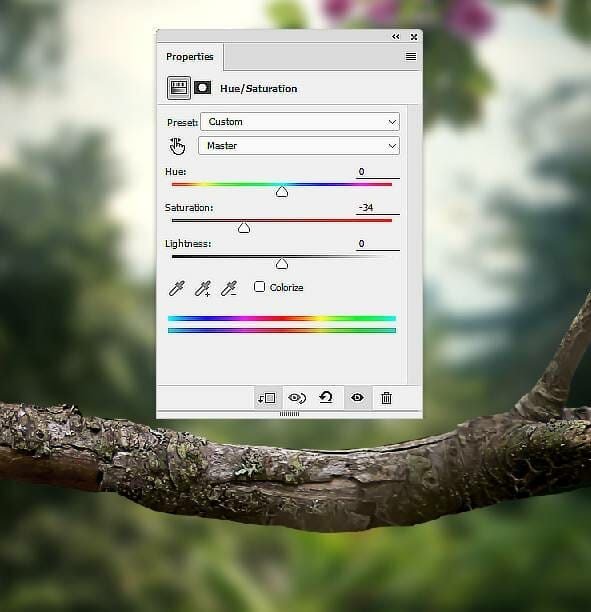
Step 12
Create a new layer, change the mode to Soft Light 100% and fill with 50% gray. Select the Dodge and Burn Tool (O) with Midtones Range and the Exposure about 15-20% to refine the light and shadow on the branch to fit the light from the background. You can see how I did it with Normal mode and the result with Soft Light mode:


Step 13
Open the owl image and use the Magnetic Lasso Tool (L) to isolate the owl from the background. Take the body of the owl and place it above the branch 2. Use the Free Transform Tool (Ctrl+T) with the Warp mode to tweak the owl’s body as shown below:

Step 14
Add a mask to this layer and use a hard black brush to remove the bottom of the body and some details on the wings.

Step 15
Use the Elliptical Marquee Tool (M) to take the head of the owl from the original image to place above the owl’s body in the main document. Use Ctrl+T with the Warp mode to rotate and tweak the head as the screenshot below shows.


Step 16
Add a mask to this layer and use both hard and soft black brushes to trim the form of the head to be smaller.


Step 17
Use the Lasso Tool to take the top of the owl’s head from the original image to add to the head of the new owl. Use Ctrl+T with the Warp mode again to bend this part to hide the beak eyes and the white feathers above them. Add a mask to this layer and use soft black brush to erase the hard edges and blend this part with the existing head.


Step 18
Use the Lasso Tool to take the part below the mouth in the original image to add to the area between the head and the body in the main document. Use a layer mask to erase the hard edges and blend it with the new body.


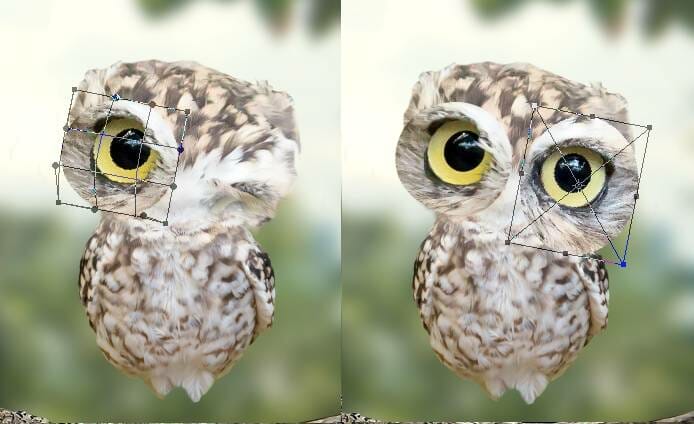
Step 19
Take the eyes from the original image to add to the new owl. Use Ctrl+T with the Warp mode to change the form of the eyes to fit the pose of the new owl. Add a mask to each of these layers and use a soft black brush to erase the hard edges and blend the eyes with the head.

Take the beak from the original to add to the head of the new owl and make it much smaller. We’re creating a baby owl and a small beak will make him much cuter . Use a layer mask to blend the beak with the existing head.
Leave a Reply