


Step 8
Now, go to File > Open and select Castle. Then use a Pen Tool(P) and start selecting. When we finish the selection press right-click on the mouse and “Make Selection” then create a layer mask. The simplest path you can draw with the standard Pen tool is a straight line, made by clicking the Pen tool to create two anchor points. By continuing to click, you create a path made of straight line segments connected by corner points.
- Select the Pen tool.
- Position the Pen tool where you want the straight segment to begin, and click to define the first anchor point (do not drag).
- Click again where you want the segment to end
- Continue clicking to set anchor points for additional straight segments.
- The last anchor point you add always appears as a solid square, indicating that it is selected. Previously defined anchor points become hollow, and deselected, as you add more anchor points
- Complete the path by doing one of the following:
- To close the path, position the Pen tool over the first (hollow) anchor point. A small circle appears next to the Pen tool pointer
 when it is positioned correctly. Click or drag to close the path.
 - To leave the path open, Ctrl-click (Windows) or Command-click (Mac OS) anywhere away from all objects. To leave the path open, you can also select a different tool.


Feather Radius set to 0px and check Anti-aliased. After the selection area has been created, simply copy (Ctrl / Cmd + C) and Paste (Ctrl / Cmd + V) it to our work canvas. Then position the image with the transform tool (Ctrl / Cmd + T). Hold Alt + Shift and resterize like image below. In Photoshop CC only hold Alt to resterize al sides together.

Then create a layer mask and with a soft round brush tool delete parts that we have not erase on previous step with the pen tool.


Step 9
Add Adjustment Layer “Color Balance”

Step 10
Add Adjustment Layer “Curves” and press Ctrl/Cmd + I to invert. Then use Brush Tool(B) Soft Round with foreground color white and paint highlight parts.

Step 11
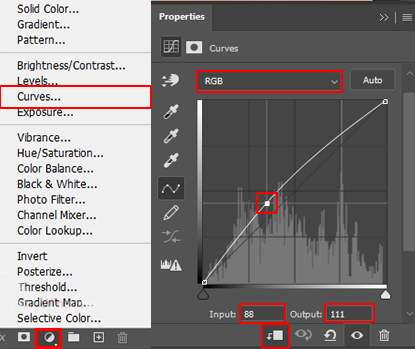
Add Adjustment Layer “Curves”

Step 12
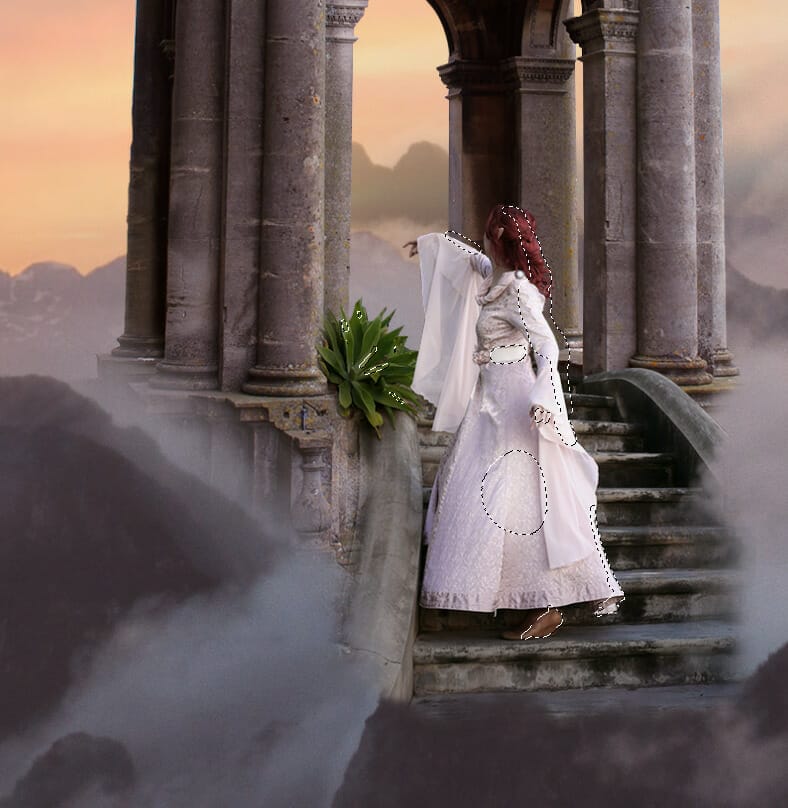
Now, open woman Go to File > Place and select woman. Then place it to our work canvas and position the image with the transform tool (Ctrl / Cmd + T). Hold Alt + Shift and rasterize like the image below. In Photoshop CC only hold Alt to rasterize all sides together.
After that create a layer mask and use Brush Tool(B) Soft Round with foreground color black and paint/delete some parts.


Step 13
Add Adjustment Layer “Color Balance”

Step 14
Add Adjustment Layer “Hue/Saturation”

Step 15
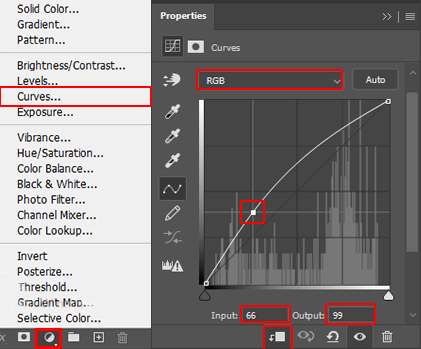
Add Adjustment Layer “Curves”

Step 16
Add Adjustment Layer “Curves” and press Ctrl/Cmd + I to invert. Then use Brush Tool(B) Soft Round with foreground color white and paint the highlight parts.
Step 17
Add Adjustment Layer “Curves”

Step 18
Open Birds and hold Ctrl/Cmd and click on the layer after the selection area has been created, simply copy (Ctrl / Cmd + C) and Paste (Ctrl / Cmd + V) it to our work canvas. Then position the image with the transform tool (Ctrl / Cmd + T). Hold Alt + Shift and resterize like image below. In Photoshop CC only hold Alt to resterize al sides together. Opacity reduces to 40%.
One response to “Create a Fantasy Place above the Clouds Photo Manipulation in Photoshop”
-

Milos, that is once again a beautiful composing
Leave a Reply