

Step 28
Make a new layer and increase the brush’s size. Use this brush to paint some bigger bubbles around the fish.

Step 29
Convert this layer to a Smart Object and go to Filter > Blur > Gaussian Blur and set the radius to 7 px:
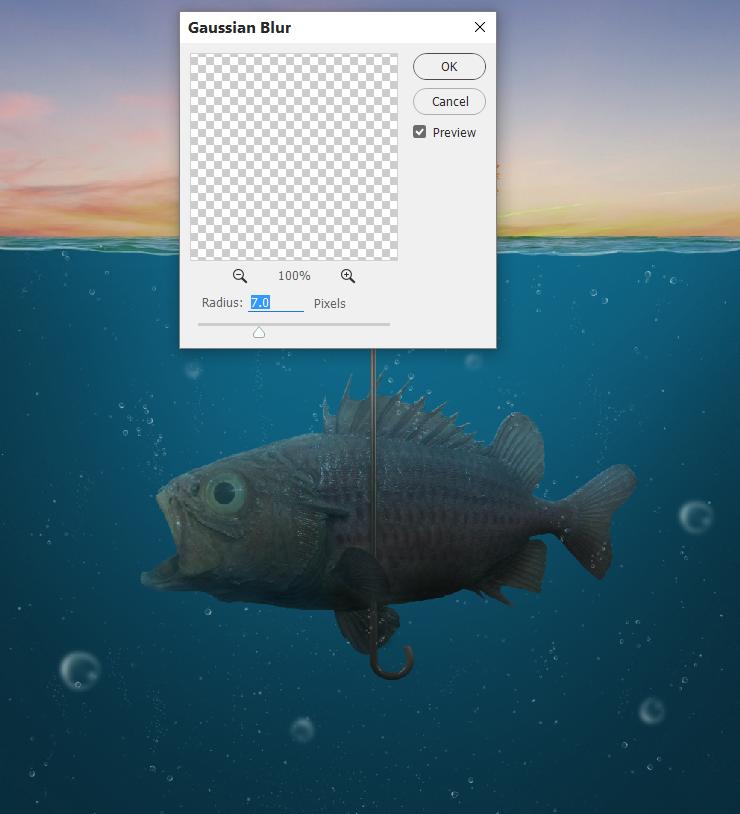
Add a mask to this layer and use a soft black brush to reduce the bubbles’ visibility.

Step 30
Open the window image and use the Polygonal Lasso Tool to select the window only. Place this window onto the middle of the leaves and use Ctrl+T to refine the form of the window a bit.

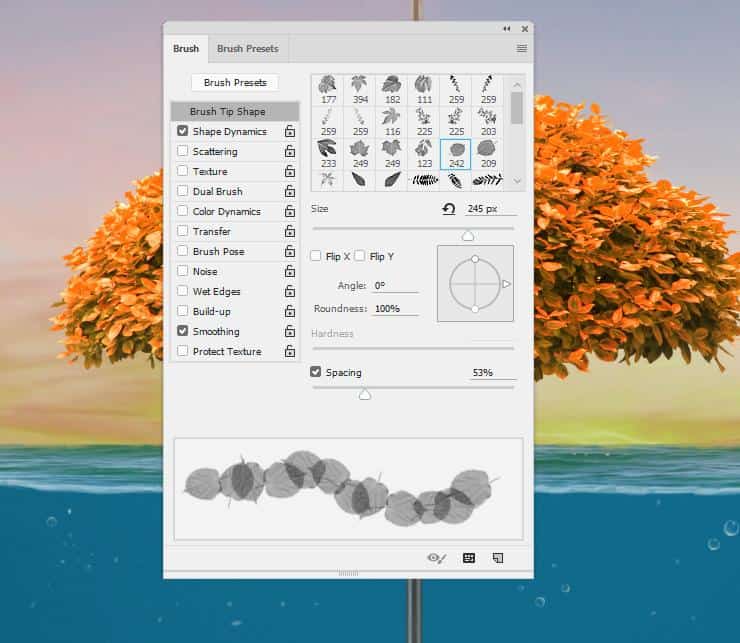
Add a mask to this layer and change the brushes to the leaves ones. On this layer mask, select one from the brush set (I’ve chosen Mulberry 1) and hit F5 to change the settings of this brush.

Use this brush to hide the window edges into the leaves.

Step 31
Make a Hue/Saturation adjustment layer to change the color of the window a bit.

Create a Curves adjustment layer to brighten the middle of the window. On this layer mask, paint on the edges to keep its shadow and contrast.

Make another Curves adjustment layer to increase the contrast and shadow for the window’s edges. Paint on the middle to reveal the lightness.

Step 32
Open the chimney image and use the Polygonal Lasso Tool to select the chimney only to add to the right of the leaves. Use Ctrl+T to make it thinner.


Add a mask to this layer and use a hard black brush to hide the bottom of the chimney into the leaves.

Step 33
Create a Color Balance adjustment layer and alter the Midtones values:

Add a Curves adjustment layer to brighten the middle of the chimney. On this layer mask, paint on the rest to keep its shadow.

Step 34
Open the smoke image and use the Lasso Tool to select the smoke part to add to the top of the chimney. Change this layer mode to Screen 100% .

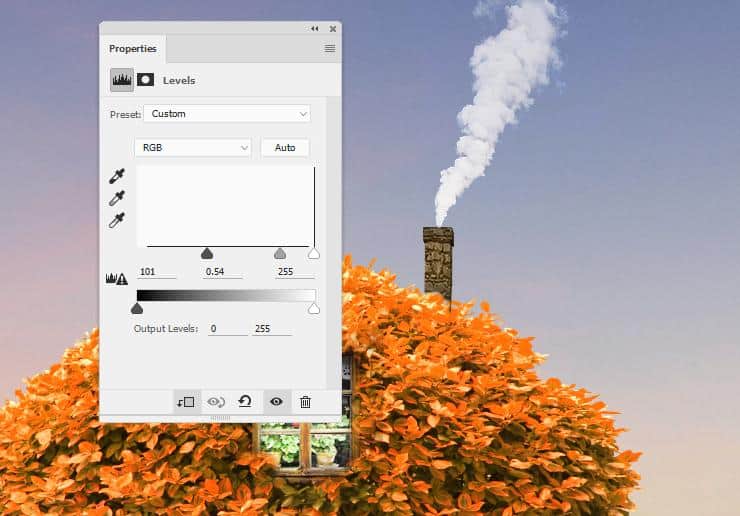
Step 35
Make a Levels adjustment layer to remove the hard edges.
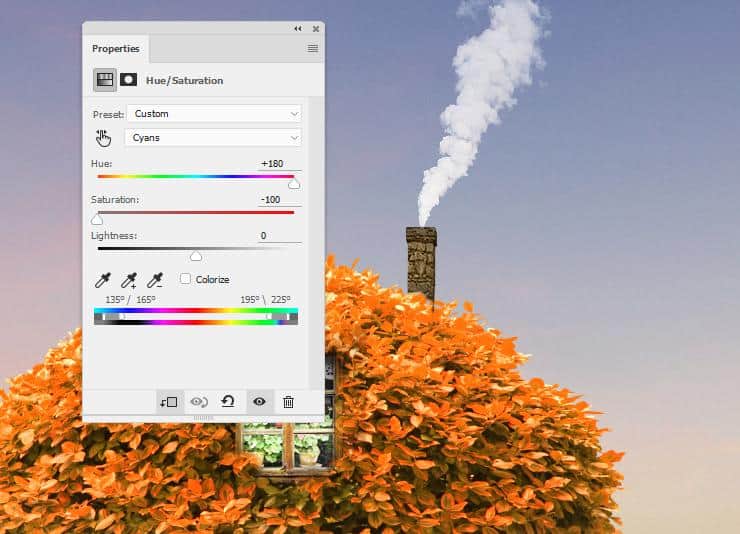
Add a Hue/Saturation adjustment layer and change the Cyans and Blues settings to remove completely the blue cast of the smoke’s edges.

Step 36
Isolate the birds and add them to the top left of the sky.

Create a Curves adjustment layer to make some dreamy effect for the birds, making them integrated better with the sky.
Leave a Reply