


Step 7
Now, create a new layer and change the blend mode to Soft Light. Pick a color to orange (#fa9f74) Then use a Brush Tool(B) Soft Round and paint. Opacity set to 15%.


Step 8
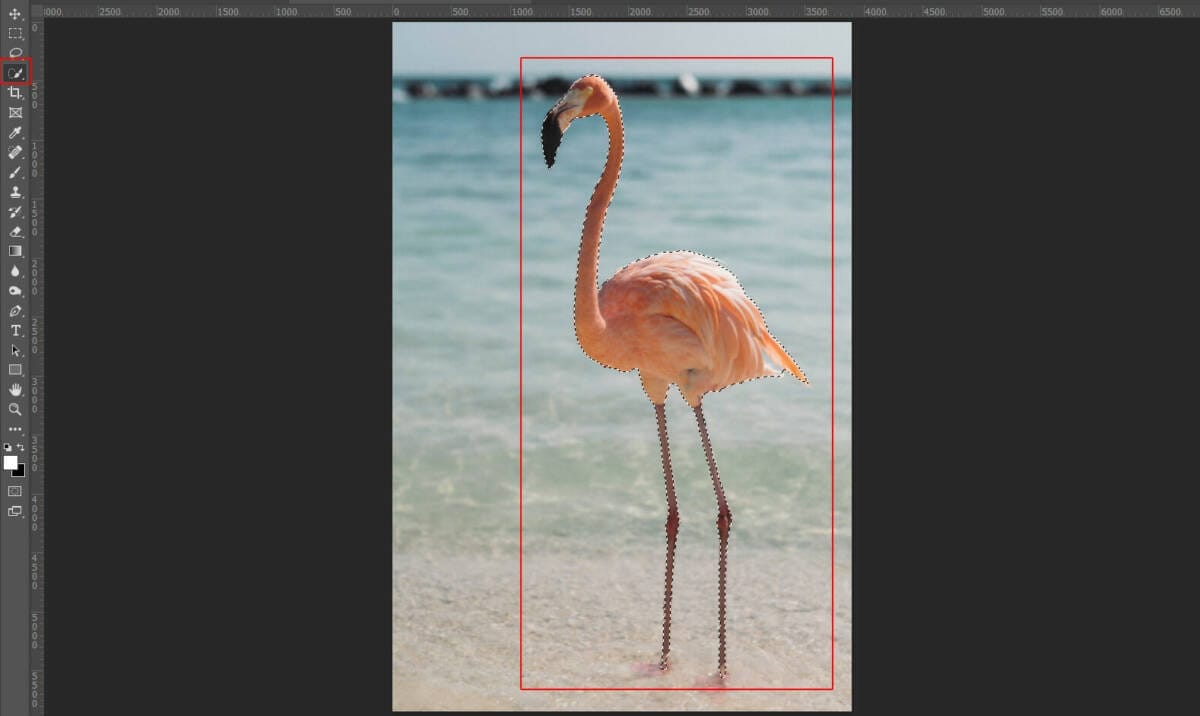
Next, we will open Flamingo. After you open the image, use the Quick Selection Tool(W) and start selecting the animal. After the selection area has been created, simply copy (Ctrl / Cmd + C) and Paste (Ctrl / Cmd + V) it to our work canvas. Then position the image with the transform tool (Ctrl / Cmd + T). Hold Alt + Shift and resterize like image below. In Photoshop CC only hold Alt to resterize al sides together.

Now convert the layer to Smart Object
Go to Filter > Blur > Gaussian Blur and set the radius to 0.5px.

Select filter mask and press Ctrl/Cmd + I to invert. Then use Brush Tool(B) Soft Round with foreground color white and paint parts like in the image below.

Step 9
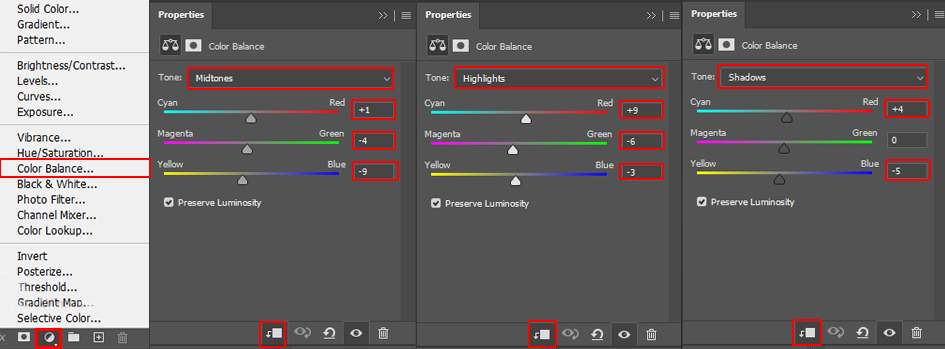
Add Adjustment Layer “Color Balance”

Step 10
Add Adjustment Layer “Hue/Saturation” Opacity set to 22%.

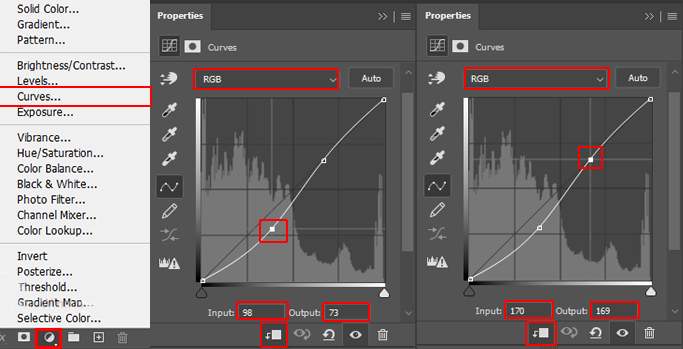
Step 11
Add Adjustment Layer “Curves” and press Ctrl/Cmd + I to invert. Then use Brush Tool(B) Soft Round with foreground color white and paint highlight parts.


Step 12
Add Adjustment Layer “Color Balance” Opacity set to 40%.

Step 13
Add Adjustment Layer “Curves” and opacity reduce to 80%.
Step 14
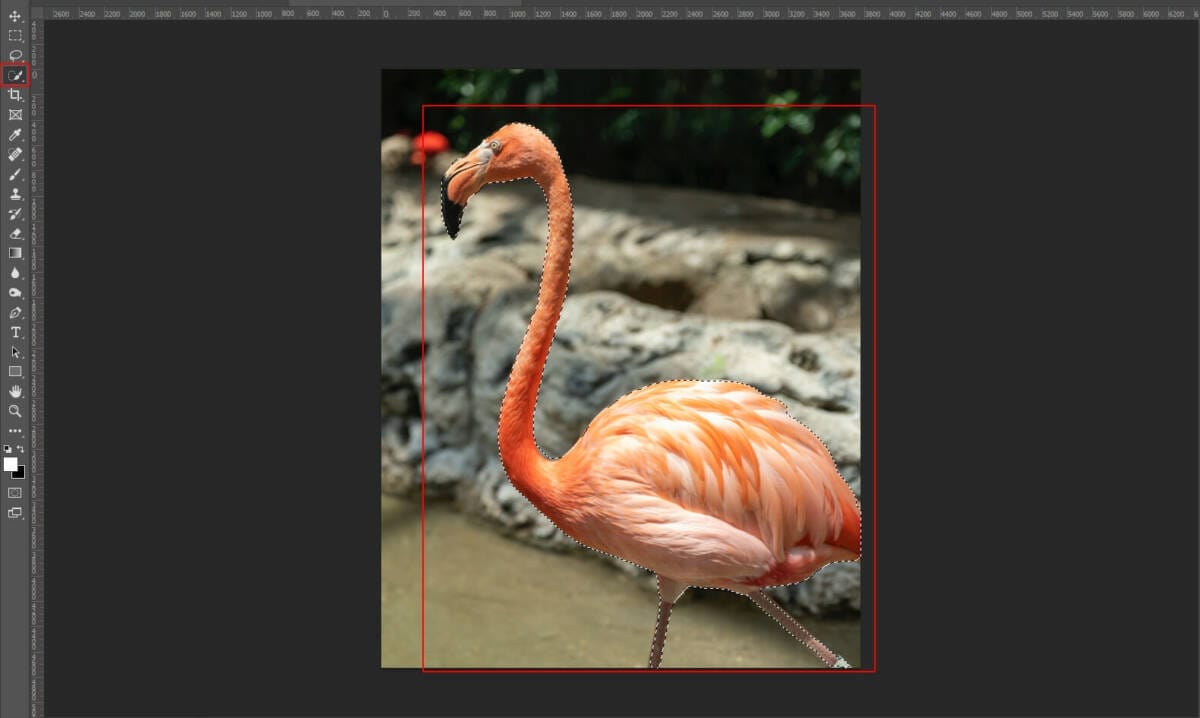
Next, open the second Flamingo. After you open the image, use the Quick Selection Tool(W) and start selecting the animal. After the selection area has been created, simply copy (Ctrl / Cmd + C) and Paste (Ctrl / Cmd + V) it to our work canvas. Then position the image with the transform tool (Ctrl / Cmd + T). Hold Alt + Shift and resterize like image below. In Photoshop CC only hold Alt to resterize al sides together.

Step 15
Add Adjustment Layer “Color Balance”
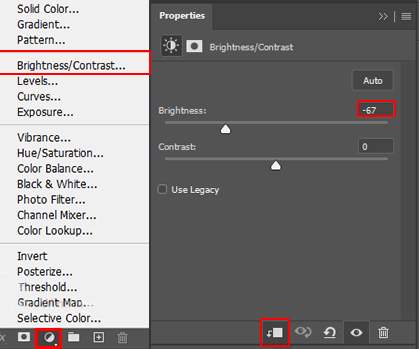
Step 16
Add Adjustment Layer “Brightness/Contrast” and press Ctrl/Cmd + I to invert. Then use Brush Tool(B) Soft Round with foreground color white and paint dark parts.

Step 17
Add Adjustment Layer “Curves” and press Ctrl/Cmd + I to invert. Then use Brush Tool(B) Soft Round with foreground color white and paint highlight parts.
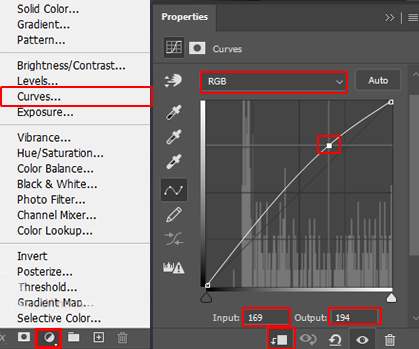

Step 18
Add Adjustment Layer “Curves” and press Ctrl/Cmd + I to invert. Then use Brush Tool(B) Soft Round with foreground color white and paint dark parts.
2 responses to “Create a Surreal Photomanipulation Flamingos above the Clouds”
-

where da first page?
Leave a Reply