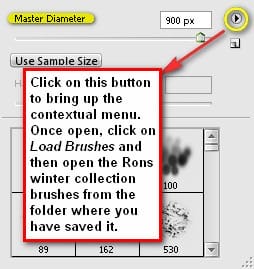
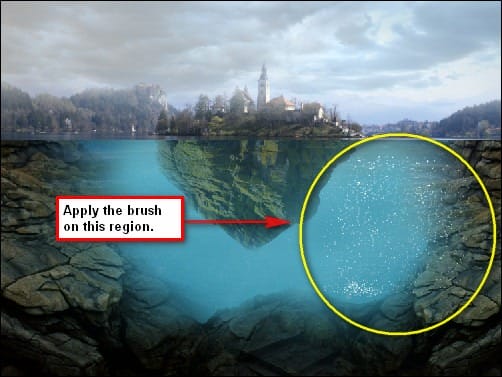
After that we would now be putting the bubbles on our image. Activate the Brush tool (B) and then right click on our image for a menu to pop up. This menu shows the brushes currently activated, but we won’t use that, what we’re going to use is Rons Winter Collection brushes! To open those brushes click on the “play†button located to the right of the Master Diameter box.

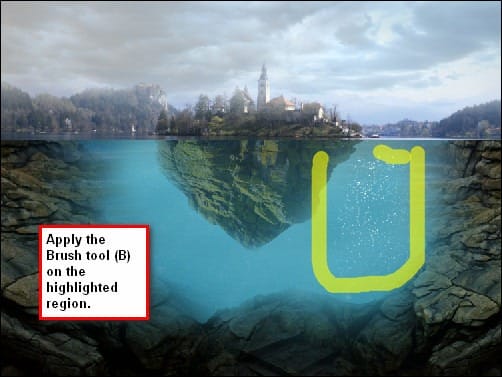
Create a new layer, rename it to “bubbles†put it on top of all the layers inside the “Under the sea†group and then activate your Brush tool (B) which has Rons Winter Collection brushes open and then change the brush values to the following:
- Brush size: 900 px
- Hardness: default
- Opacity: 100%
Flow: 100%

We will be erasing the excess to make the bubbles look realistic. Activate the Eraser tool (E) and set its values to the following:
- Brush size: 700 px
- Hardness: 0%
- Opacity: 100%
- Flow: 100%

If you’d look carefully these bubbles still look unreal, so to make it blend in seamlessly, let’s reduce its Opacity to 50%.
Step 4 – Retouch the image
In this step we would be retouching the overall image, we would be painting a dark blue color on the region under the sea and a little blue green color on the surface of the sea as well to make it look realistic. We would also be adding some general changes to our image like changing its color, its brightness and its contrast and a lot more.
So to begin, let’s create a new layer, put it on top of the “bubbles†layer and name it “dark blueâ€. Activate the Brush tool (B) and let’s change the color of our Brush by clicking on the foreground color on the Color picker on the Tools menu. Once the Color Picker box opens, input the following values:
- #: 133639

Next, activate the Brush tool (B), then right click on the canvas and click on the “play†button once again and click on “Reset Brushes†then use the following brush settings below:
- Brush size: 900px
- Hardness: 0%
- Opacity: 100%
- Flow: 100%
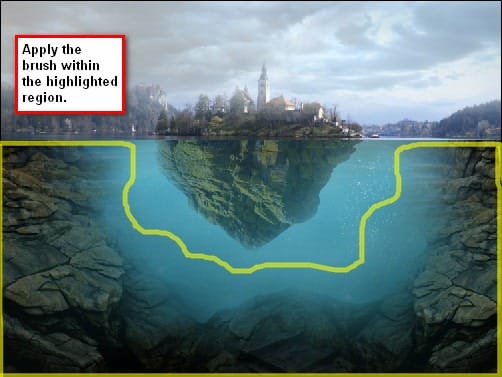
Now we’re all set to paint! Click on the “dark blue†layer and follow the instructions on the image below:

Now let’s add a little blue green color on the area just below the surface of the body of water and on the island itself. Create a new layer and rename it to “blue-green†and then click on the Set foreground color button and input the following value:
10 responses to “Floating Island on Water”
-
amazing tutorial.
The mysterious island -
this is hard
-
way to go
-
nice
-
Cool im doing it right now
-
I don’t get how you went from “water texture†to cloning that image.
It’s like you skipped a step or two.
-
Nice photoshop manipulation. Top picture “Island” is from Slovenia – lake Bled.
-
Thanks for this tutorial! This is my version
http://silvialorica.tumblr.com/post/59341356745/floating-island-lisola-che-galleggia-made-by-
Thts not yours cheater ..
-
-
im so gonna try this!


Leave a Reply