

Step 22
Isolate the flower image and add it to the head of the model. Use Ctrl+T with the Warp mode to bend it as shown below:

Add a mask to this layer and use a hard black brush to erase the part on the forehead and the top of the head.

Step 23
Drag the flower from the original image to our working document again and place it onto the existing one. Use Ctrl+T with the Warp mode to tweak it a bit.

Add a mask to this layer and use a hard black brush to remove the part on the forehead and both sides of the ears.

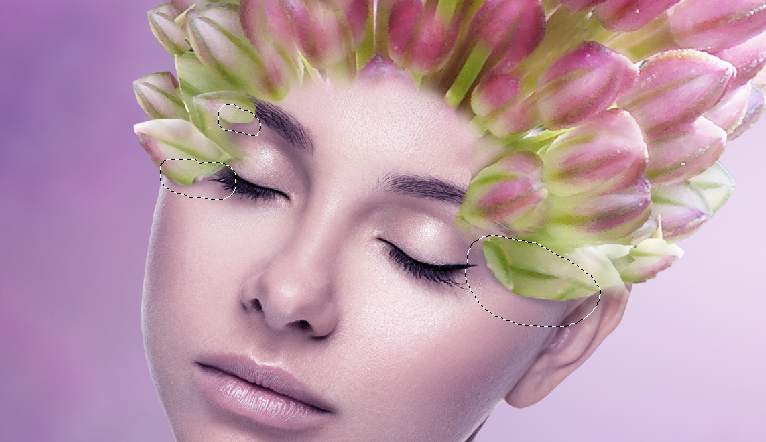
Step 24
Use the Magnetic Lasso Tool (L) to select a bud from the flower image to add to the area above the left ear of the model. Set this layer below the flower ones.


Step 25
Select another bud to add to the right of the model’s head and then duplicate this layer. Use Ctrl+T to resize it to be smaller to add to the higher position than the first one.

Step 26
Create a new layer and activate the Clone Tool (S) . Use a cloning brush with the opacity about 40% to reduce the highlight on the buds.

Step 27
Select all the flower , bud and cloning layers and hit Ctrl+G to make a group for them. Change this group’s mode to Normal 100% and add a Hue/Saturation adjustment layer and alter the Master values:

Step 28
Make a Curves adjustment layer and increase the lightness. On this layer mask, use a soft black brush to remove the light on the right and any details you feel too bright.

Step 29
Make a new layer below the flower group and use a small brush with the color #3d3357, the opacity about 33% to paint shadow for the buds on the model’s face.
Step 30
Open the leaves image and take a leaf to add to the model. Go to Filter > Liquify and use the Forward Warp Tool (W) to tweak the leaf into a curve. Place this curve onto the model’s back.


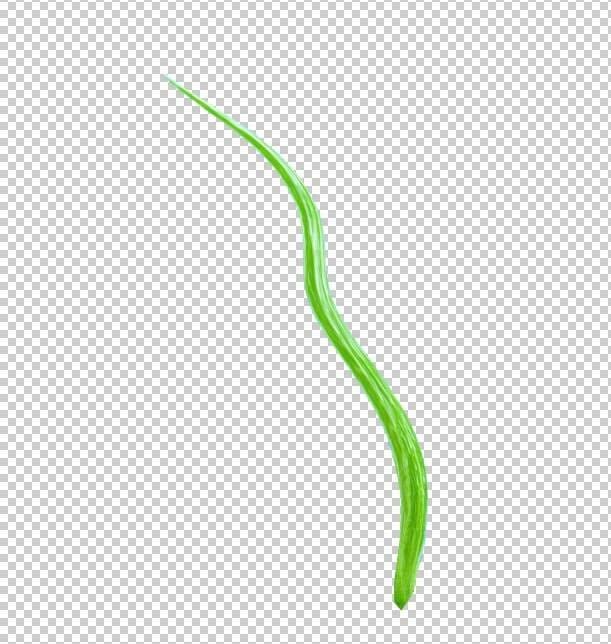

Step 31
Take three other leaves and use the same method to turn them into the curves. Place two of them onto the model’s back as done with the first one and the rest on another shoulder.

Add a mask to each of these layers to erase the bottom of the curves.

Step 32
Take different leaves to add to the model’s head and shoulders. Add a mask to each of these layers to hide the unwanted details.
One response to “How to Create a Flower Portrait Photo Manipulation With Adobe Photoshop”
-

nice.. very helpful.. thanks for sharing
Leave a Reply