
Step 27
Now in Camera Raw Filter, set the Value: Basic
- Temperature: -2
- Tint: +4
- Exposure: -0.20
- Contrast: +5
- Highlights: +18
- Shadows: -11
- Whites: +5
- Blacks: -4
- Texture: +15
- Clarity: +15
- Vibrance: +13
- Saturation:-7

Curves
- Lights: +10

Detail
- Sharpening: 10

Color Mixer Hue
- Reds: -2
Saturation
- Reds: +5
- Oranges: +8
Luminance
- Reds: +1

Radial filter
- Exposure: +0.20
- Highlights: +15
- Shadows: +15
- Blacks: +5

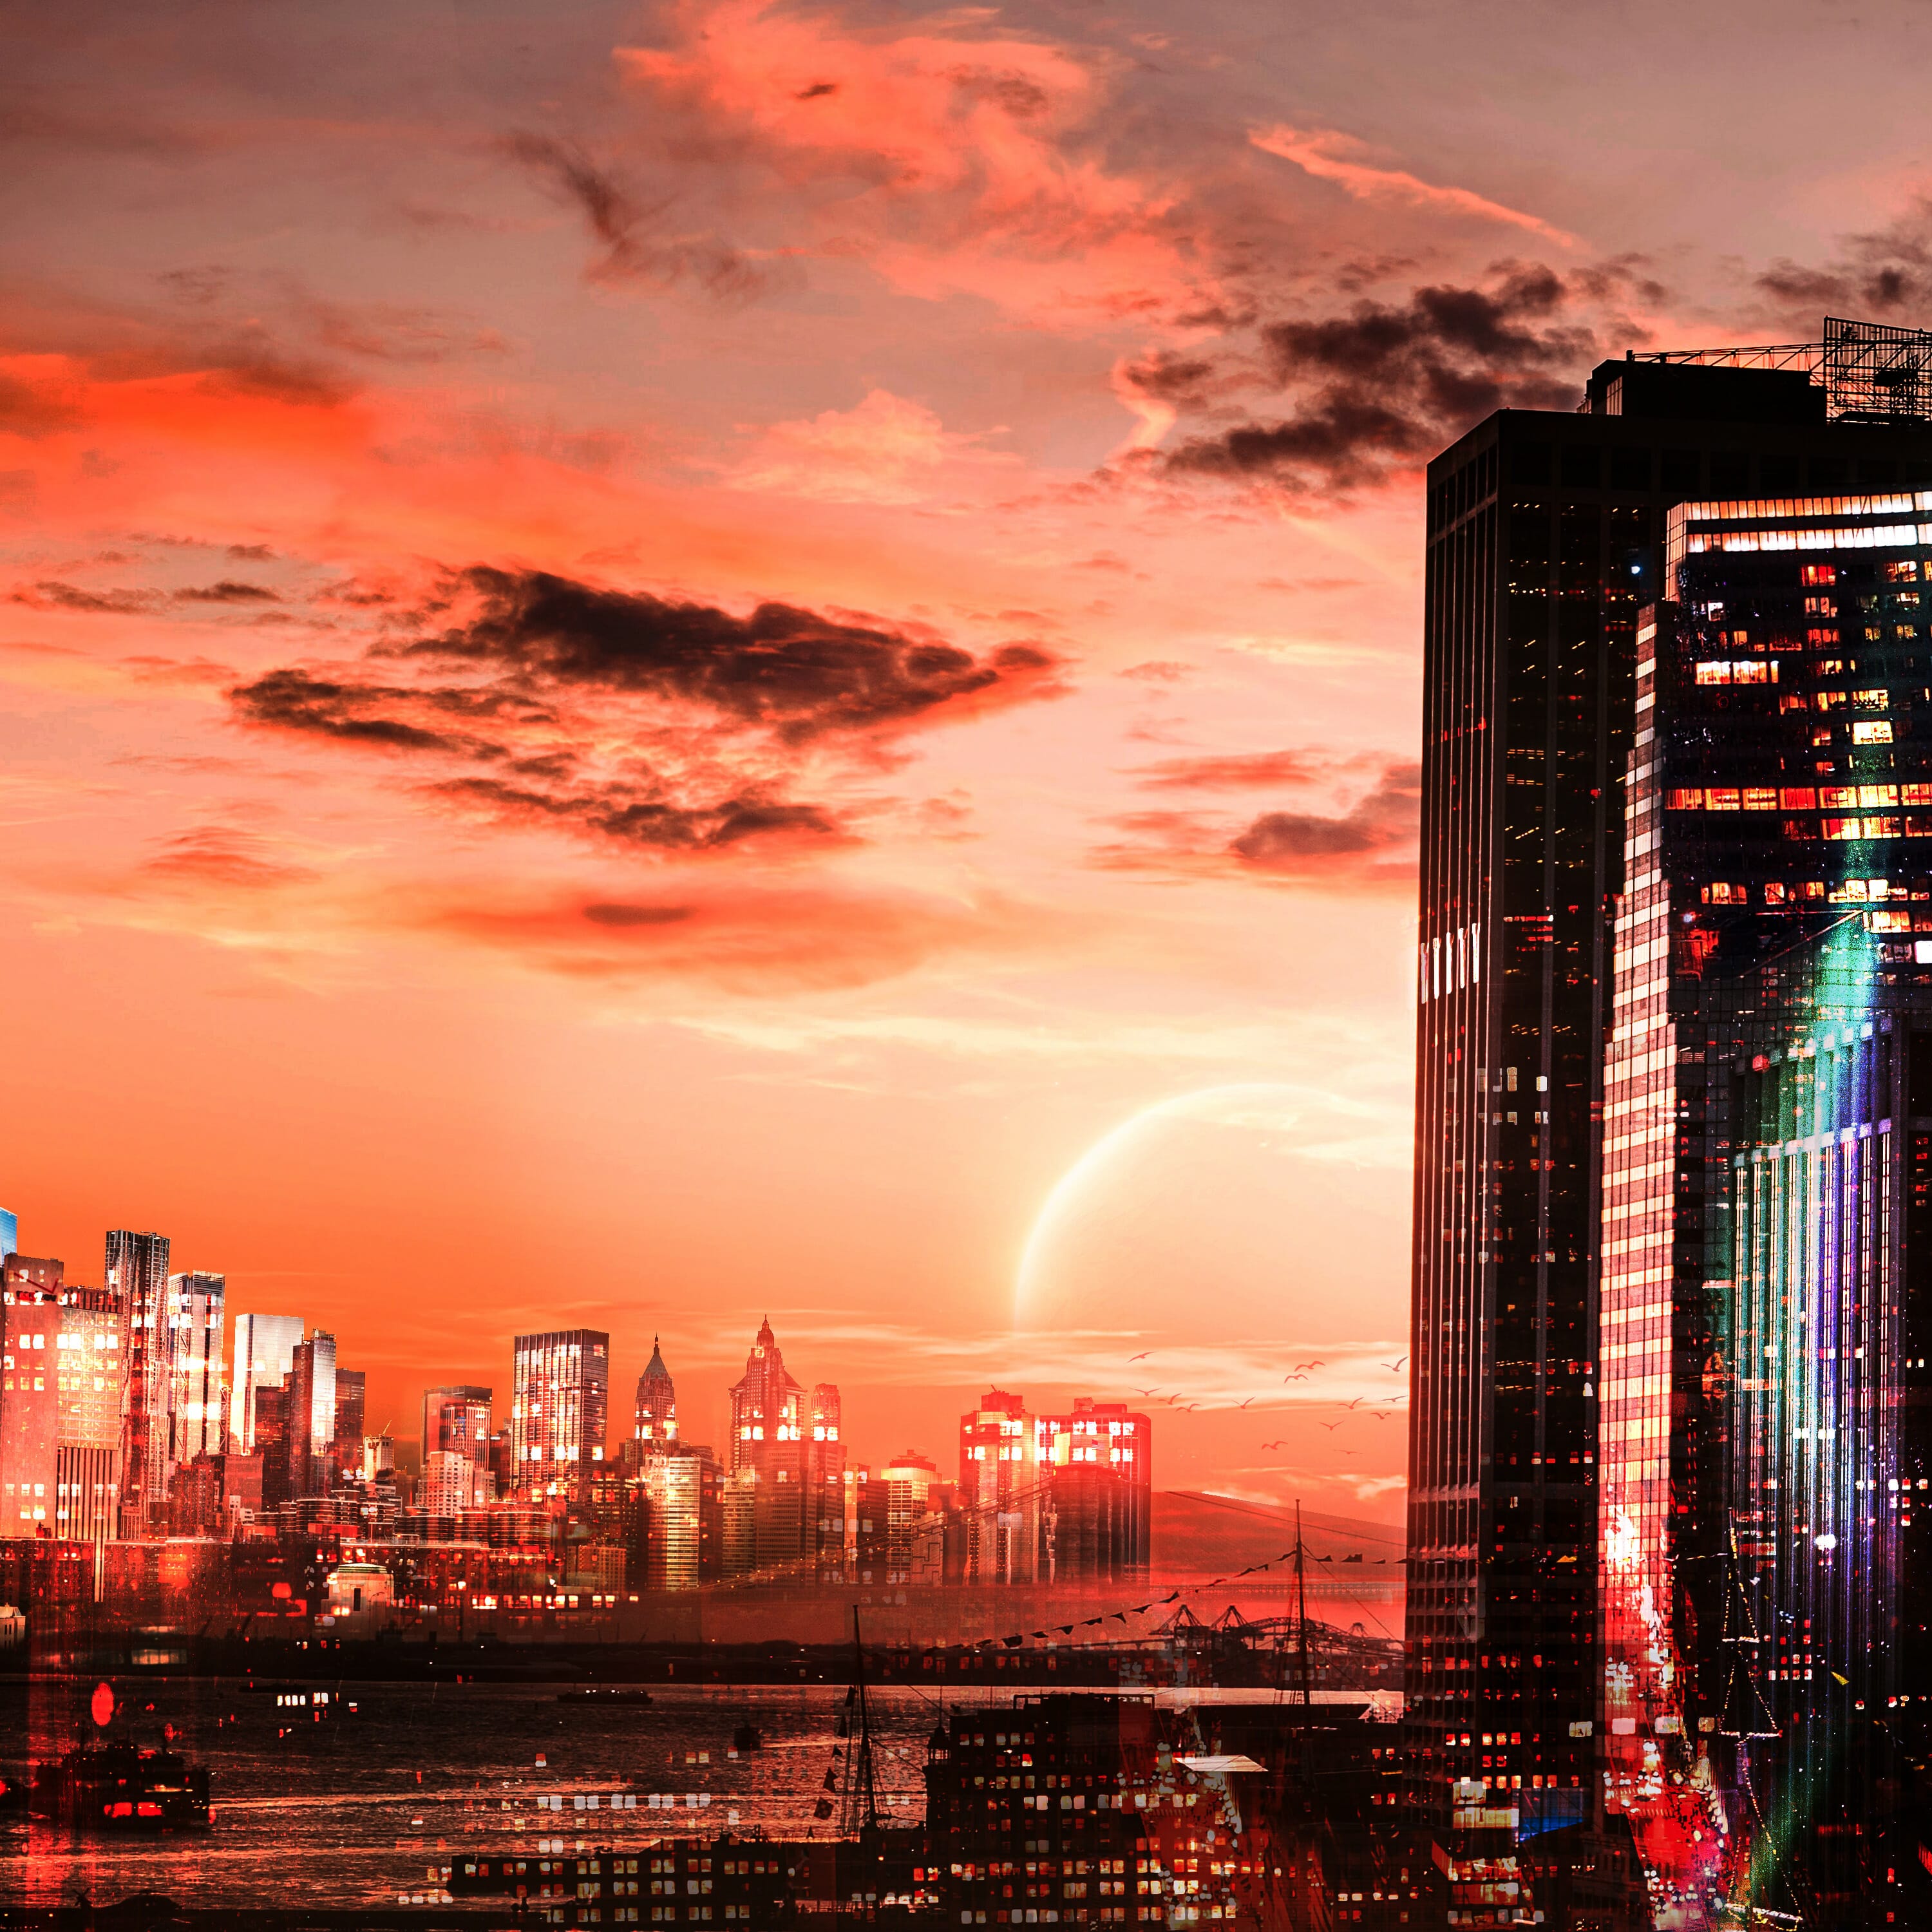
And finally, everything should look like this.

Final Results

Download the PSD
2 responses to “Create a Futuristic City Photoshop Tutorial”
-

aint futuristic tho just some normal city
-
got bit of rgb tho
-
Leave a Reply