


Step 9
Add Adjustment Layer “Exposure” and press Ctrl/Cmd + I to invert. Then use Brush Tool(B) Soft Round with foreground color white and paint.


Step 10
Add Adjustment Layer “Gradient Map” Blend mode change to Hue with Opacity 12%.

Step 11
Now, create more lights. Create a new layer and press right click “Create Clipping Mask” Blend mode change to Overlay.

Then go to Edit > Fill and Contenst: 50% Gray and press Ok.

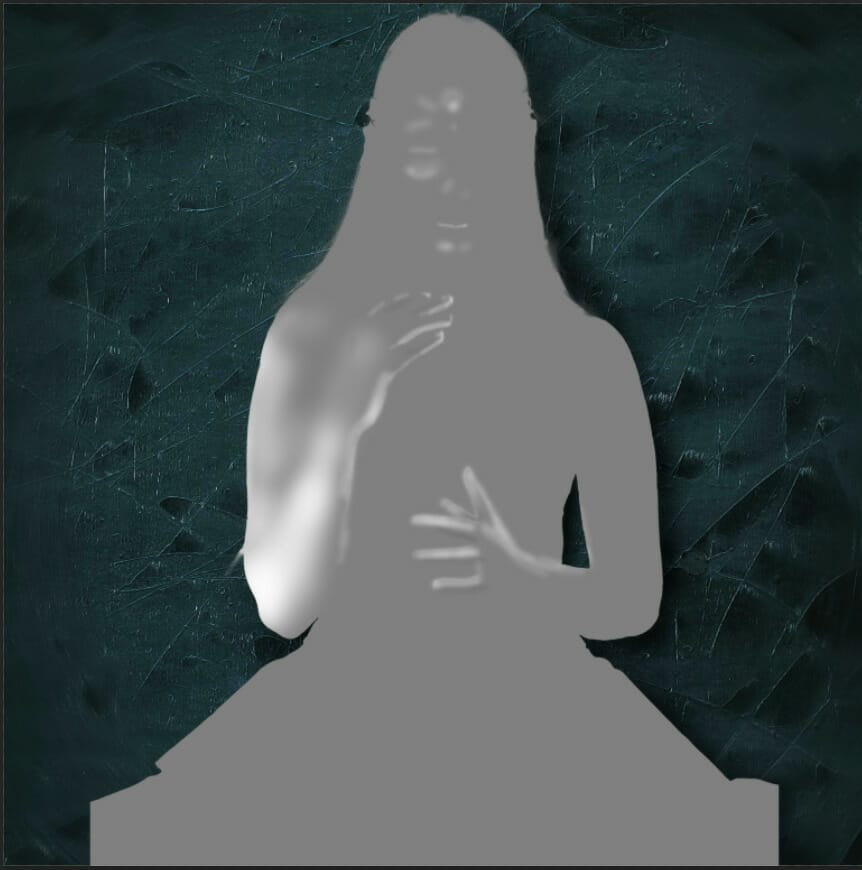
Now use Brush Tool(B) Soft Round with foreground color white and Brush Opacity set to 10-20%. Then start painting. Take a look at the example in the picture below how much you need to paint, where there is the most white color, draw the most.
Step 12
Next, place Texture Go to File > Place and select Texture. Then place it to our work canvas and position the image with the transform tool (Ctrl / Cmd + T). Hold Alt + Shift and rasterize like the image below. In Photoshop CC only hold Alt to rasterize all sides together and Create Clipping Mask.

Then Blend mode change to Multiply with Opacity 85%.
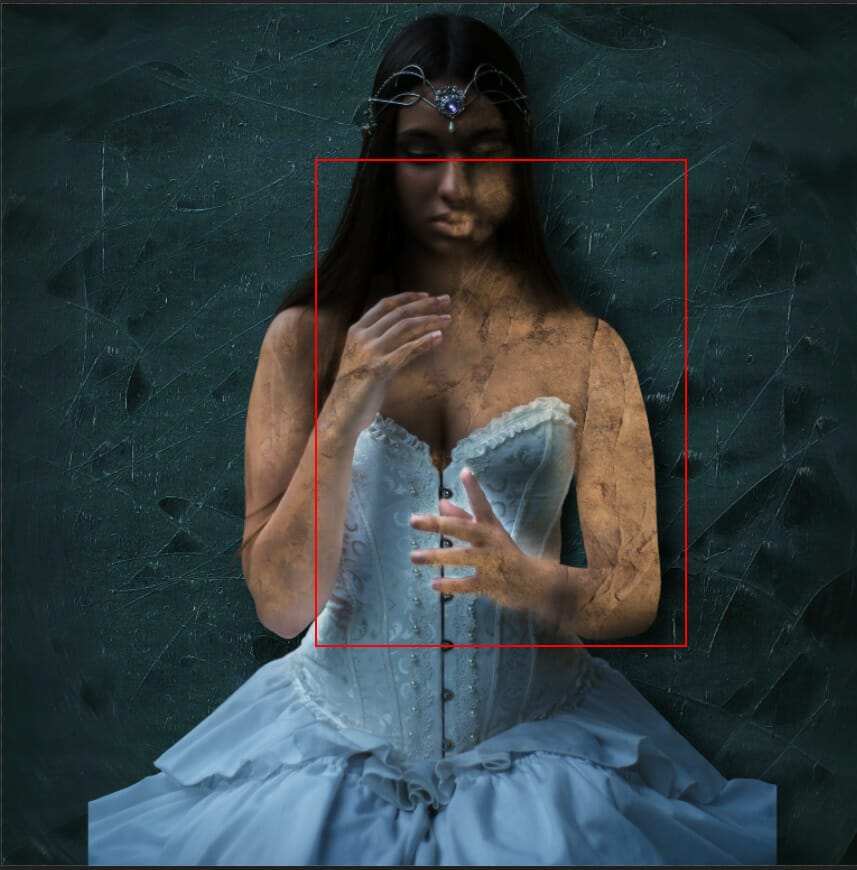
Use Brush Tool (B) Soft Round with foreground color black and paint on left side to delete it.

Step 13
Create a new layer with Blend mode Linear Dodge (Add) and use Brush tool (B) Soft Round with foreground color bright blue #699ba7 and paint some glow.

Step 14
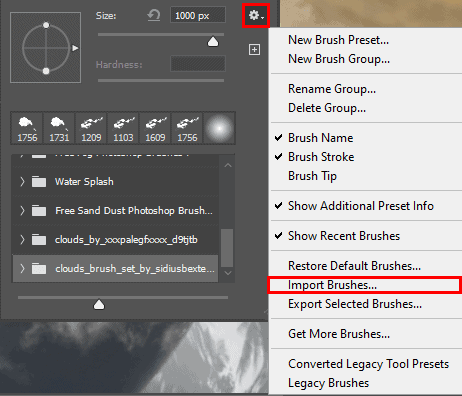
Next, we add Clouds but first we need to import brushes. Select a Brush Tool(B) and right click on background. Now click on the gear icon and Import Brushes (Select a downloaded brush).

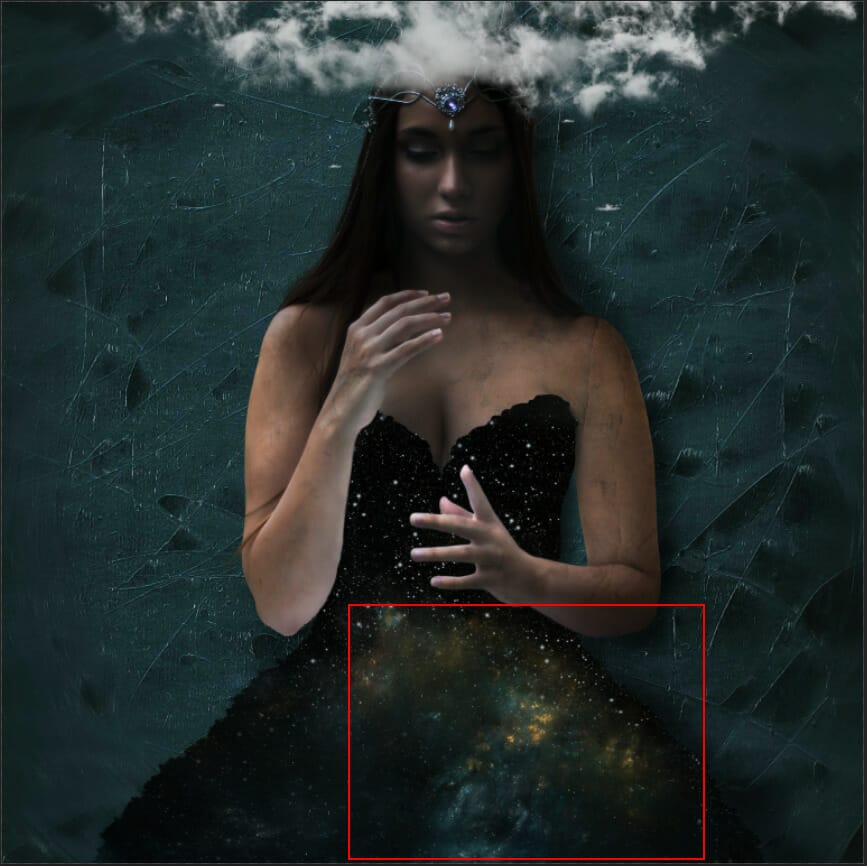
Now we can paint Clouds. Create a new layer and Foreground color use White.

Step 15
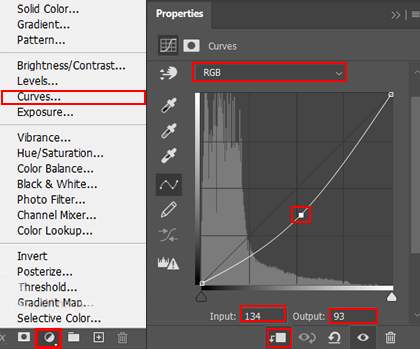
Add Adjustment Layer “Curves”

Step 16
Next, go to File > Place and select Stars Texture. Then create a layer mask and press Ctrl/Cmd + I to invert. Then use Brush Tool(B) Soft Round with foreground color white and paint on dress.


Step 17
Next, open Nebula Go to File > Place and select Nebula and repeat the same procedure as in Step 16. Now select Stars Texture and Nebula then put to folder (Ctrl/Cmd +G).

Step 18
Add Adjustment Layer “Curves”
Step 19
Now go to open Planet. File > Open and select Planet. Use Eliptical Marquee Tool(M). With the Eliptical Marquee tool, drag over the area you want to select. Hold down Shift as you drag to constrain the marquee to(release the mouse button before you release Shift to keep the selection shape constrained).
2 responses to “How to create a Galaxy Portrait in Photoshop”
-

thank you!
-
I really like this project, one question you did not include a link for the clouds!
Thanks
Leave a Reply