


The unblended Vignette will look like this:

Once the blending mode is set to “Multiply” it would look like this:
Step 39
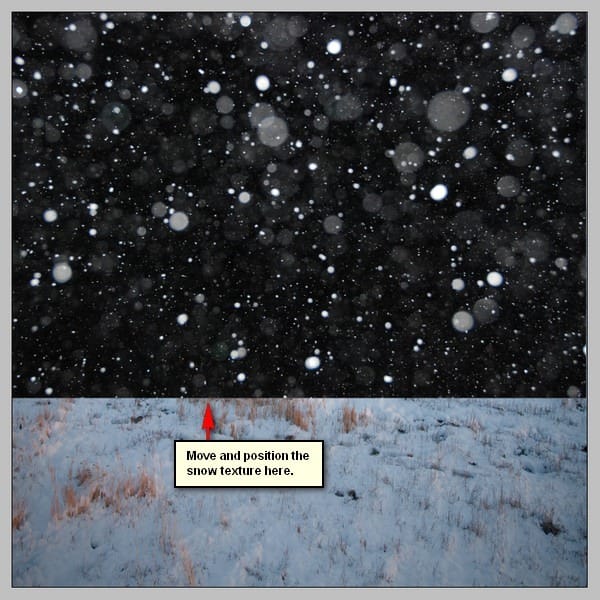
To enhance the Christmas feel, let’s add some snow textures. Let’s start, by opening the stock image – “snowing texture” by wchild. Once it is open, activate the Move tool (V) and drag it to our canvas. Position it on our canvas as shown below:
Next, activate the Transform tool (Ctrl/Cmd + T) and resize the texture as shown below:
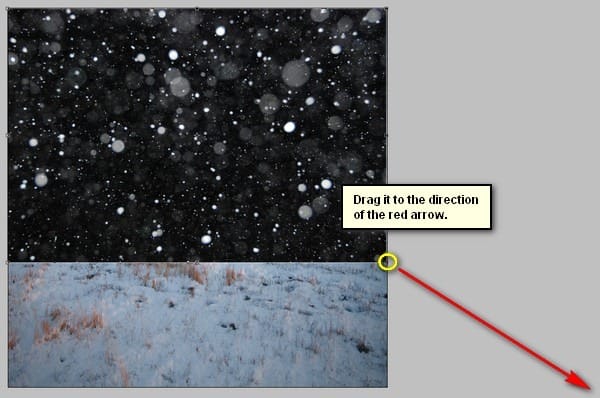
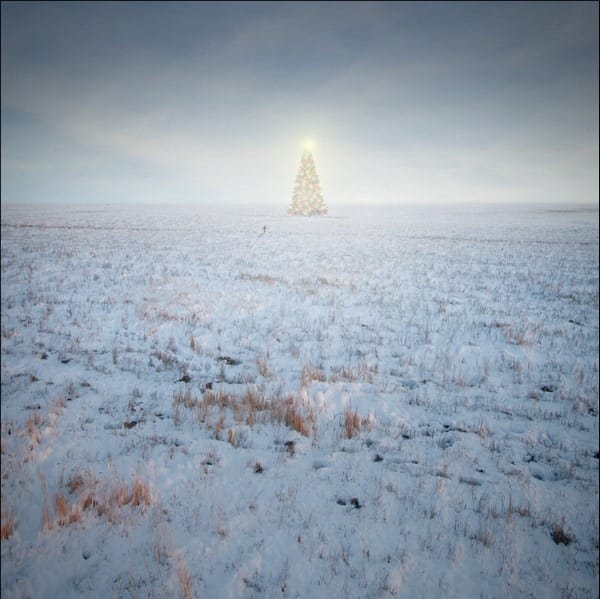
The result:

Step 40
Now, to make it blend with our image, just change the Blending mode and Opacity to the following:
- Blending mode: Soft Light
- Opacity: 70%

The result:

Step 41
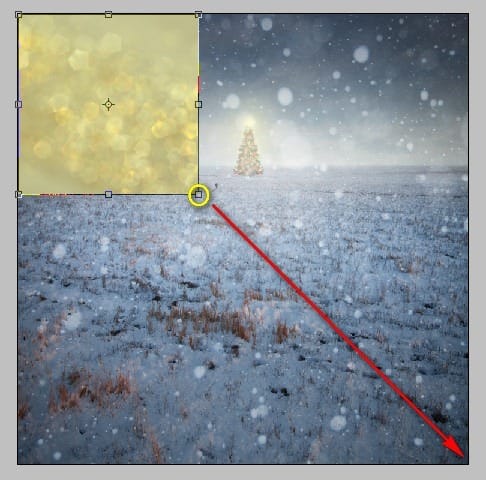
Next, let’s add the second texture – open the Glitter Bokeh Texture Pack zip file by regularjane and then unzip the files, once unzipped, choose “glitter bokeh1_8”. Activate the Move tool (V) and drag the image to our canvas. Position it as shown below:

Next, activate the Transform tool (Ctrl/Cmd + T) and resize it as shown below:
The result:

Step 42
Now, to make it blend with our image, just change the Blending mode and Opacity to the following:
- Blending mode: Soft Light
- Opacity: 40%

The result:

Now, select all these textures and then group them (Ctrl/Cmd + G). Name the group to “snow textures”.
Step 43
Let us now enhance color of our image. Start off by creating a Solid Color adjustment layer from the Create New Fill/Adjustment layer button on the Layer window.

Once the contextual menu opens, click on Solid Color:

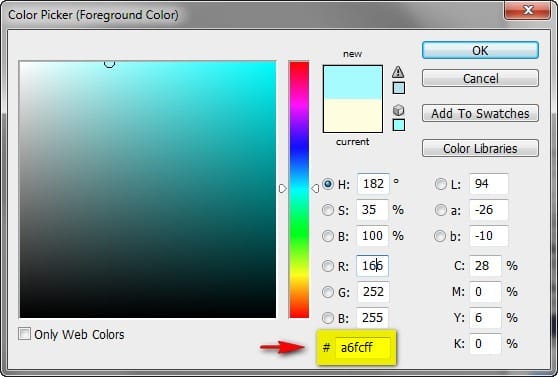
Now, clicking on the Solid Color option will open the Color Picker box. Set the color to #000627.

Step 44
Make sure to put this Solid Color layer above the “Textures” group. Once done, change the Blending mode and Opacity of this Solid Color layer to the following:
- Blending mode: Exclusion
- Opacity: 60%

Step 45
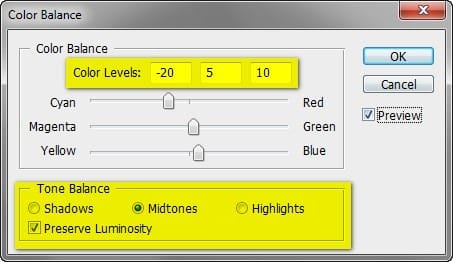
Next, let’s create a Color Balance adjustment layer from the “Create New Fill/Adjustment layer button”.

When it opens, input the following:
- Color Levels: -20, +5, 10
- Tone Balance: Midtones
- Preserve Luminosity: Check
Step 46
Next, let’s create another Solid Color adjustment layer from the “Create New Fill/Adjustment layer button”. Once the Solid Color box opens, input the following:
Step 47
Change the Blending mode and Opacity to the following:
- Blending mode: Linear Dodge (add)
- Opacity: 20%

Step 48
Once done, we will now move to the creation of a Gradient Map layer; from the “Create New Fill/Adjustment layer button” click on Gradient Map.
11 responses to “How to Create a Breathtaking Christmas Artwork in Photoshop”
-

i agree that they are almost the same i think the overlay is a little darker than soft light
-
Intgihss like this liven things up around here.
-
Awesome resources.Huge collection.Great job.Very useful post.Thanks for sharing.
-
That’s a shrewd answer to a tricky qutiosen
-
-
i cant download the snow feild????
-
What a great tutorial!!
Thank you so much -
nice concept and tutorial thank you !
-
very Nice Tutorial
Thank you so much -
You forgot to write about darkening sky in Step 9. Just about layer creating.
-
At step 8, “Change the Blending mode of “sky 2″ to Soft Light” but you changed it to Overlay..
Well, which one is it sir?
-
Soft light is about the same as overlay. Overlay is more contrast and saturation.
-
Leave a Reply