
If the effect doesn’t look the way you like it, you can scale the effect by going to Layer > Layer Style > Scale Effects.

Here’s what our image looks like so far.

Step 17
Add a splatter to the bottom using the same technique we used to create the drip. To do this, create a new layer then draw the splatter with the Pen tool. Right-click on the path then choose Make Selection. Fill the selection with a brown color. Complete it by copying the layer style from another layer and pasting it into the layer with the splatter (Layer > Layer Style > Copy/Paste Layer Style).

Step 18
To complete the image, draw in a few more drips using the same technique you used to create the first drip. Place the image of the cherries and you’re done!
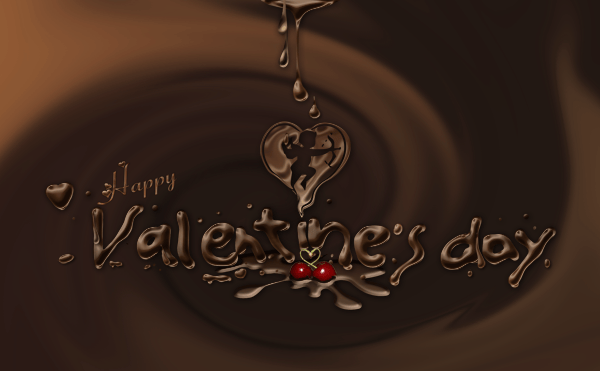
Final Results

Don’t forget to experiment with the colors! You can add Hue/Saturation adjustment layer (Layer > New Adjustment Layer > Hue/Saturation) to adjust the colors. Place this layer above the background layer.

Download the PSD
Authors Comment
 KMahesh is the author of howtouse-photoshop. He is on a mission to increase Photoshop literacy among all people in the world with this website. You can follow KMahesh on Twitter.
KMahesh
19 responses to “How to Create a Chocolaty Valentine’s Day Card for Your Girlfriend”
-

No step 15.
-
Who else thinks this is Amazing?
-
Hand raised
-
-
amazing im eating this its awesome cool 4 lyfe unstopable
-
cool, but how to make the love shape like that?
-
i have downloaded the psd , but unable to edit the letters … i want to put my name .
If not can someone help me in creating a logo/signature to keep for all my photographs ?
Thanks,
Jas. -
Looks great, definitely try to do myself.
-
Very difficult.
Do not recommend unless you like tearing your hair out. -
Very difficult
-
It’s gorgeous and very easy, thanks a lot for this tutorial, i inspired to make my logo.
-
**** this
-
Agreed
-
-
where to get these font? how are they called?
-
The author didn’t use any font – it was hand-drawn (see step 5)
-
-
but I don’t have a girlfriend
-
i can be ur girlfriend :)
-
-
Thanks for this tutorial
-
this easy to do
Leave a Reply