

Step 23
Create a Hue/Saturation adjustment layer (set as Clipping Mask) and bring the Saturation values down to -19:

Step 24
Add a Color Balance adjustment layer and change the Midtones settings:

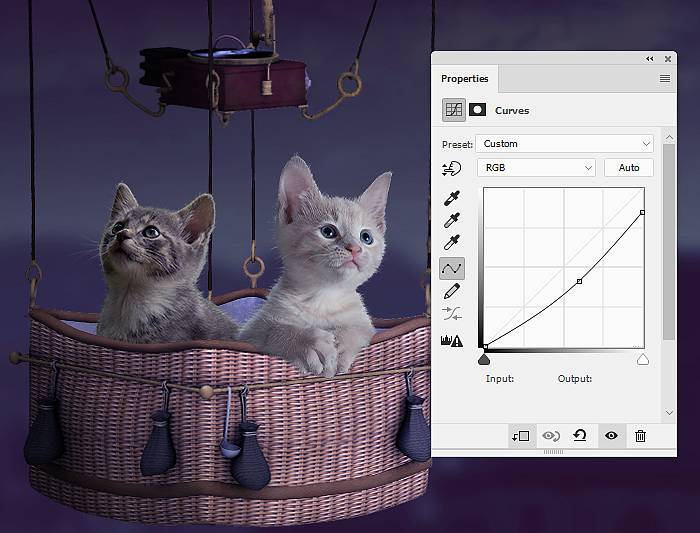
Step 25
Create a Curves adjustment layer to darken the cat. On this layer mask, use a soft black brush to reduce the dark effect on some areas on the cat’s cheek and body.

Step 26
Make a new layer, change the mode to Overlay 100% and fill with 50% gray. Use the Burn Tool to darken some details on the cat.

Step 27
Open the kitten 2 image and cut out him from the background. Copy the isolated cat into a new layer and make a Color Fill layer between the background and the isolated one (I’ve picked the color #e0d0c7).

Create two layers and select a small brush with the colors #8b8b83 and #eff3f6 to paint the missing furs for the cat.


Step 28
Merge all transparent layers (the cat and the fur ones) and move him into our working document. Place him on the right of the first cat. Add a mask to this layer and use a medium hard black brush to erase the part on his left arm.

Step 29
Create a Hue/Saturation adjustment layer and reduce the Saturation values to –25.

Step 30
Add a Color Balance adjustment layer and alter the Midtones settings:

Make a Curves adjustment layer to darken the cat.
Step 31
Create a new layer, change the mode to Overlay 100% and fill with 50% gray. Use the Dodge and Burn Tool to refine the light and shadow on the cat.

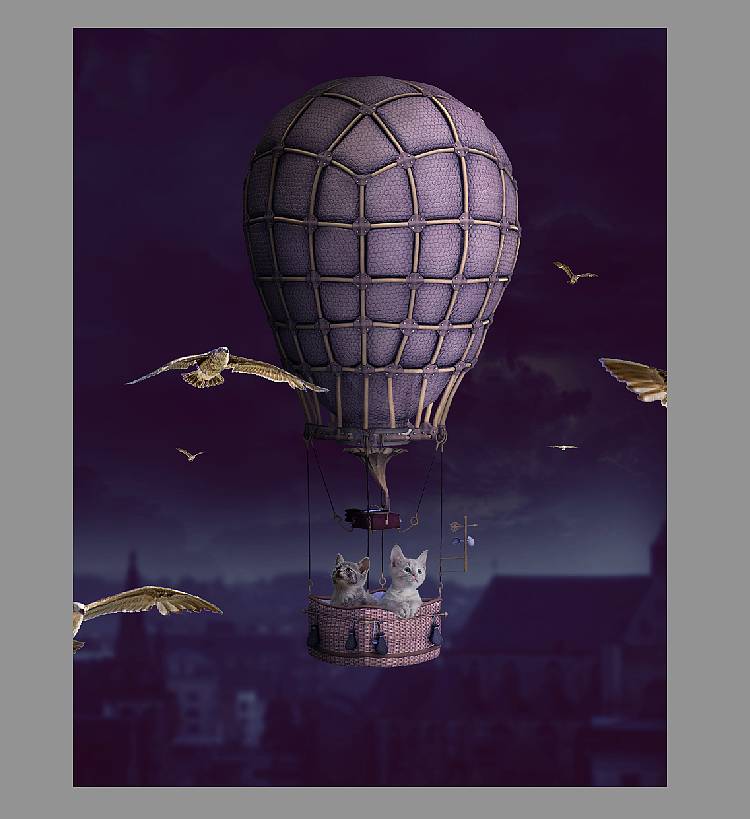
Step 32
Open the birds image and use the Magic Wand Tool (W) to isolate the birds from the background. Use the Lasso Tool to select different birds to add around the canvas. Use Ctrl+T to vary their size to increase the depth of the scene. Place one beside the envelope of the balloon to fit the look of the first cat and one on the right side to fit the look of the second cat. Convert all of these layers to Smart Objects.
Step 33
On each of the small bird layers, apply a Gaussian Blur of 3 px to fit the softness of the background.

On each of the big bird layers, apply a Gaussian Blur of 8 px.

Step 34
Make a new layer above the bird one beside the envelope and use a small brush with the color #73624e,, the opacity about 36% to remove some light details on the left wing and body.
6 responses to “How to Create a Fantasy Fly Photo Manipulation with Adobe Photoshop”
-

Beautiful 😍
-
Hi! in step 18, what is the envelope layer?
-
You can download the psd and see the layer structure
-
-
This is neat! Thank you!
-
Lovely! Many thanks
-
Great jop
Leave a Reply