
Step 10
Use the Rectangular Marquee tool to create a selection near the picture frame like shown in the image below. The selection doesn’t have to be precise; it just needs to be a little extended from the middle.

Step 11
With the Photos group selected, click on the Add Layer Mask button. This will create a layer mask from the selection you made in the previous step.

Step 12
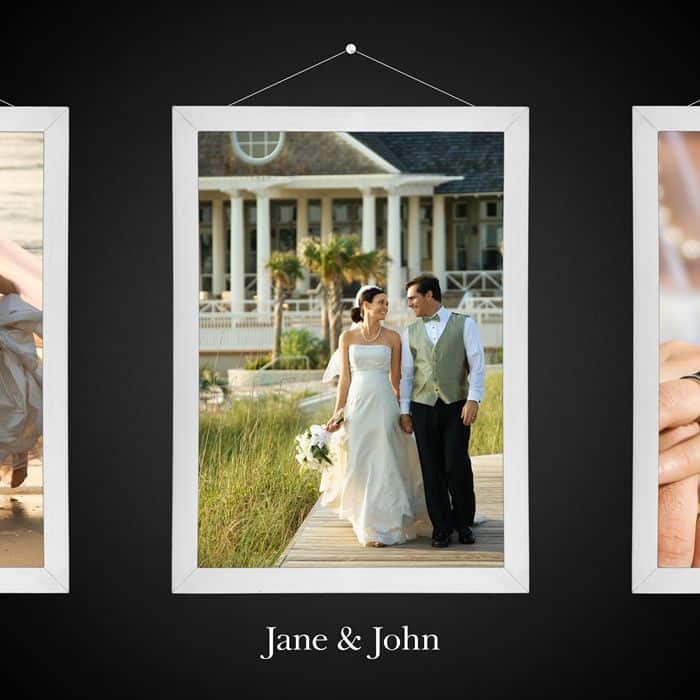
Now it’s time to place your photos! Go to File > Place, browse for the photo you want to add, then click OK. Scale the image to the size you like. Just like before, if you hold the Shift key while scaling, Photoshop will preserve the aspect ratio of your image so that it doesn’t get distorted. You can scale the image larger than the size the frame.

Step 13
Drag the layer with your photo into the Photos group.
Your photo will now appear inside the frame.

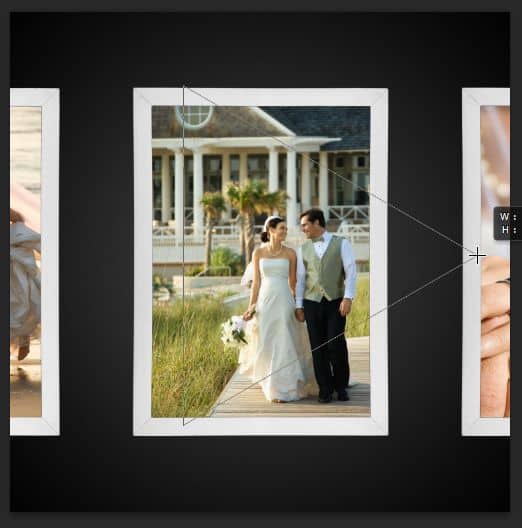
Step 14
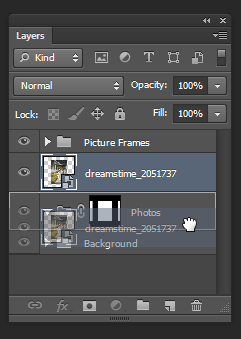
Repeat the previous two steps with two more photos for the left and right frame. You should now have 3 layers like shown in the image below.

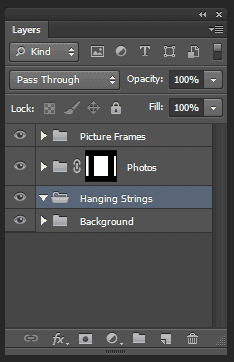
Step 15
Create a new group called “Hanging Strings” and position it above the Background layer.
Step 16
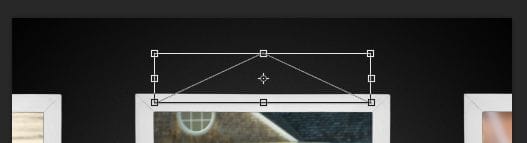
Select the Polygon tool.
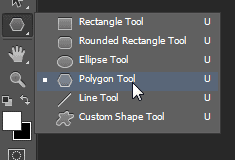
In the option bar (located at the top), set the fill to none, stroke to 3 pt, and sides to 3. These options are only available in Photoshop CS6.

Holding the Shift key, draw a triangle like shown in the image below. With the shift key held down, Photoshop will constrain your triangle so that one side is 100% vertical/horizontal.
Step 17
Go to Edit > Free Transform. Hold Shift and rotate the triangle so that the bottom side is horizontal. Next, scale and position the triangle like shown below. Don’t apply this transformation yet.

Drag the top-center point downwards to compress the height of your triangle. It should look like the image below. Press Enter to apply the transformation.
Step 18
The string is done and now we’re going to create a metallic pin. Select the Ellipse tool.

Before we draw, create a new layer above your string layer. This will tell Photoshop to add the next shape we draw on the new layer instead of adding it to the existing shape layer. Create a circle like shown below.
8 responses to “Create a Skeuomorphic Wedding CD Cover Using Only Nondestructive Layers”
-

This is perfect for a wedding photographer! Great post!
-
Wow, these are really creative! They remind me of those Chip Fosse drawings from Overhauling’. Great work!
-
I’ve the C6 but could not find the poly option for 3 sides…also I couldn’t find the steps for text. Thanks i advance for help it is appreciated.
-
I have a problem man when I tried to save it as picture A window came and reporting that the operation couldn’t be completed!
What I do :(? -
Thanks brother for good work and perfect design I just made changes that I just made metallic with LAB instead of HSB
and thanks again finished like you exactly . :) ^^ Yours:Alaa -
Oh goodness!!Simple tutorial and nice :DBut i wanna ask how could you do the 10 step above?I mean, i just got one selection rectangular tool ( middle only)
How to make the selection as above?-
@ZakiiAydia hey man to make many selections just press shift when you are making new selection will make it with the previous selection and press again shift and will again make the third selection :D .
Hope it works ^-^.
-
-
Your organizational skills are marvelous! This is a nice tutorial! Thank you
Leave a Reply