
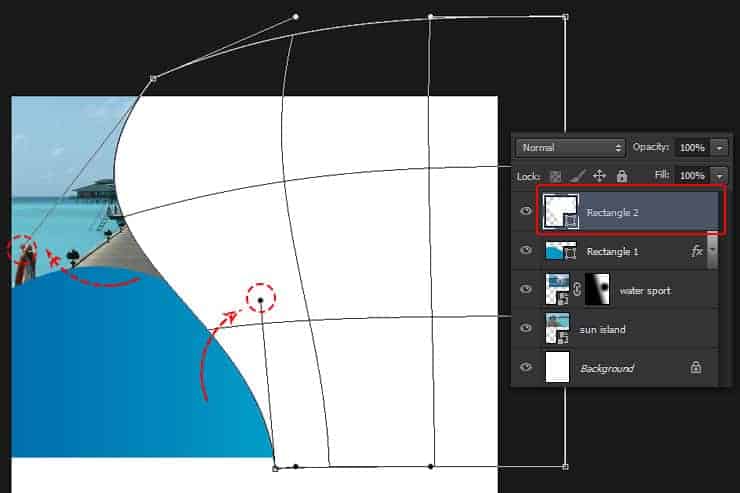
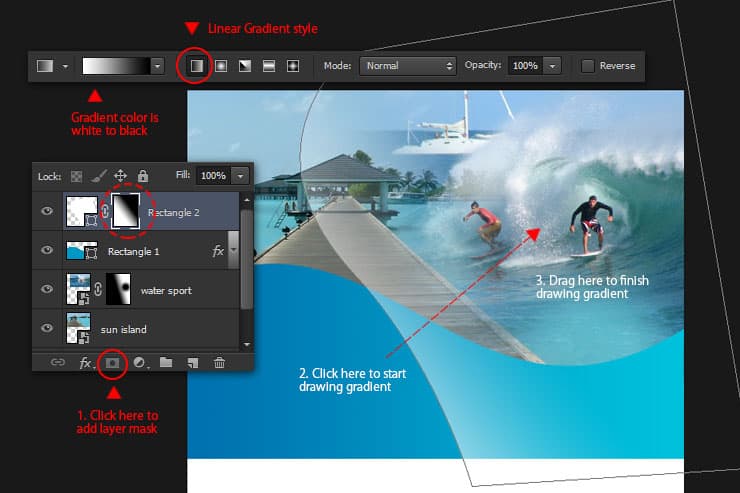
Step 9
Add layer mask into current shape’s layer. Draw white to black linear gradient using gradient tool, drag diagonally from bottom left to the top right corner of the white rectangle. If done right, you should get some nice “glossy” effect as shown in image below.
Step 10
Draw a blue filled (#005c98) ellipse shape with the Ellipse tool. Use the transform command Ctrl+T to adjust the blue ellipse’s size and position as shown in the image below.

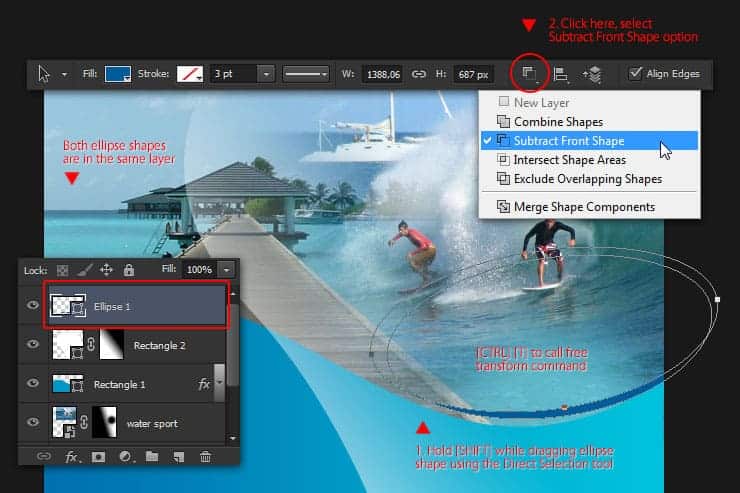
Step 11
With the blue ellipse selected, press Ctrl+C to copy it to clipboard. Press Ctrl+V to paste the blue ellipse we copied earlier. Duplicate blue ellipse shape, upscale until it gets a bit larger then the previous ellipse. Alter the path option to Subtract Front Shape. This way, the first ellipse shape will be cut by the second one, leaving a ‘curvy shape’ as a result.
Step 12
Still on the shape layers, go to the path option and then click the Merge Shape Components button. Those ‘curvy shape’ should be merged by now.

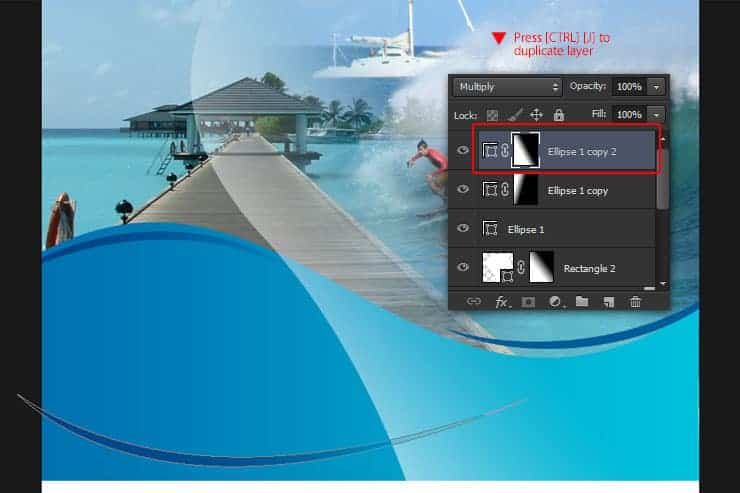
Step 13
Duplicate the ‘curvy shape’ layer, flip it vertically using the Edit > Transform path > Flip Vertical. Use the Move tool to drag it all-the-way to the left and then change the blend mode to multiply.

Step 14
Add layer mask to ‘curvy shape’ layer, use the linear Gradient tool to hide half-right side of the shape.

Step 15
Repeat step 13 – 14 to get another curvy shape layer for the canvas bottom. Use Free Transform command to upscale its size.
Step 16
Select all layers, except the background, water sport and sun island layer. Hit Ctrl+G to group selected layers. Double click the newly created layer group, so now you can rename it to “blue shape”. This step is optional, but i usually group my layers to maintain orders and simplify things.

Step 17
On the top of ‘blue shape’ folder, draw a pale brown (#efe0c9) rectangle using the Rectangle shape tool.
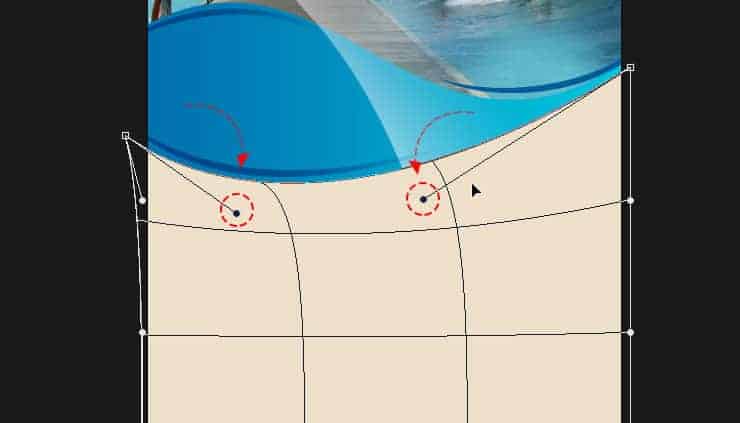
Step 18
Use the Edit > Transform Path > Warp menu again to curve the rectangle’s topside. See image below for your reference. Hit Enter to apply warp command.
Step 19
Add another dark brown (#b19e90) rectangle to the bottom, around 425 pixels height. Use the warp command again to curve the topside of the rectangle.
14 responses to “Create Your Own Travel Brochure Using Only Photoshop”
-

hi every one lol XD ヅ
-
hi every one
-
hey
-
who dis
-
-
legendary Austin
HI I WOULD LIKE TO KNOW HOW TO CREATE A SHAPE ON TOP OF ANOTHER LAYER ON THE TUTORIAL IS NOT CLEAR WHAT TO DO.
Fantastic tutorial. Love your work you are truly talented
ok
This tutorial go against Alaluh,,,, Very not good. You will pay ffore this,,,
-
Day is now,,, ready for achmed you bete
First of all how dare you make this awful tutorial. I just thirty minutes of my life making a gosh darn arrow that’s small /:(
Thanks, very helpful!!!
Hi, Wayang Puppet link takes me to 410-Image Not Available. Do you have another link to the image? Thanks.
-
Sorry, I meant Shrine Temple link takes me to a 410 page.
Leave a Reply