
Step 20
Add white rectangle shape for the left side of the canvas. Recall the warp command to curve the top and right side of the rectangle.
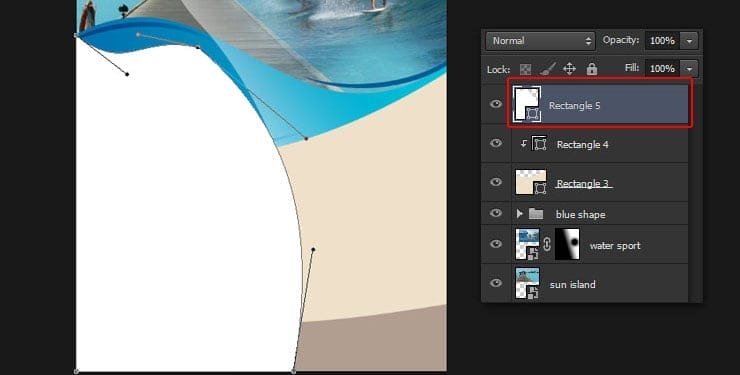
Step 21
Still in the white rectangle layer, change the blend mode to soft light. Press Alt+Ctrl+G to apply clipping mask layer.

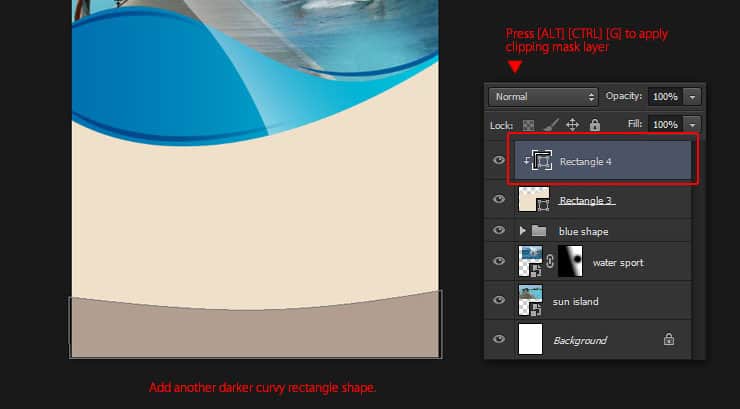
Step 22
Draw a black rectangle shape on the top right of the canvas, set the width to 952 pixels and height to 460 pixels.

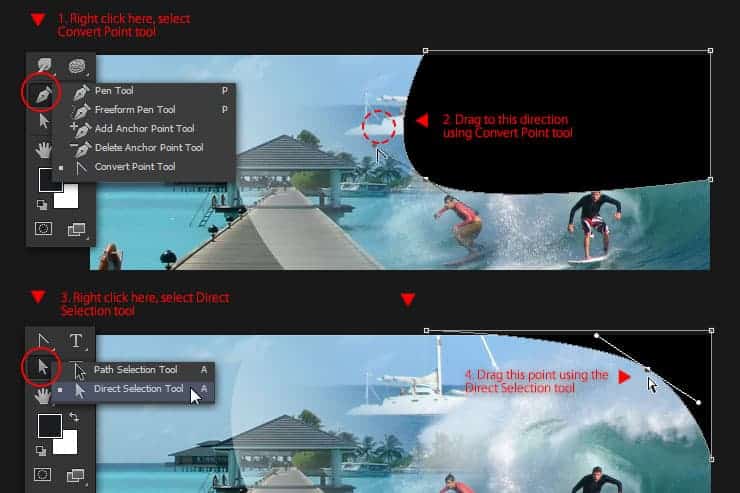
Step 23
Drag the black rectangle’s left bottom point using Convert Point tool to convert the sharp angle into round. Drag the same point to the top-right position with the Direct Selection tool.
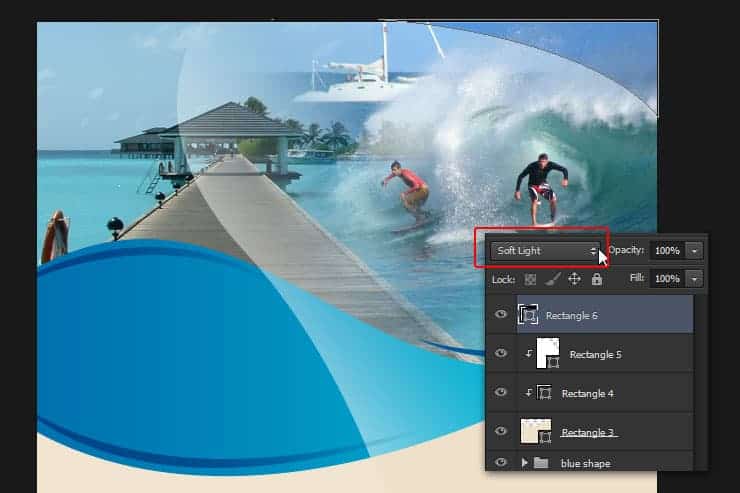
Step 24
Change the black rectangle’s blend mode to Soft light. This will change its appearance into semi-transparent black color.
Step 25
Add a new layer. Activate the Brush tool and pick the soft round brush. Adjust brush size around 1300 pixels, set the brush color to white and set the brush opacity to 30%. Click 2-3 times on the same spot within the blue curvy shape area. This will generate a soft white highlight as the result.

Step 26
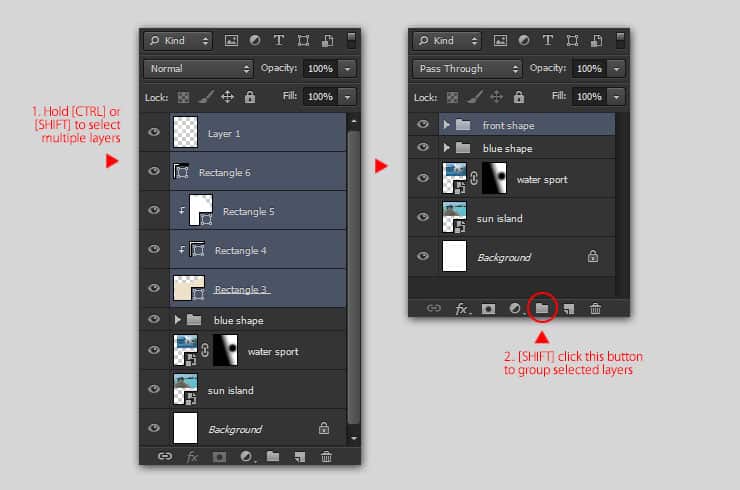
Select five layers you just created and then group them all. Rename the group to “front shape”. Don’t forget to Save the document by clicking File > Save menu.
Step 27
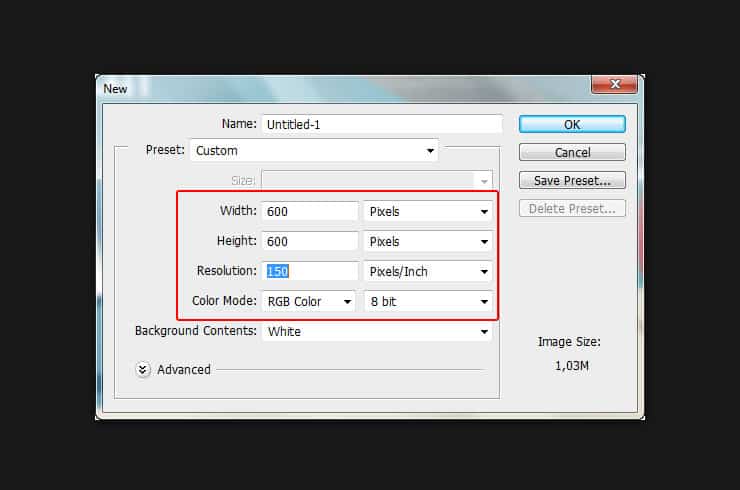
Press Ctrl+N to create a new document. Set the width to 600 pixels, height to 600 pixels and the resolution to 150ppi.
Step 28
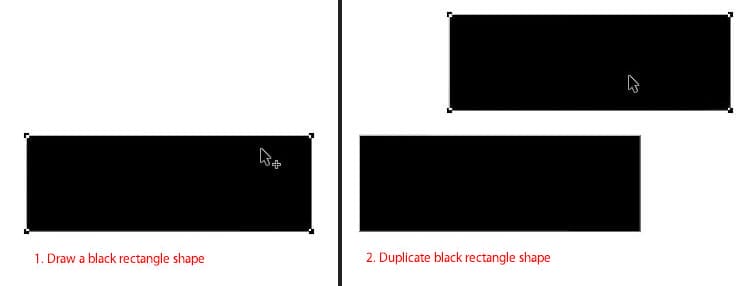
Draw a 300×100 pixels black rectangle shape. Duplicate the black rectangle by holding Alt while dragging it with the Path selection tool.
Step 29
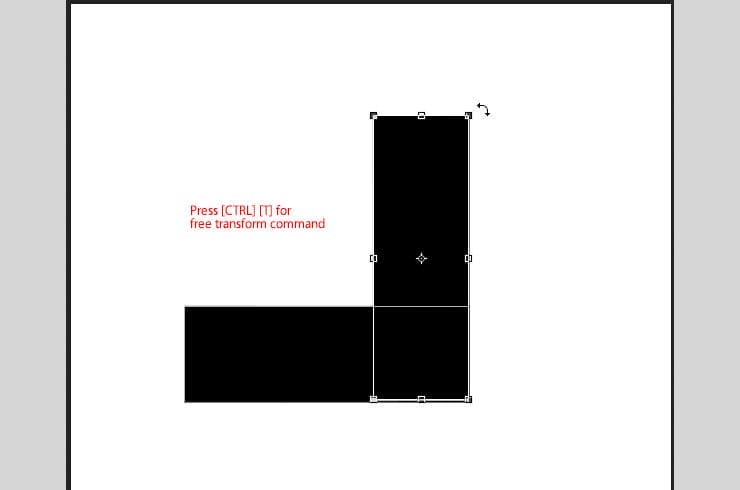
Rotate and move one of the black rectangle, to form a flipped “L” letter.
Step 30
To make sure both black rectangles align perfectly, select them using the Path Selection tool and then click the Align Right Edges button from the option bar.

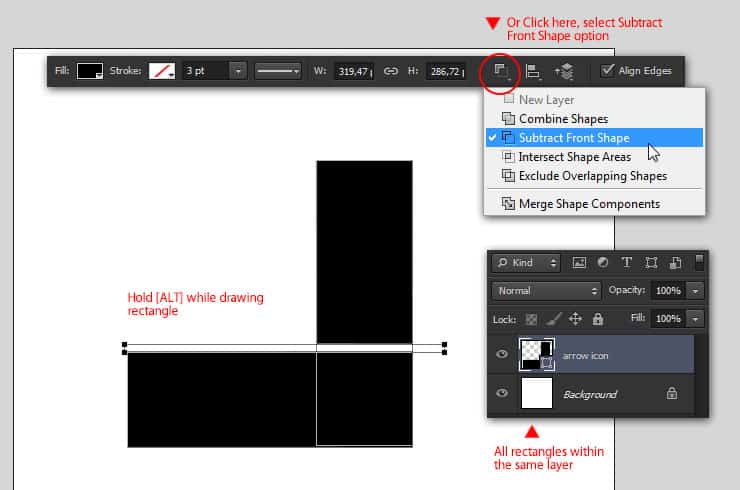
Step 31
Draw a thin rectangle horizontally. Select the Subtract Front Shape option for it, resulting a horizontal cut for the black rectangles.
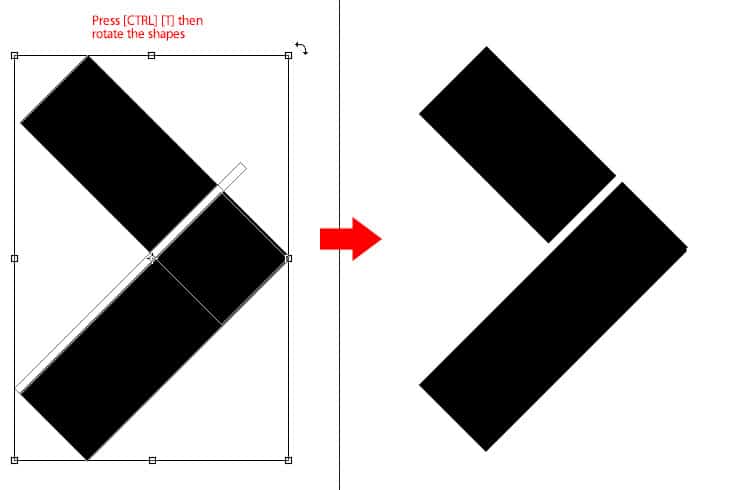
Step 32
Click outside canvas or blank space to deselect all rectangle shapes. Use the free transform command to rotate the shape until it looks like a ‘greater than’ symbol.
Step 33
Select the Merge Shape component button from the option bar. This will merge all three rectangles together.
14 responses to “Create Your Own Travel Brochure Using Only Photoshop”
-

hi every one lol XD ヅ
-
hi every one
-
hey
-
who dis
-
-
legendary Austin
HI I WOULD LIKE TO KNOW HOW TO CREATE A SHAPE ON TOP OF ANOTHER LAYER ON THE TUTORIAL IS NOT CLEAR WHAT TO DO.
Fantastic tutorial. Love your work you are truly talented
ok
This tutorial go against Alaluh,,,, Very not good. You will pay ffore this,,,
-
Day is now,,, ready for achmed you bete
First of all how dare you make this awful tutorial. I just thirty minutes of my life making a gosh darn arrow that’s small /:(
Thanks, very helpful!!!
Hi, Wayang Puppet link takes me to 410-Image Not Available. Do you have another link to the image? Thanks.
-
Sorry, I meant Shrine Temple link takes me to a 410 page.
Leave a Reply