
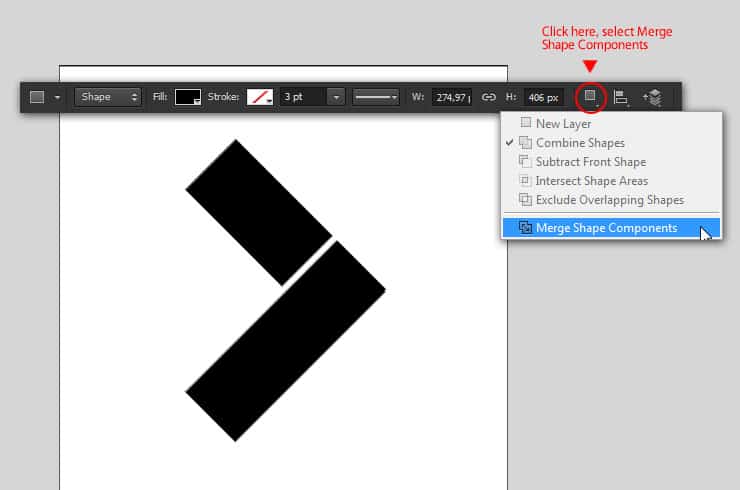
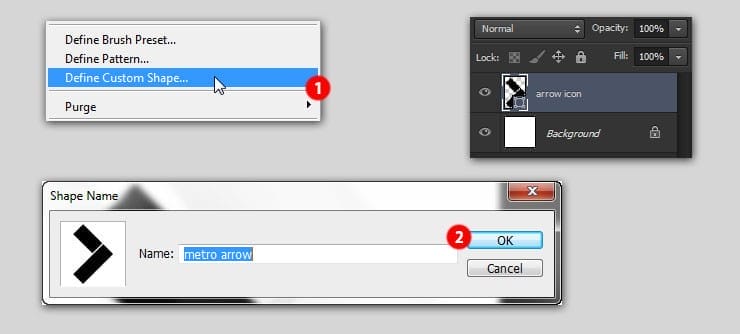
Step 34
Go to Edit > Define Custom Shape menu, name it “metro arrow”, then click OK. This is the way to save your custom shape, so you can easily use it to another document just by drawing with the Custom Shape tool.
Step 35
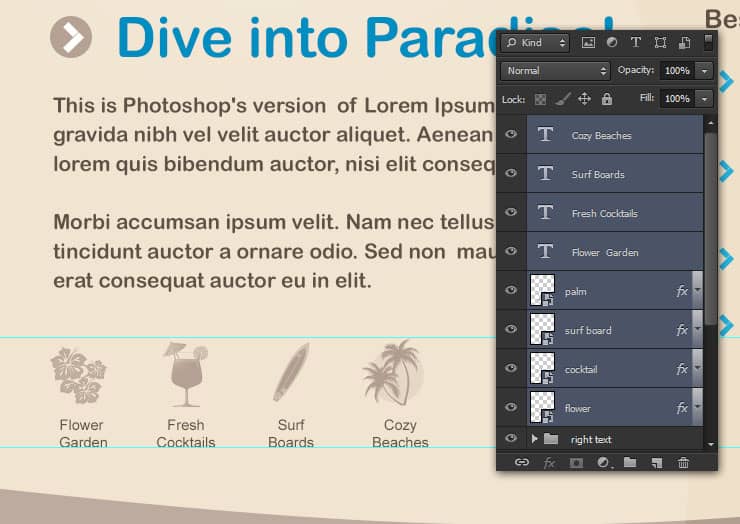
Now back to our first document window, the one with the sun island and water sport picture. Draw a dark brown circle (#b5a294) with the Ellipse tool. Write a blue (#018dc0) header text and two dummy paragraphs using the Horizontal Type tool.
In case you didn’t know, Photoshop can make this step easier by providing the placeholder text, which is accessible from the menu Type> Paste lorem ipsum. What you need is create a paragraph text box in order to make the menu available.

Step 36
Grab the Custom shape tool, set the color to white. Choose and draw the “metro arrow” shape inside the dark brown circle.

Step 37
Select the four layers, group it in a folder named “left text”.

Step 38
Add more text on the document’s right side, which is a brown header text and four bullet list paragraph. Draw four metro arrow shape as the bullets, but this time set the color to blue.

Step 39
Grab the Brush tool. From the option bar, set brush opacity to 50% and choose dark brown as the brush color. Click the brush option button, choose Load Brushes. Search and load the desired custom brush, in this example isbeach icon brush.
In the load brush dialogue box, click the Append button. This shall adds beach icon brush to the brush list, not replacing them.

Step 40
Add a new layer with the name “flower”. Pick a flower shaped brush and click once on the canvas to draw it.

Step 41
Downscale the flower with the free transform command. But before that, make sure you already convert it to smart object first.

Step 42
Using the Type tool, add subtitle “Flower Garden” below flower shape.

Step 43
Add more beach icons with the Brush tool. Convert it to smart object, make it smaller and don’t forget to add subtitles below each of them.
Step 44
Select the beach icons dan subtitle layers, group them as usual. Rename the group to ‘features’.
14 responses to “Create Your Own Travel Brochure Using Only Photoshop”
-

hi every one lol XD ヅ
-
hi every one
-
hey
-
who dis
-
legendary Austin
-
-
HI I WOULD LIKE TO KNOW HOW TO CREATE A SHAPE ON TOP OF ANOTHER LAYER ON THE TUTORIAL IS NOT CLEAR WHAT TO DO.
-
Fantastic tutorial. Love your work you are truly talented
-
ok
-
This tutorial go against Alaluh,,,, Very not good. You will pay ffore this,,,
-
Day is now,,, ready for achmed you bete
-
-
First of all how dare you make this awful tutorial. I just thirty minutes of my life making a gosh darn arrow that’s small /:(
-
Thanks, very helpful!!!
-
Hi, Wayang Puppet link takes me to 410-Image Not Available. Do you have another link to the image? Thanks.
-
Sorry, I meant Shrine Temple link takes me to a 410 page.
-
Leave a Reply