
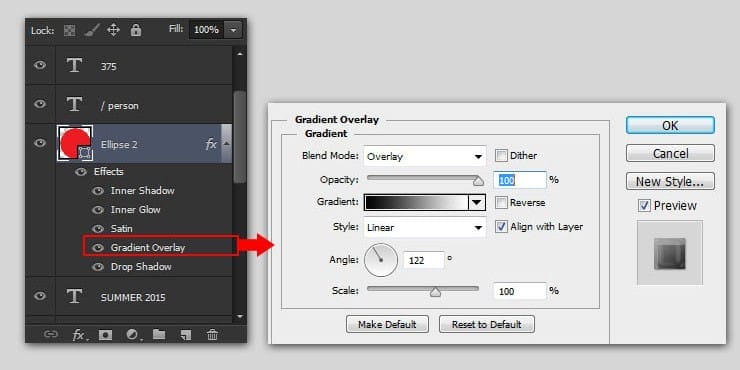
Step 60
Add Gradient Overlay layer style. Change the blend mode to Overlay, set gradient color from black to white, Style is Linear, and adjust the Angle around 122 degrees.
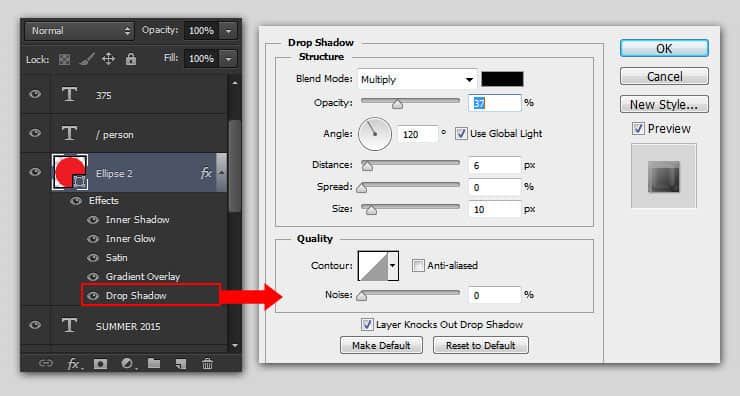
Step 61
Add Drop Shadow layer style. Decrease the drop shadow opacity to 37%, set the Distance to 6 pixels and Size is 10px. Click OK to apply all layer styles we’ve been setting from Step 57.
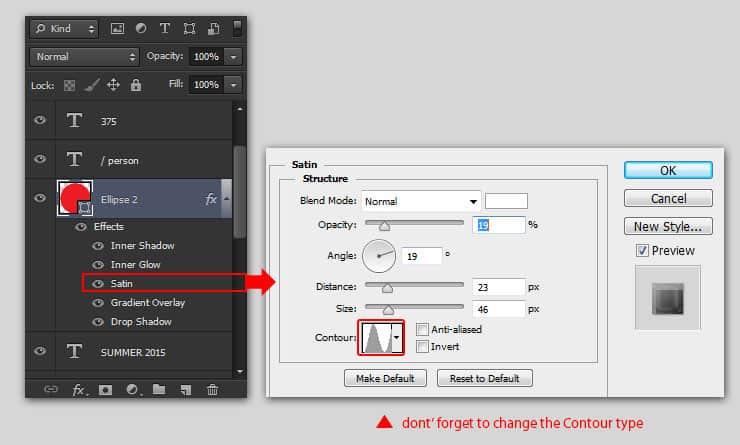
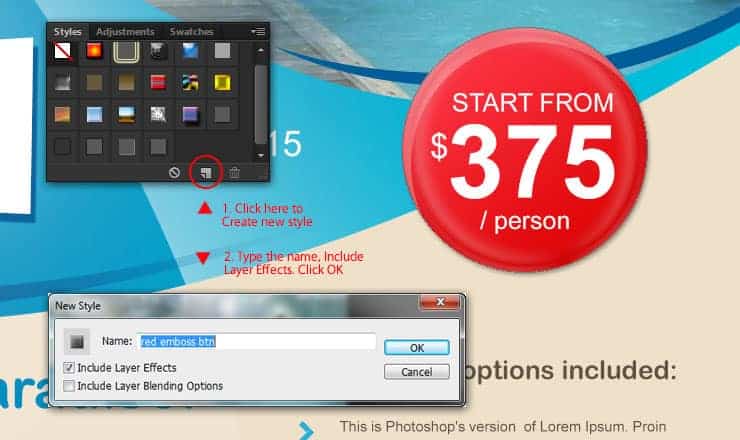
Step 62
We will need the same “red button effect” for this flyer backside’s, so saving them as styles will save our time later. All you need to do is open the Styles panel (usually, it is located in the same panel group with the Adjustment and Swatches panel).
Click the Create New Style button, give it an obvious name like “red emboss btn” and check the Include Layer Effects option.
Step 63
Grab the Horizontal Type tool. Point it on the red circle’s top-edge until the pointer icon is change, then click it. This will allow us to type text following the red circle’s shape. Click the Commit button on the option bar to confirm the text.

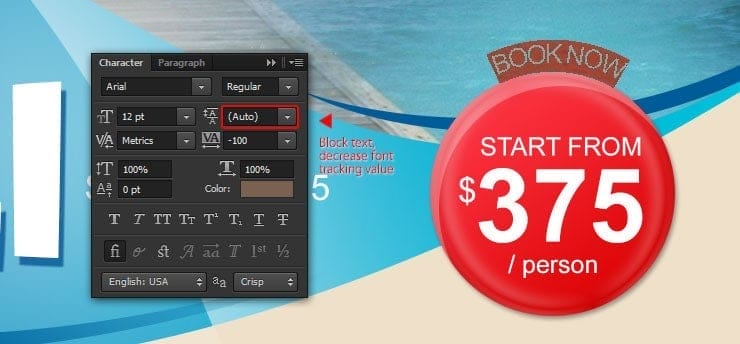
Step 64
Block text using the Type tool. Adjust the text size, color and tracking value from the Character Panel.
Step 65
Still in the text layer. Press Ctrl+T to call the free transform command, upscale the circle’s size and then rotate until the text get centered. Don’t forget to press Enter to apply the transformation.

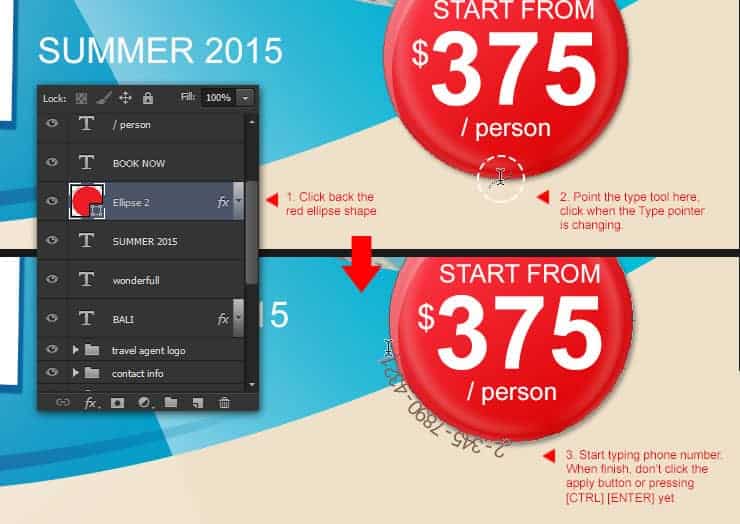
Step 66
Click back the red circle shape’s layer to select it. Repeat the process on Step 63, but this time we add text on the bottom. After you finish typing phone number, don’t click the commit button yet.
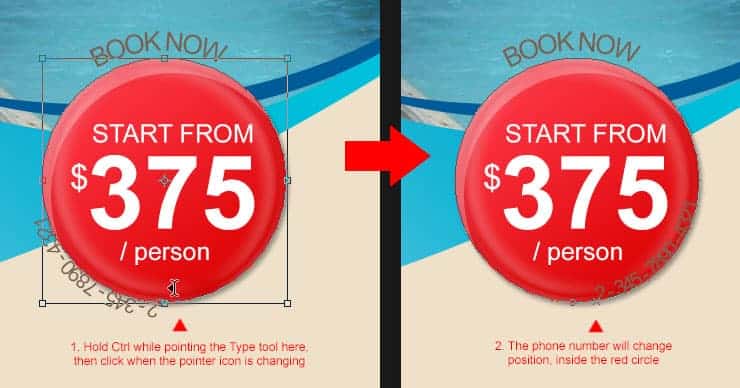
Step 67
We need to change the phone number position. Do it by holding the Ctrl button while pointing the mouse pointer inside red circle’s shape, click it when a small black triangle icon appear. The phone number should change position inside the red circle shape now.
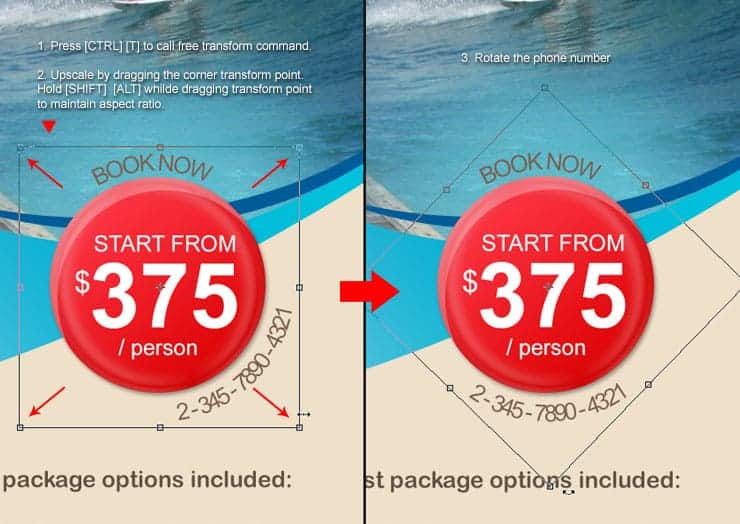
Step 68
Adjust phone number position; Call the Free transform command, upscale and then rotate it. Hit Ctrl+Enter to apply the rotation.
Step 69
Before we proceed to the next step, I think it will be helpful if we hide front shape and blue shape group folder.
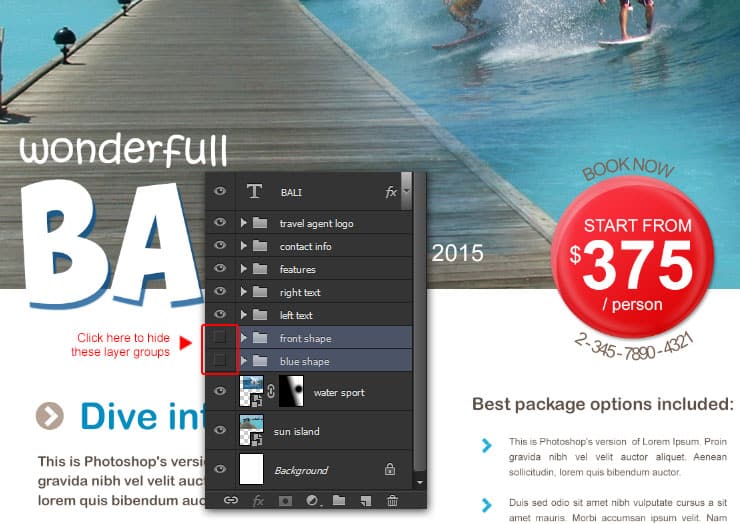
Step 70
Go back to red circle shape layer. Pull two guidelines on the left and right side of the red circle, then draw a right arrow shape using the Custom Shape tool. Set the arrow color to pale brown (#b4a193).
14 responses to “Create Your Own Travel Brochure Using Only Photoshop”
-

hi every one lol XD ヅ
-
hi every one
-
hey
-
who dis
-
-
legendary Austin
HI I WOULD LIKE TO KNOW HOW TO CREATE A SHAPE ON TOP OF ANOTHER LAYER ON THE TUTORIAL IS NOT CLEAR WHAT TO DO.
Fantastic tutorial. Love your work you are truly talented
ok
This tutorial go against Alaluh,,,, Very not good. You will pay ffore this,,,
-
Day is now,,, ready for achmed you bete
First of all how dare you make this awful tutorial. I just thirty minutes of my life making a gosh darn arrow that’s small /:(
Thanks, very helpful!!!
Hi, Wayang Puppet link takes me to 410-Image Not Available. Do you have another link to the image? Thanks.
-
Sorry, I meant Shrine Temple link takes me to a 410 page.
Leave a Reply