

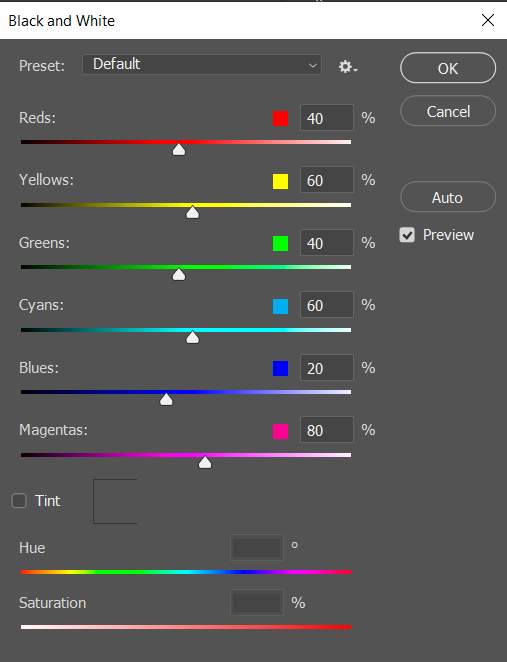
Then go to Image > Adjustment > Black & White… then press OK. Next create layer mask and use soft round brush with foreground color black and delete some parts of bubbles. Blend mode change to Screen.

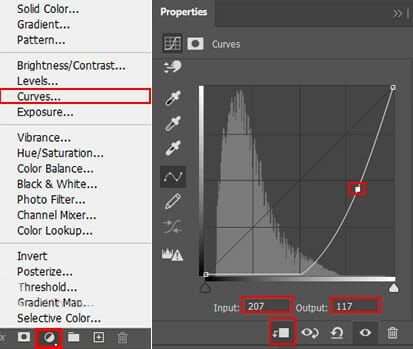
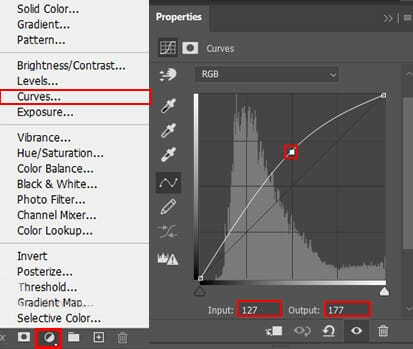
Add Adjustment Layer “Curves”
Step 24
Create a new layer and change blend mode to Linear Dodge (Add) with Opacity 15%. Then use Soft Round Brush with foreground color code #335e88 and paint.
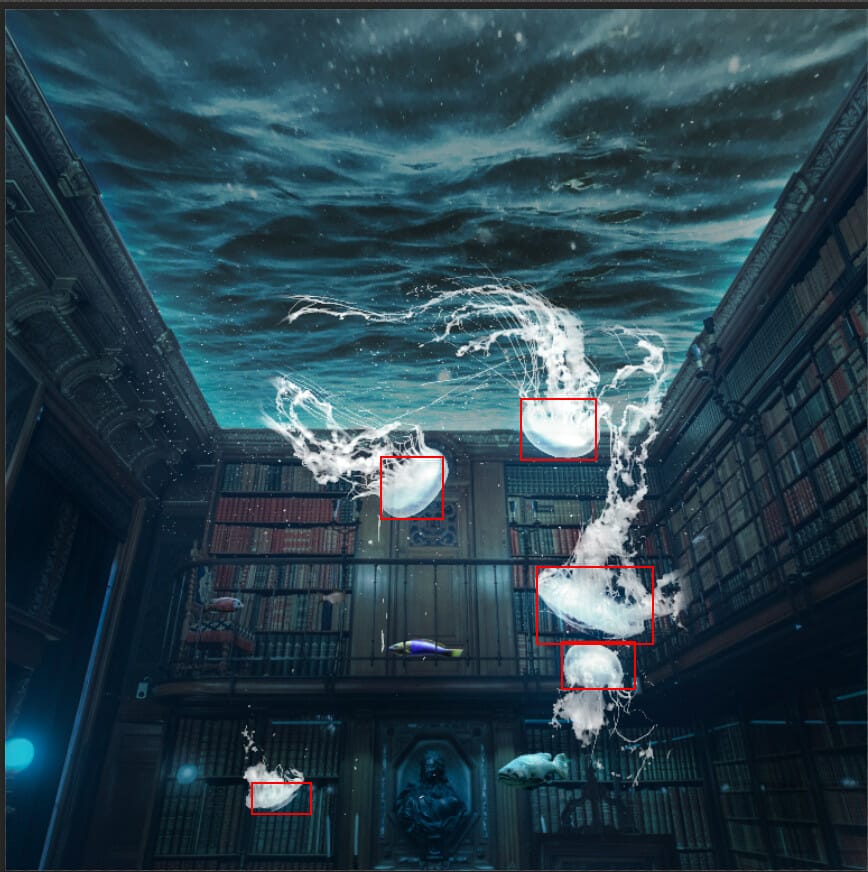
Step 25
Next go to File > Place and select Jelly. Then place it to our work canvas. Then position the image with the transform tool (Ctrl / Cmd + T). Hold Alt + Shift and rasterize like the image below. In Photoshop CC only hold Alt to rasterize all sides together. Blend mode change to Screen.

Add Adjustment Layer “Black & White”

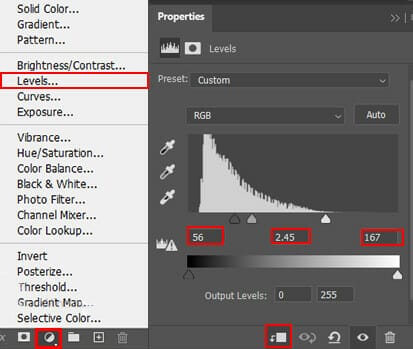
Add Adjustment Layer “Levels”
Next go back to jelly layer and create layer mask. Then use Brush Tool(B) Soft Round with foreground color black and paint edges.

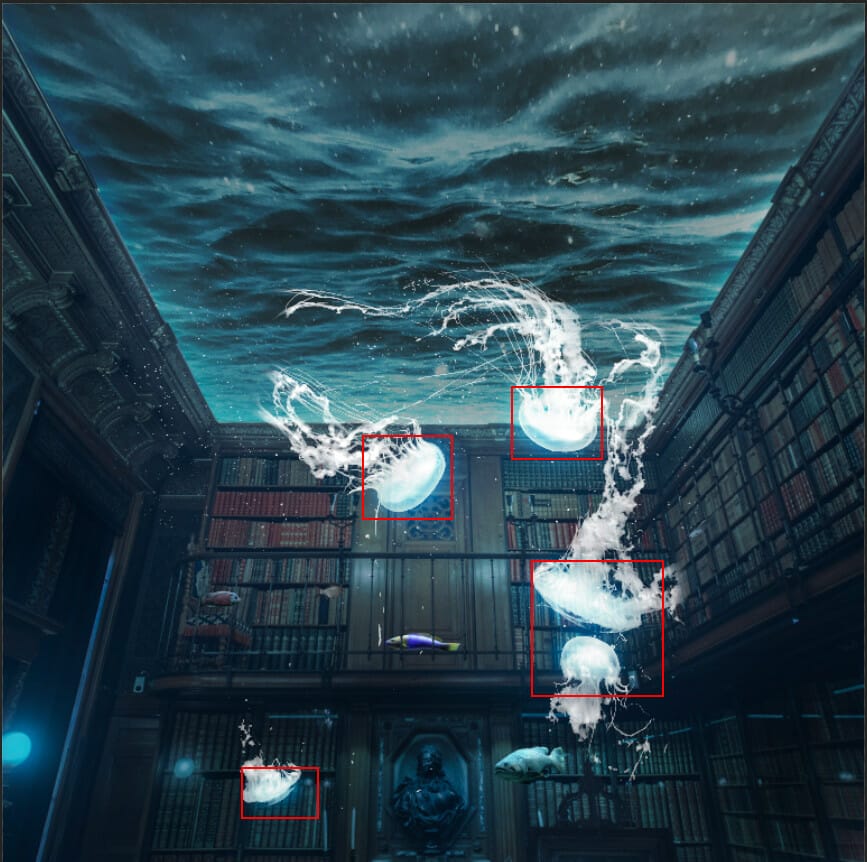
Step 26
Now add some glow to Jellys. Lets create a new layer and use Soft Round brush with foreground color code #517396. Next set flow of Brush to 10% and paint on head to Jellys. Blend mode change to Linear Dodge (Add).

Create another layer and repeat the same process, only change the color to #2d5881 and Blend mode to Linear Dodge (Add) with Opacity 75%.
Step 27
Create new layer and use Brush Tool(B) Soft Round with foreground color blue #71a2c2. Flow to Brush set 10% and start painting. Blend mode change to Soft Light with Opacity 24%. Look at picture below.

Step 28
Add Adjustment Layer “Curves” and press Ctrl/Cmd + I to invert and use Brush Tool(B) Soft Round with big size and foreground color white. Then paint on roof and jellys. Opacity set to 32%.
Step 29
Create another layer and use Soft round brush with foreground color white and paint to center. Blend mode change to Overlay with Opacity 25%.
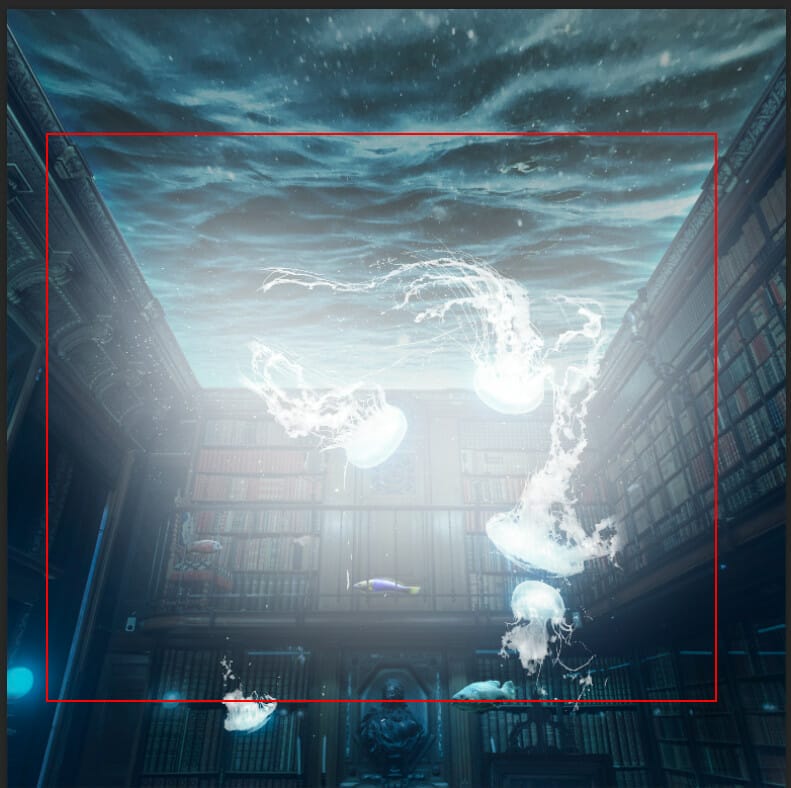
Step 30
Now add some texture, go to File > Open and select water texture. Use Rectangular Marquee Tool(M). With the Rectangular Marquee tool, drag over the area you want to select. Hold down Shift as you drag to constrain the marquee to(release the mouse button before you release Shift to keep the selection shape constrained).
8 responses to “Create a Library Aquarium Photomanipulation”
-

It made me super happy! I can’t wait to show my family.
-
Hi you………
-
hi
-
hello
-
it made me happy!!
-
GRRRRRR
-
so beautiful ,thank u
-
its gorgeous
-
Leave a Reply