
Step 34
Add Adjustment Layer “Levels”

Step 35
Add Adjustment Layer “Hue/Saturation”

Step 36
Add Adjustment Layer “Curves” and set Opacity to 60%.

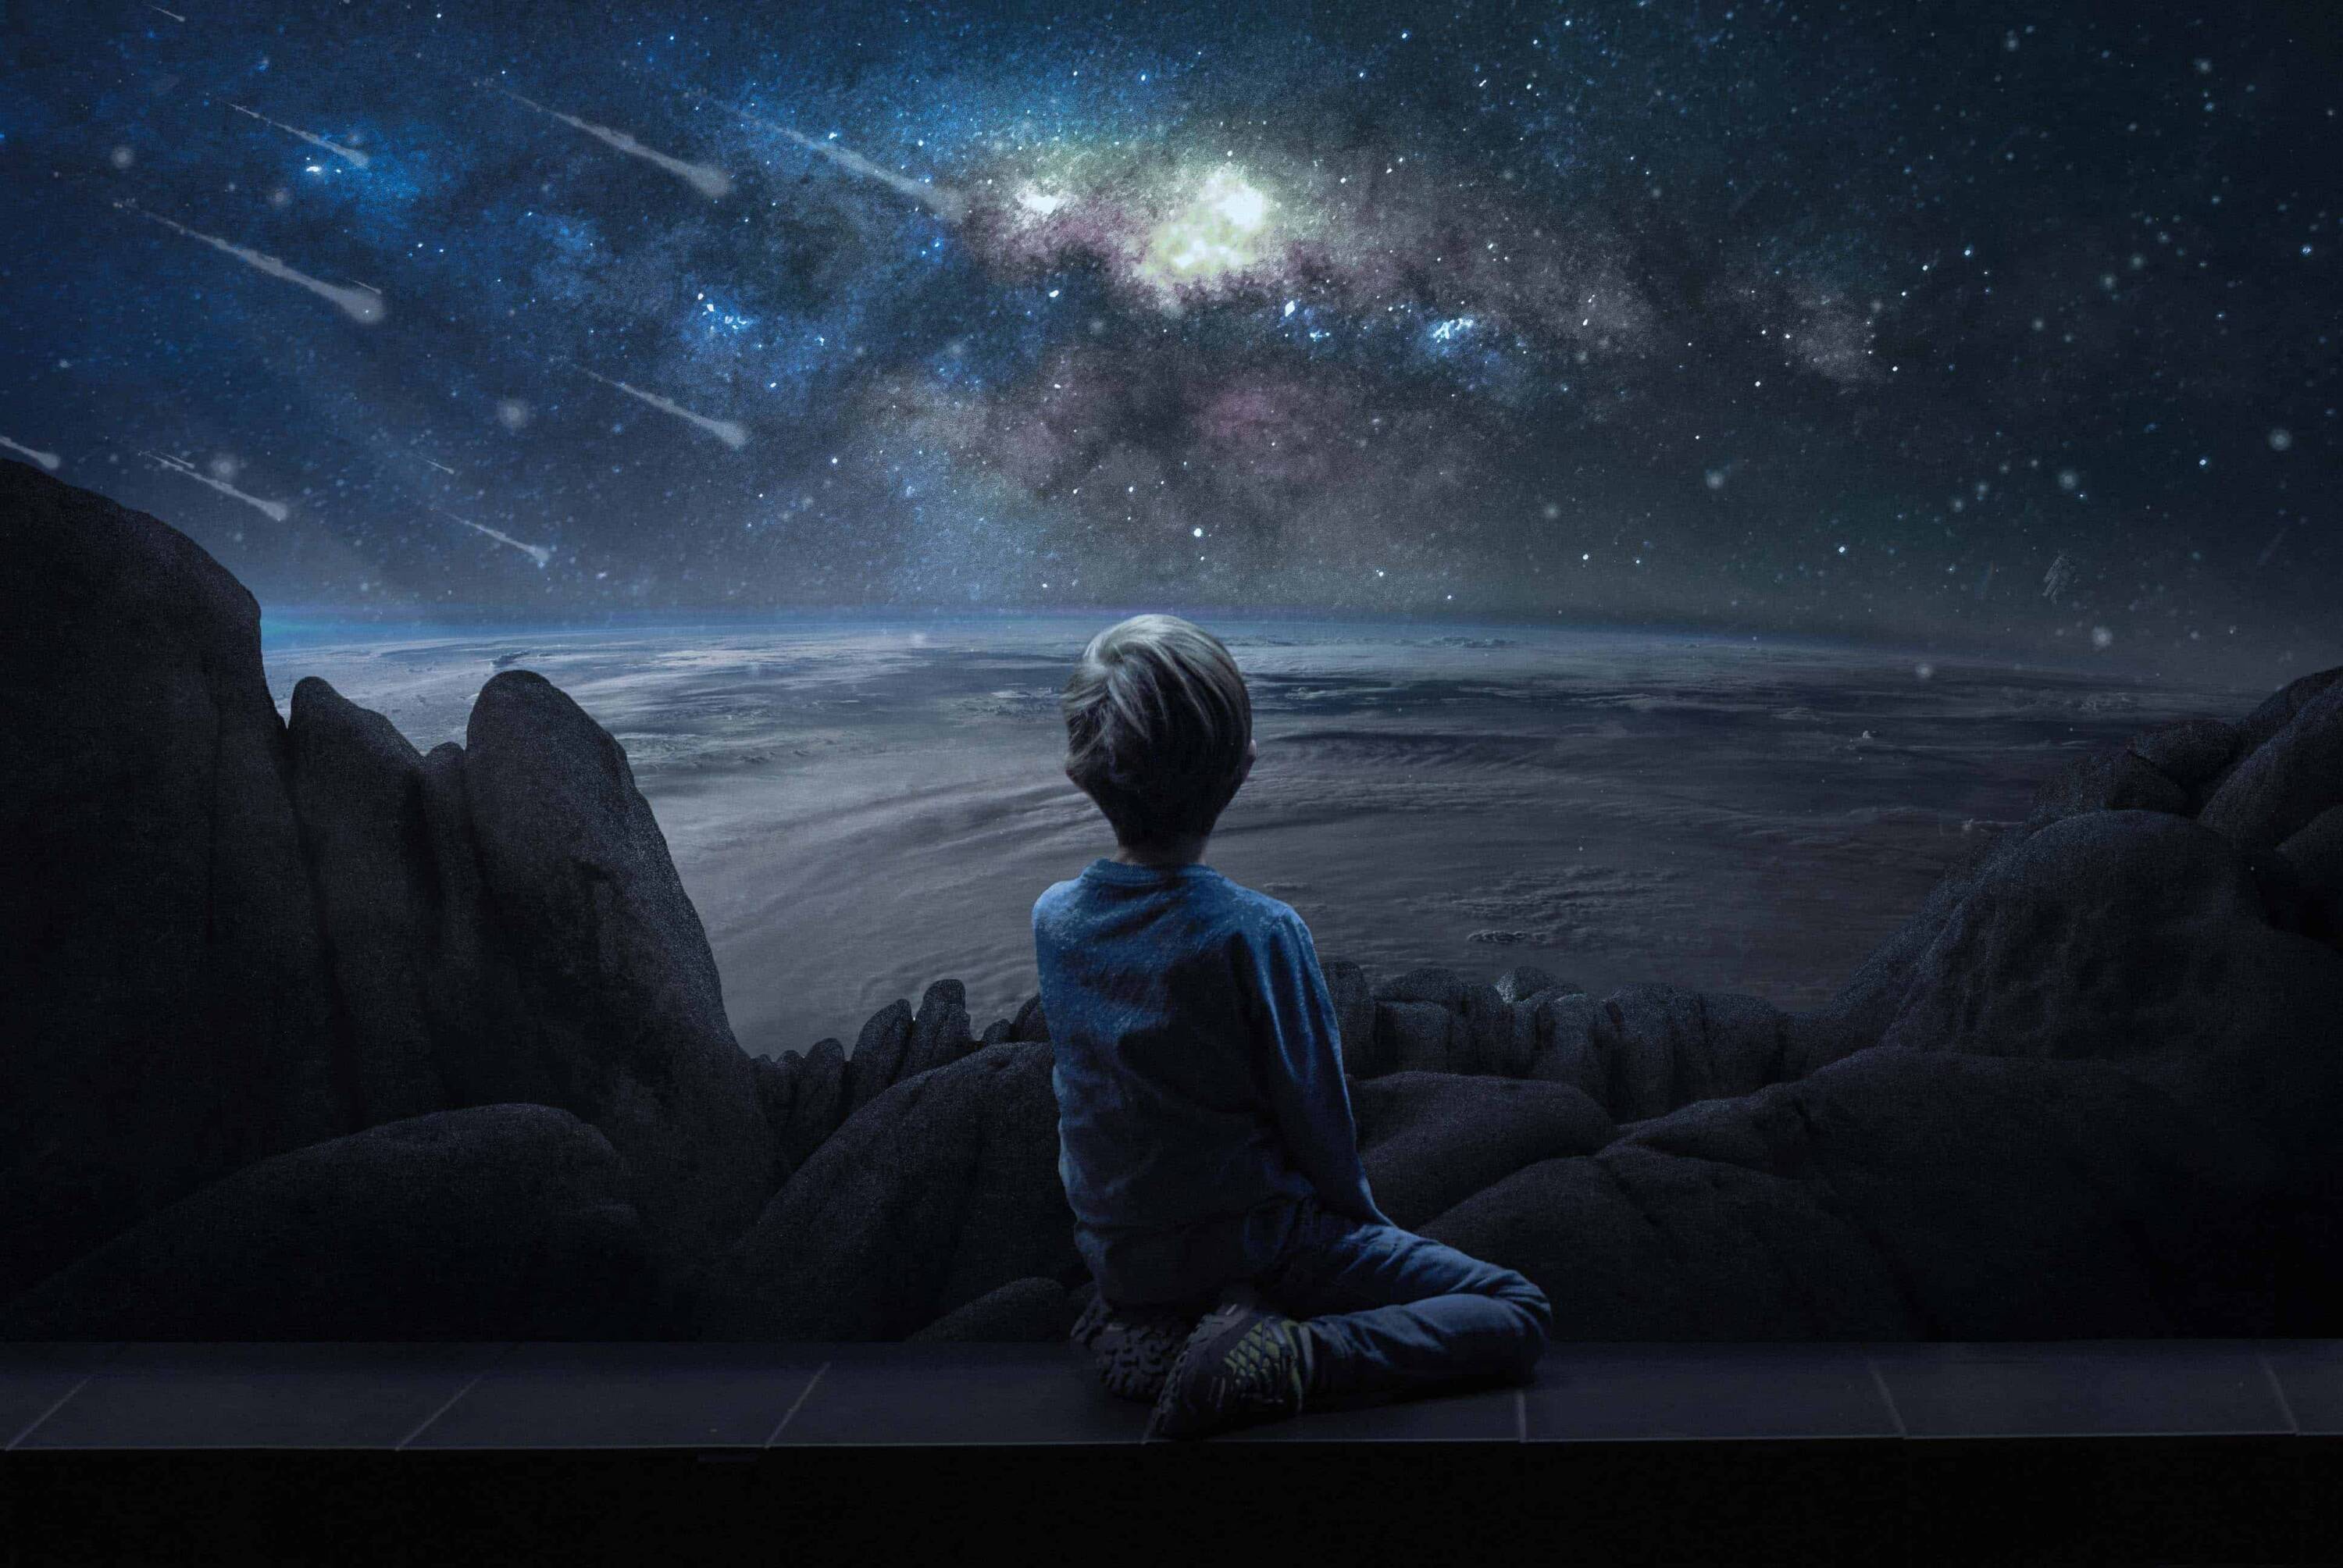
Step 37
Now go to File > Place and select Texture 1. Then create a layer mask and use Brush Tool(B) Soft Round with foreground color black and paint around the boy, as in the picture below. Blend mode change From Normal to Screen and Opacity se to 9%.


Step 38
Add Adjustment Layer “Gradient Map” Blend mode change to Soft Light with Opacity 10%.

Step 39
Add Adjustment Layer “Gradient Map” Blend mode change to Hue with Opacity 40%.

Step 40
Add Adjustment Layer “Color Balance” and press Ctrl/Cmd + I to invert. Now use Brush Tool(B) Soft Round with foreground color white and start paint the upper part ass shown in picture below.


Step 41
Add Adjustment Layer “Gradient Map” Blend mode change from Normal to Soft Light with Opacity 40%.

Step 42
When we finished all this, now merge all layers to one. Create a new layer above all and hold CTRL/CMD + SHIFT + ALT + E. Now we have a final layer, right click on mouse and select Convert to Smart Object. Then go to Filter > Camera RAW Filter. At its most basic, the Photoshop Camera Raw filter allows you to use the functions of the ACR interface at any time within Photoshop. This allows you to make any adjustments within ACR at any time during your workflow instead of just limiting its usage to theraw processing stage.While it would be possible to import your working file into Lightroom to make the same sets of adjustments, doing this in Photoshop saves you from that cumbersome step. It allows you the use of these tools without any extra effort.

Step 43
Now in Camera Raw Filter, set the Value:
Basic
- Temperature: -10
- Tint: +5
- Exposure: -0.90
- Highlights: -27
- Shadows: -8
- Whites: +8
- Saturation: +5

Step 44
Detail
- Sharpening
- Amount: 35
- Radius: 1.0
- Detail: 25

Step 45
Effects
- Grain
- Amount: 15
- Size: 25
- Roughness: 50

Step 46
Gradulated Filter
- Exposure: -0.40
- Highlights: -50
- Whites: -44

Layer Opacity reduce to 90%.
Step 47
Add Adjustment Layer “Color Lookup” and 3DLUT File select “DropBlues.3DL”. Opacity set to 7%.

Step 48
Add Adjustment Layer “Color Lookup” and 3DLUT File select “NightFromDay.CUBE”. Opacity set to 7%.

Step 49
Finaly Adjustment Layer is Brightness/Contrast, but before we set the value go to Image > Apply image… > OK
Apply Image can be used on a layer or layer mask, allowing you to control the visibility of a layer.A completely white layer mask will make the layer completely visible, and a black layer mask will make the layer invisible.When applying an image onto a layer mask, the lighter parts of the image will be visible and the darker parts will be invisible.You can use this method to make a layer only visible in the Highlights or shadows of an image, giving you more control over blending.
6 responses to “Look at Earth Surreal Photomanipulation Tutorial”
-

this is crazy and not teaching. Get real yall terrible
-
This is a super unclear tutorial. You can’t even see step 5… Horrible UX and technical writing.
-
Tutorial is very claer , well done !!! Thanks for sharing . 👍👍👍😉
-
This tutorial could have been a good one if the steps were all visible
-
-
Thank you very much! This is neat!
-
Hi a great tutorial, It would have helpful to see all the layers from start to finish, and even see the PSD file which is not available your link is not there, the missing layers would answer a lot of questions, many thanks
Leave a Reply