
Step 62
Let’s spice up the appearance of the torn photo by adding highlight and shadow on top of it. Add new layer above the photo and set it to Clipping Mask by hitting shortcut Ctrl + Alt + G. Name the layer highlight/shadow.

Step 63
Activate the Brush Tooland then set its Opacityto 10%or lower. Paint with black to add shadow to the piece or use white to add highlight.

Step 64
Make sure to keep it subtle. Remember, the Opacityof the Brush Tool –can be found at the Options Bar— should never exceed 10%.

Step 65
Let’s review the details. There are some flaws. The screenshot below show one of them. The two pieces is right next to each other and it appears as if it is continuous. The image also don’t cover the whole piece, which is why the paper color is shown through.

Step 66
To fix this, add a new layer underneath the second piece or on top of the third piece. In the layer, draw shadow separating both pieces.

Step 67
To fix the paper color that coming through behind the photo, we just need to simply reapply transformation process. Select the photo, hit Ctrl + T, use Warpif needed, and modify it until the color is covered.

Step 68
Let’s take a look at the result. Our current result is using solid color as its background.

Step 69
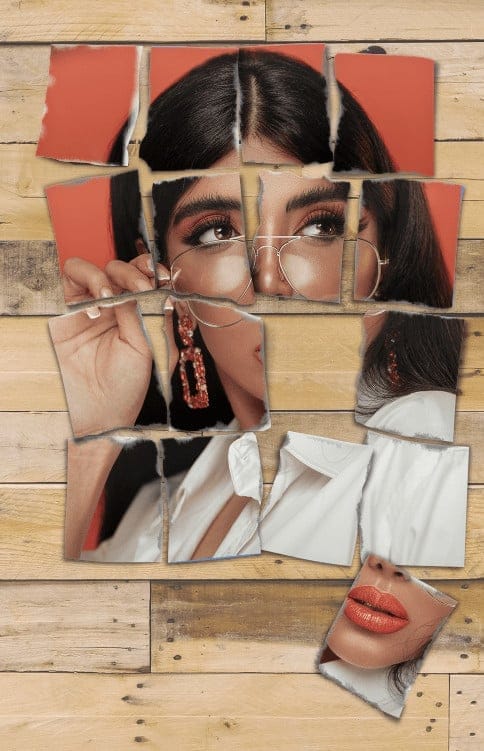
We can also add background by adding texture behind the torn photo.

Final Results
As seen from the tutorial above, there are many ways to modify the final result. You can change the content of the torn photo, its photo paper color, and the background. The result below is using a portrait photoand I think it suits better because the photo subject is more recognizable.

Download the PSD
One response to “Making Photoshop Mockup of A Torn Photo”
-
Nice.


Leave a Reply